Adding Your Logo to Forms
You can use one logo for the following document types:
- Estimates
- Repair orders and customer invoices
- Parts-only tickets
You can add one logo file to R.O. Writer and it is used for all the logo custom forms. The logo prints in the upper left corner of the logo forms automatically.
To enable this functionality, R.O. Writer has added
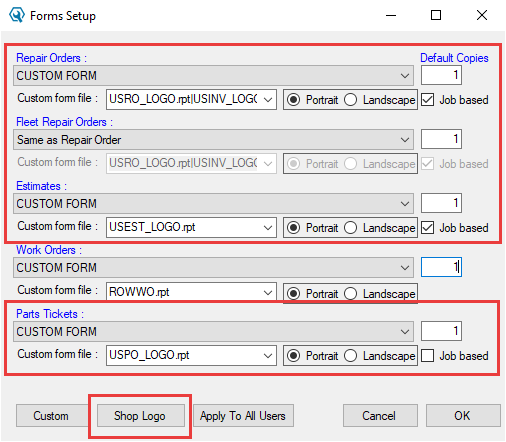
- A Shop Logo button at the bottom of the Forms Setup window where you can add the logo file.
- The logo forms to the Custom Form File dropdown lists for repair orders, fleet repair orders, estimates, and parts tickets.
Guidelines for Adding the Logo
Please keep the following information in mind when adding the logo.
Logo Files
The first thing you need to do when adding a logo is select the logo file you want to use. The logo file should not be too large in terms of resolution or file size.
- R.O. Writer limits the file size to 200 KB.
- R.O. Writer supports the following file formats: *.bmp, *.jpg, *.gif, and *.png.
Logo Forms
There are seven custom forms that have been formatted to print logos. All logo forms are available as custom forms.
|
Form |
Orientation |
Select this form to print the logo on… |
|---|---|---|
|
USEST_LOGO.rpt |
Portrait |
Job-based estimates. |
|
USINV_LOGO.rpt |
Portrait |
Job-based invoices. |
|
USNJEST_LOGO.rpt |
Portrait |
Non-job-based estimates. |
|
USNJINV_LOGO.rpt |
Portrait |
Non-job-based estimates. |
|
USNJRO_LOGO.rpt |
Portrait |
Non-job-based invoices. |
|
USPO_LOGO.rpt |
Portrait |
Job-based parts-only tickets. |
|
USRO_LOGO.rpt |
Portrait |
Job-based repair orders. |
You can select any of the logo files in the Custom Form File dropdown lists on the Forms Setup window.
NOTE: You must select one of these forms on the Forms Setup window to print logos on that document type.
Adding the Logo to Forms
There are three main steps to adding the logo:
Step 1 - Add the Logo to R.O. Writer
Step 3 - Select the Logo Forms
NOTE: You may need to repeat steps one and two a few times until the logo appears on the printed form as desired.
Step 1 - Add the Logo to R.O. Writer
After you select the logo file you want to use, you must add it to R.O. Writer. There can be only one logo stored in the database. Whenever you add and save a logo file, it replaces the existing logo file.
After you save the logo, the logo file is stored in the database for all users but prints only on the logo forms.
Complete these steps:
- Save the logo file to a location you can access from R.O. Writer.
- Open R.O. Writer Configuration
 .
. - Click File menu > Form Types. The Forms Setup window opens.
-
Click the Shop Logo button. The Shop Logo Configuration window opens.
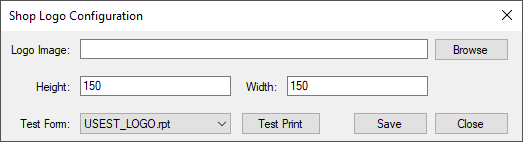
- Click the Browse button.
-
Navigate to the location of the file and select it.
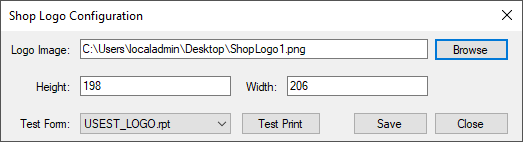
- The path appears in the Logo Image field.
- The Height and Width fields display the resolution of the file in pixels. You can adjust the height and width by typing in new numbers, but you may distort the image on the printed form.
- Before you click Save, you should test print the selected logo.
Step 2 - Test Print the Logo
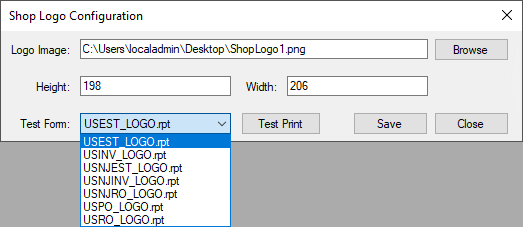
You can test print the logo immediately after you add the logo file on the Shop Logo Configuration window. The seven logo forms appear in the Test Form dropdown list. Use these forms to test print the logo you added.
Complete these steps:
- Complete Step 1 - Add the Logo to R.O. Writer.
-
In the Test Form dropdown list, select the form.
-
Click the Test Print button. The standard printing window opens to the PDF tab.
The default name and location of the test print appear. You can click the Browse button the save the test print to a new location.
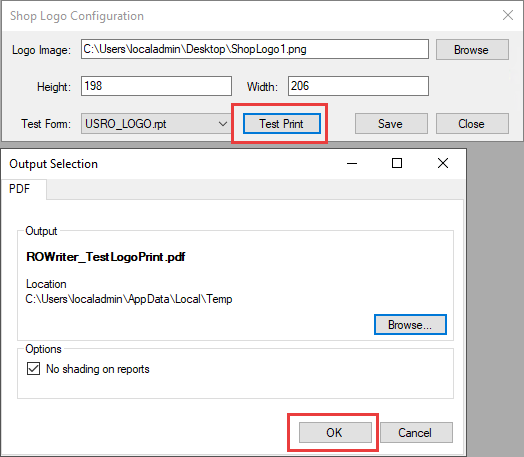
-
Click OK. The document prints with the logo.
-
Review the PDF, then print it to a physical printer.
Keep in mind that documents can appear on the screen differently than they appear when printed to a physical printer.
-
When the printed document appears as you want it to, click the Save button.
- The logo is saved to the database.
- The Forms Setup window appears.
Step 3 - Select the Logo Forms
After the logo file is saved to the database, you need to select the logo forms on the Forms Setup window.
Complete these steps:
- Complete Step 1 - Add the Logo to R.O. Writer.
- Complete Step 2 - Test Print the Logo.
-
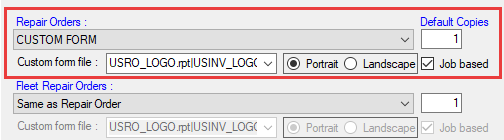
On the Forms Setup window, in the repair order, estimate, and parts tickets sections, select the logo forms in the Custom Form File dropdown list.
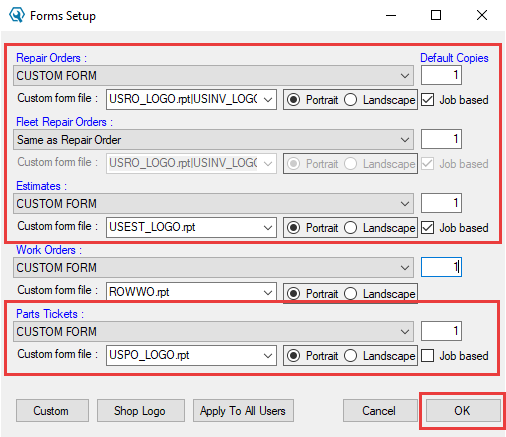
To print the repair order (that prints before being finalized) and the invoice (that prints after being finalized), you must type the two logo forms into the Custom Form File field of the Repair Orders section as follows: "USRO_LOGO.rpt|USINV_LOGO.rpt".
-
Check the Portrait setting. (All logo forms are in Portrait orientation.)
-
If the form you select is job-based, check the Job Based box.
- Click OK. All form selections are saved.
- Close and re-open R.O. Writer. (You must re-boot R.O. Writer for the new form selections to apply.)
- To verify that the logo prints as desired, print an estimate, repair order, invoice, and parts only ticket to a physical printer.