Refunding Repair Orders
There are two ways to issue refunds on repair orders:
- For open repair orders, void a previous payment.
- For closed repair orders, create a new repair order with a negative amount and process a payment for the negative amount.
Refunds on Open Repair Orders
You can void any payment before the repair is closed (finalized). You can void only a previous payment and not enter an amount.
Voiding payments
- Voids the transaction on the credit or debit card
- Creates a reverse entry of a previous payment on the repair order
- Appear on the printed repair order as a return
After the repair order is finalized, electronic payments cannot be voided.
To Void a Payment on an Open Repair Order
Complete these steps:
- Open a repair order that has had any amount already paid toward its Balance Due via the ePayment button.
- Either
- Click the Finalize button in the ticket toolbar.
OR - Click the Calculations tab, then the Advanced Payment button.
- Click the Finalize button in the ticket toolbar.
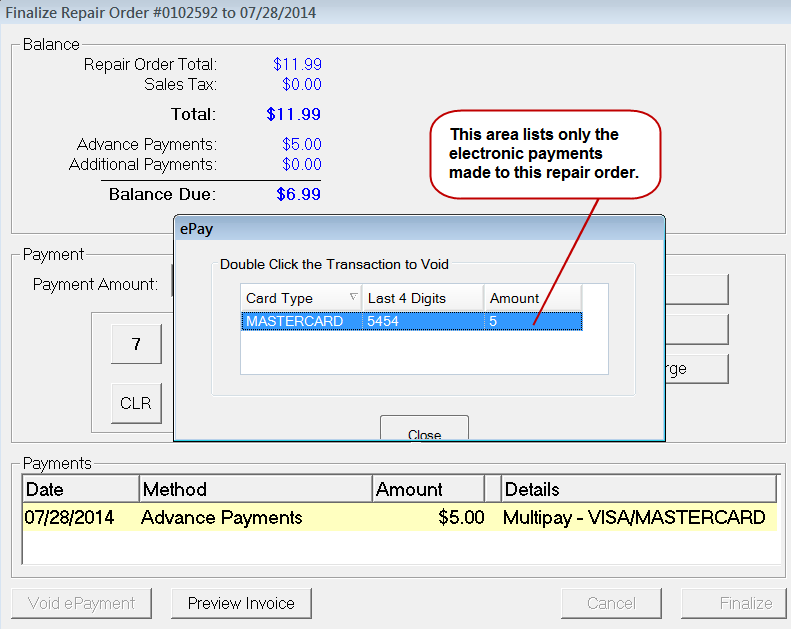
- On the payment window, the previous payments display at the bottom of the window in the Payments section.
- Click the Void ePayment button.
-
The ePay window opens displaying all electronic payments made to the repair order; all other payment methods – cash, check, charge, etc. - made to the repair order are filtered out.
-
Double-click on a payment to void it. A reverse entry for the same amount of the selected payment appears on the ePay window.
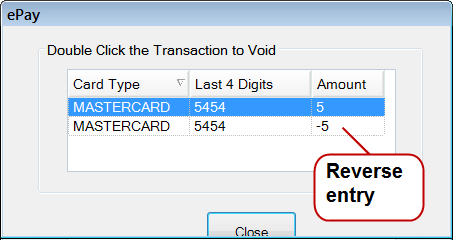
-
Click the Close button. The payment window is updated to reflect the voided payment.

Refunds on Closed Repair Orders
After a repair order has been finalized, you cannot void a payment on it. Instead, you need to create a new repair order for the same customer and vehicle with a negative amount and process that payment. For more information, click the following link: Special Considerations for Refund Repair Orders.
- The Balance Due amount of the repair order is the amount of the refund to the card. The payment process is the same as a regular repair order; it’s just that the amount is negative instead of positive.
- You need an Override PIN from Merchant Partners to complete a refund transaction. If you do not have one, please contact their Support.
Merchant Partners First Mile Customer Support can be reached at:
- Email: fmsupport@merchantpartners.com
- Phone: 855-554-6179
To Refund Closed Repair Orders
Complete these steps:
- Create a new repair order.
- Select a labor operation by clicking the Labor button in the ticket toolbar.
- Double-click on the labor operation to open it.
-
Enter the refund amount in the Charge field and then press the minus (-) key on the keyboard. The amount displays in parenthesis to indicate that this is a negative amount.
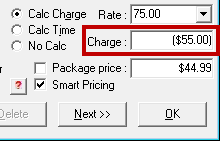
- Click OK to save.
- Click the Finalize button in the ticket toolbar.
- You may have to authorize the repair order due to the negative amount.
- The falling below profit margin prompt will most likely appear because of the negative amount. Click OK.
- The R.O. Writer Payment window opens displaying a negative amount in the Balance Due field.
If the amount is different than the one you entered in the Charge field, check the Calculations tab. -
Click the ePayment button and the Merchant First Mile Credit Card Refund window opens.
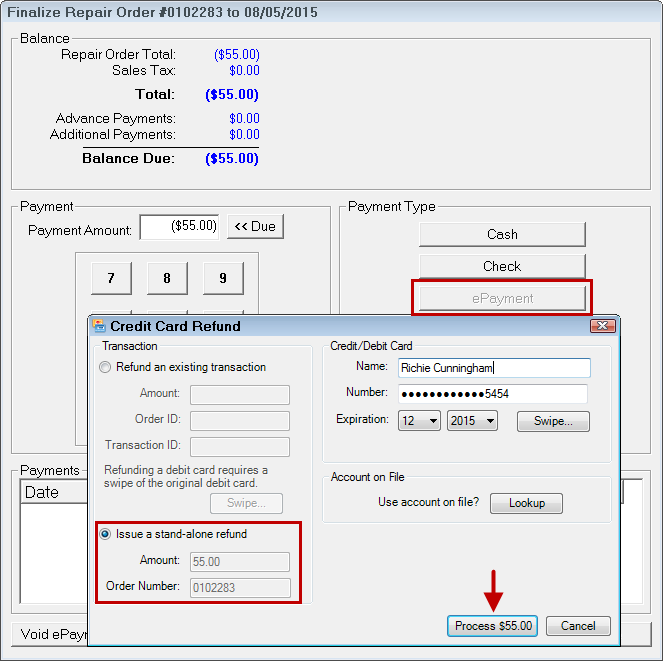
- Enter the customer’s name and credit card information and click the Swipe button and swipe the card.
-
A popup window appears asking for the Override PIN.
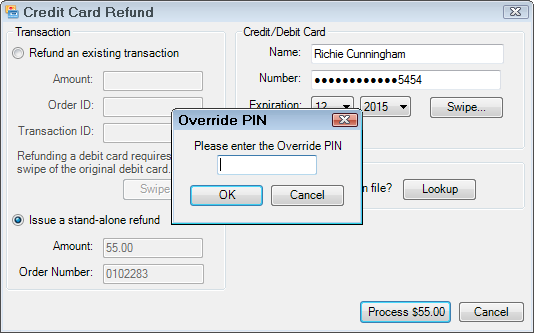
-
Enter your Override PIN and click OK.
Merchant Partners processes the refund and it appears in the Payments section of the R.O. Writer Finalize window.
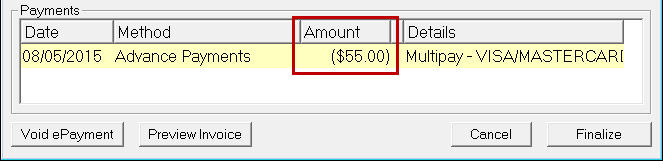
- At this point, you can click Cancel to return to the repair order or click Finalize to close the repair order.
- You are prompted to obtain signatures (if your configuration requires it) and asked if you want to print the repair order.
Special Considerations for Refund Repair Orders
When processing refunds, there are several things to keep in mind.
Choosing the Labor Operation
Which labor operation you select depends on your established business and accounting processes and reporting.
If you are tracking labor operations for reporting, for example, it makes sense to select the same labor operation as the closed repair order. You might even want to put the number of the previous repair order in the Repair Order Notes.
If you want to track refunds specifically, you might want to create a labor operation specifically for refunds.
Adjusting the Refund Amount
When you type the negative amount into the Charge field of the Edit Labor window, remember that the same taxes and fees that apply to normal labor operations on repair orders.
- If the Taxable option is selected for the labor operation, sales tax is calculated and added to the negative Charge amount.
- If shop fees are added to repair orders, shop fees are added to the negative Charge amount.
Check the Calculations tab to see how the refund was applied.

Depending on how you want to track labor operations and refunds, you may want to keep the taxes and shop fees. If this is the case, leave the sales tax and shop fees in place.
To Remove Shop Fees
Open the Calculations tab, delete the amount in the Supply Charges field and click Save.
To Remove the Sales Tax
Open the labor operation on the Parts/Labor tab and uncheck the Taxable box and click OK.
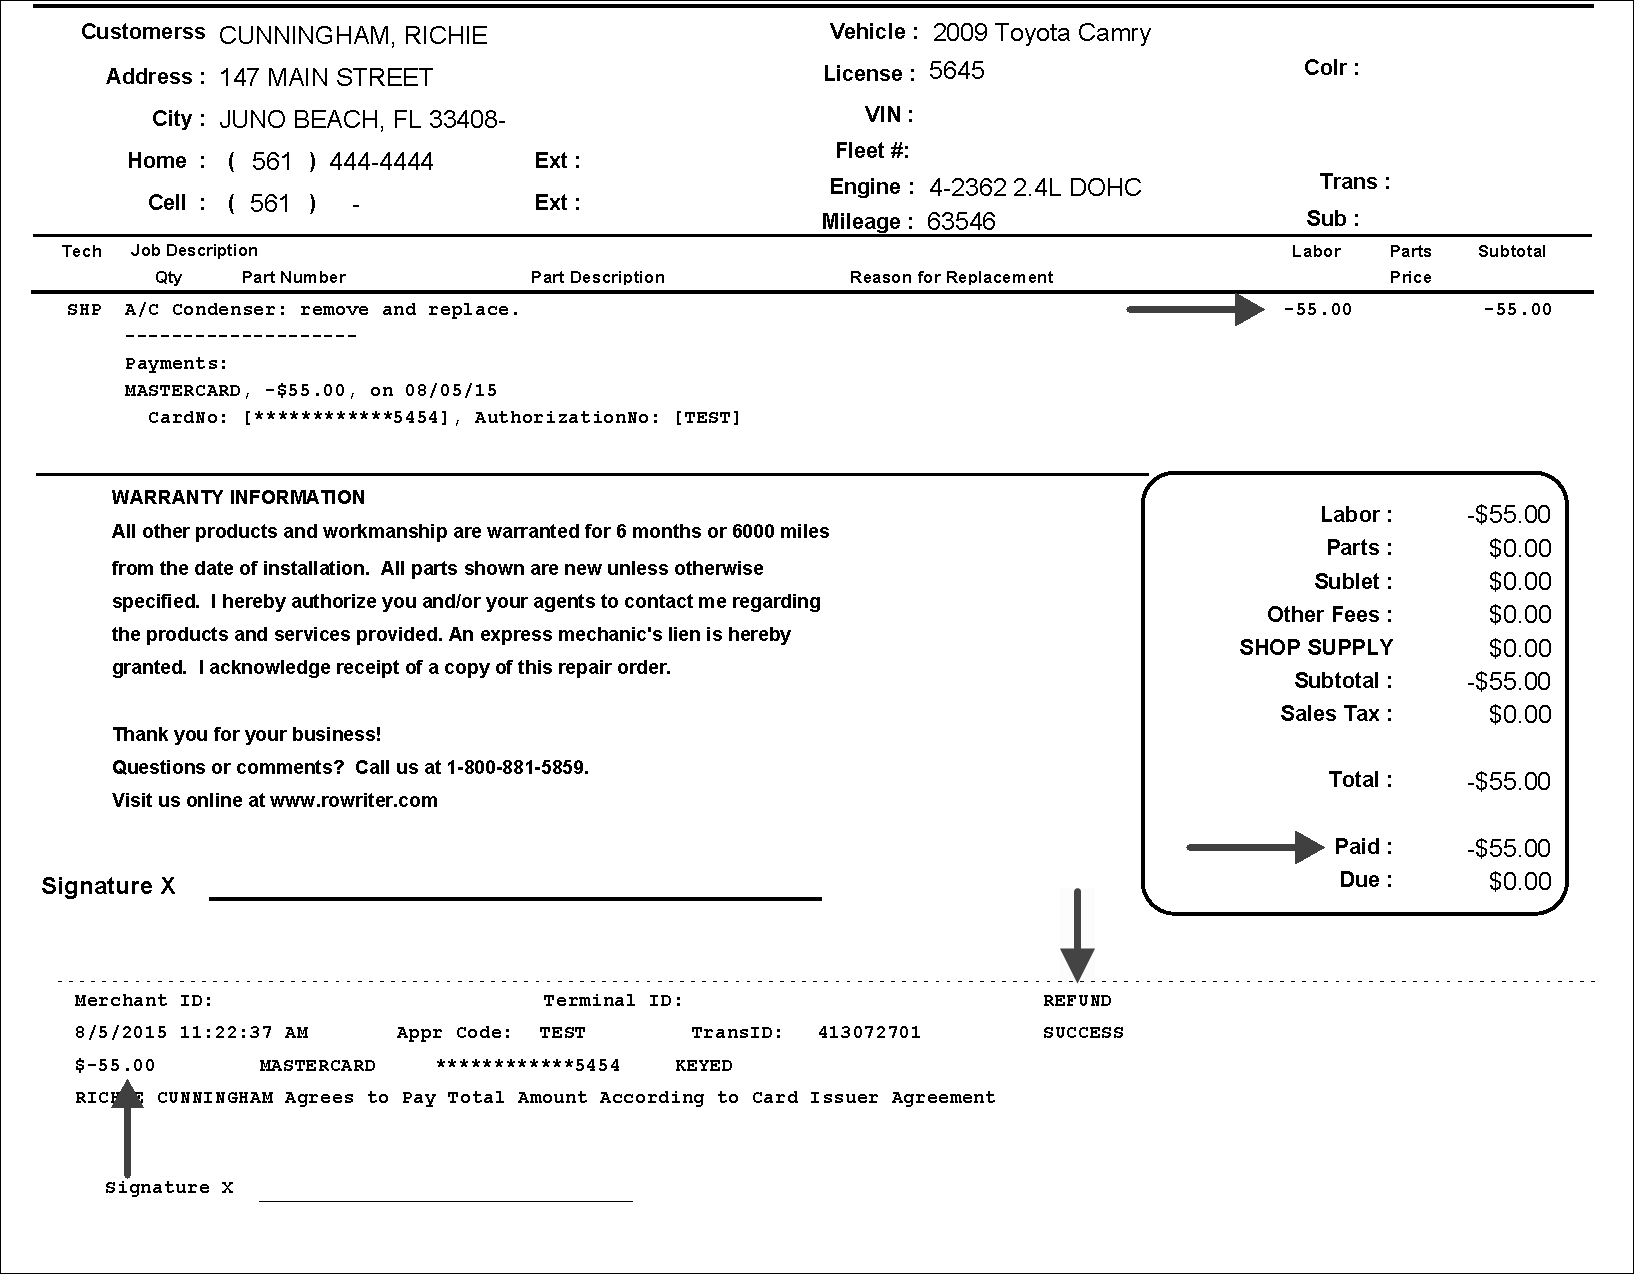
Printed Refund Repair Orders
When you print a refund repair order, it displays the refund information as part of the transaction information and in the totals.
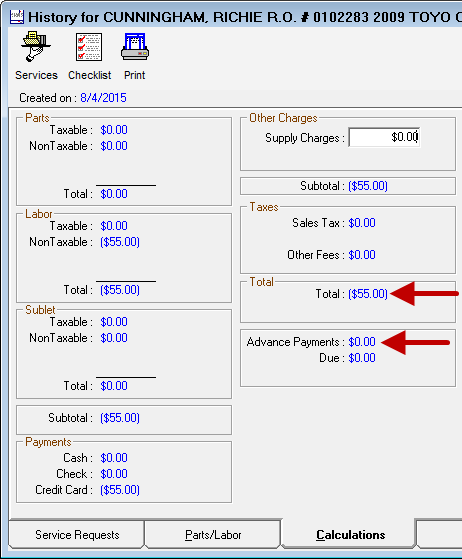
Refund Repair Orders in History
If you open a refund repair order from History and click the Calculations tab, the refund appears in the Total, not in Advanced Payments.