Printing statements begins the aging of accounts and adds finance charges to the account (see Aging and Finance Charges).
It is highly recommended to only print statements every 30 days for finance charges to calculate correctly. If you need to print a statement before 30 days, it is recommended to print the AR Transaction Report or the Customer A/R Transactions Report instead which will give you the same information.

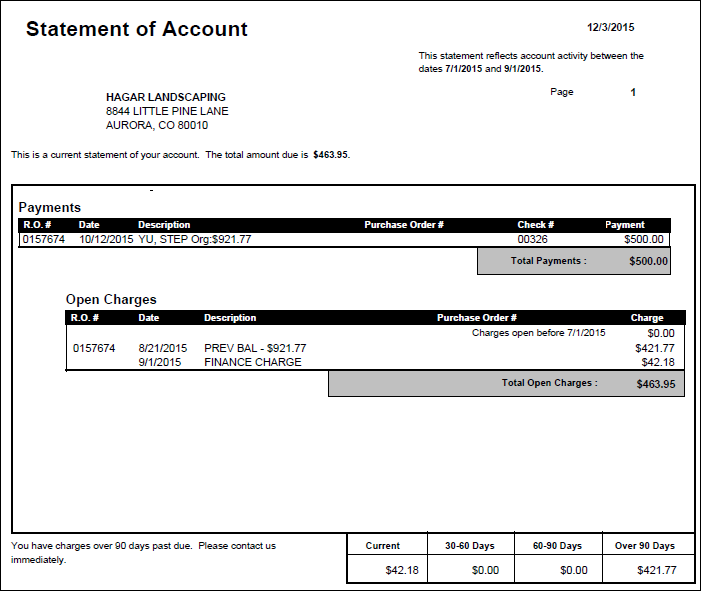
Select the type of statement to print, and select the date range to include transactions. Only the customers that are set up for the type of billing selected will be printed, and only the transactions that occurred during the time period selected will appear on the statements. All other transactions, charges or payments, will be shown as balance forward.
When Print is selected, the customer selection list is built based on the selection criteria.
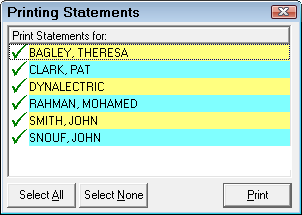
- All customers are selected by default.
- A green check mark (
 ) appears if the customer is selected.
 - A red (
 ) appears if the customer is not selected.
 - Use the Select All button and Select None buttons to select all customers or no customers.
- Change the individual selections by double-clicking on the customer name.
To exit without printing, press the Cancel button.
To print the selected customer list, select Print.
To print the accounts receivable statements, select the appropriate printer, and press the Print button. The customer information is merged with the letter and printed, and the files are updated. Printing the statements begins the account aging process.
If the Type of statement selected is a statement for a single customer, the customer must be identified (see Searches). When the customer has been identified, select the appropriate printer, and press the Print button. The customer information is merged with the letter and printed, and the files are updated.
Printing the statement begins the account aging process.