Browse displays all inventory records in a list where you can review, select, and edit them.
Inventory information modified here is saved automatically. Therefore, use caution when you modify inventory here.
The arrow (![]() ) in the far left column identifies the selected record.
) in the far left column identifies the selected record.
To view all information pertaining to a record, use the scroll bar at the bottom of the right window. The information in the left window will remain stationary.
Committed and on order quantities are not immediately updated. To update these items, click the Update Committed/On Order button at the bottom of the screen.
Each field may be used to search, sort, or filter the information displayed. Custom reports may also be designed.
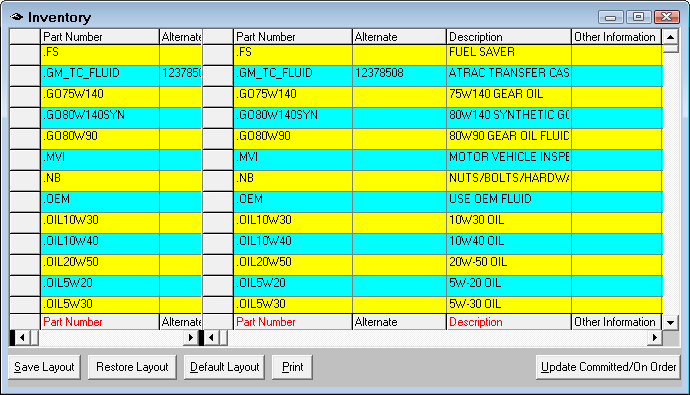
This function lets you view all your parts at a glance, sort by different fields, apply filters and save.
NOTE: This function takes exclusive use of the inventory file. In multi-user configurations, all other users will not be able to access inventory when you are in this function.
You can edit fields by highlighting the information you wish to edit and typing in the new information or selecting from a dropdown box when available.
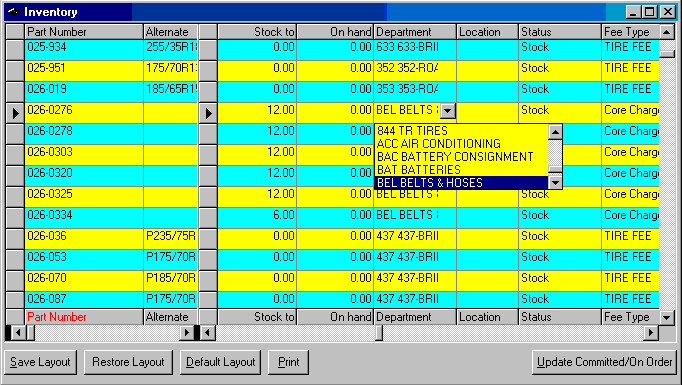
You can delete parts by highlighting the part you wish to delete by clicking the gray button to the left of the part number to highlight the entire row and pressing the delete button on the keyboard.
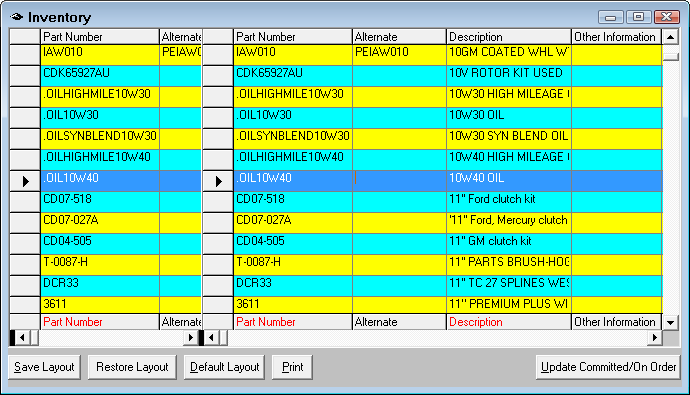
You can scroll to the field you want to stay stationary in the first window and then scroll through the part information in the second window.
The committed and on order totals are not immediately updated in inventory. To be sure these numbers are correct, select Update Committed / On Order to refresh these values.
Columns can be re sized or completely collapsed. To modify the layout, select the field to be moved by moving the mouse pointer over the field description. The pointer will change to a down arrow (![]() ). Click the left mouse button to select the field.
). Click the left mouse button to select the field.
To move the selected field, click and hold the left mouse button and slide the description to the point to be inserted.
Two red opposing triangles (![]() ) will mark the insertion point. Release the left mouse button when the field had been moved to the desired location.
) will mark the insertion point. Release the left mouse button when the field had been moved to the desired location.
The width of the field may also be modified. To return to the default setting, press the Default Layout button.
Column Heading Tools
By right clicking on any column heading, you have the following options:
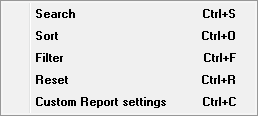
Search
Any field may be used to search for desired inventory records. The scroll bar at the bottom may be used to move right or left to display additional fields.
Select the desired field by moving the pointer to that field, and using the right mouse button, click on the field description. The function box will appear.
Next, select the Search function. A selection criteria box will appear.
Enter the selection criteria appropriate for the field selected, and press Enter or OK.
The search will find the first record meeting the criteria that is located beyond the currently selected record, assuming that the selected record does not meet the search criteria.
An arrow ( ) in the far left column identifies the selected record.
To continue searching, select a record beyond the selected record by clicking in the far left column, and entering the search criteria again.
Example: right clicking on the column heading, part number lets you enter part number is equal to

Sort
The Sort function will sort the records by the column selected in alternating increasing or decreasing order.
If the description field is selected and sorted, all of the records will appear in increasing alphabetical order, with blanks, special characters, and numbers appearing first.
If Sort is selected again, the list begins with "Z", and continues toward the numbers blanks, special characters, and blanks.
Filter
Any field may be used to filter for desired inventory records. The scroll bar at the bottom may be used to move right or left to display additional fields.
Select the desired field by moving the pointer to that field, and using the right mouse button, click on the field description. The function box will appear.
Next, select the Filter function.
Filter will select records that meet the selection criteria, and only display those records.
Selection conditions may be selected from the dropdown list and the value for the condition is entered in the right box.
Enter the value to be used for the filter, and press Enter or OK. The records that match the condition and the value display.

NOTE: Filter options in the supplier and department fields require you to type in the code instead of the name. Filter option for the status field (non-stock or stock) require an S for stock, N for non-stock, or C for consigned.
Reset
Reset will return the browse list to the original order. To restore the complete list after using filter, search, or sort, select Reset.
Custom Report Settings
While R.O. Writer provides a set of canned reports that anticipates the majority of shop’s needs and covers the basics; however, because no two shops ever want or need exactly the same format or the same data, we have provided a custom report feature in the Browse section of the Inventory module.
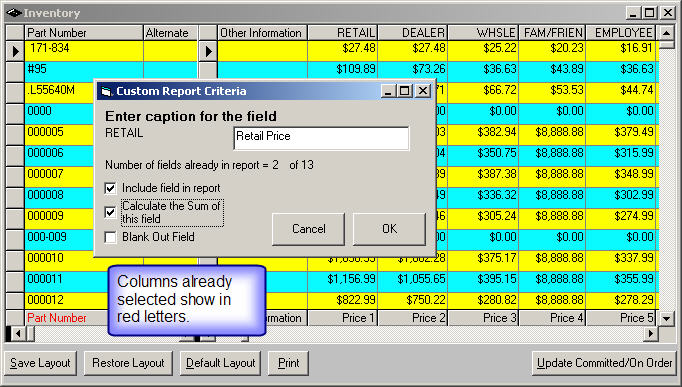
This allows you to select which columns you want added to a custom report. The maximum number of columns you can select is 13. When you have the parts filtered out you do not want and the columns sorted the way you want, use this option to select which fields you want to appear on your report. Select them in the order you want them to appear.
Enter the Caption for that column which you want printed on the report or accept the default and select the box include this field in the report. A helpful tip is columns that are selected to print on the report will show the field names at the bottom of the columns in red letters.
NOTE: Part Number and Part Description are automatically selected for you.
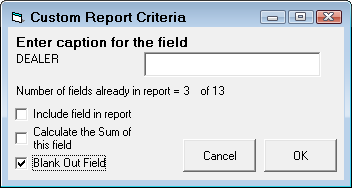
You are also able to add a blank column with custom header in a custom report in browse inventory that will print "________" which is useful for doing inventory. Right Click on any column, enter a new caption or leave blank and select the Blank Out Field option.
You can select the option to Calculate the Sum of this field which is useful for on-hand, cost, and price fields for example.
When you have selected the columns you wish to print on the report, click the Print button (Alt + P).
There is a way to export the report to another program such as Excel where you can add formulas or further manipulate the data (see You can then add formulas to multiply quantities times cost and sum the total number of units.
Layouts
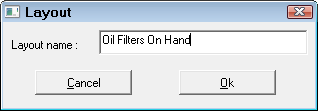
After you have used the above options and features and you want to save that exact layout, click on Save Layout (Alt + S) and type in a name for your layout.
To revert back to the default layout, click Default Layout (Alt + D)
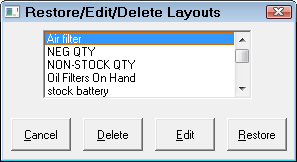
To Restore a saved layout click Restore Layout and double-click or click once and click the Restore button on the layout name you wish to show.
Click Edit to edit the name of the layout.
Click Delete to delete the selected layout.