Edit Smart Jobs Window
The Edit Smart Jobs window opens when you click Configuration menu > Labor > Smart Jobs > Smart Job Category and then
- Click Add to add a new job OR
- Click Edit on an existing job.
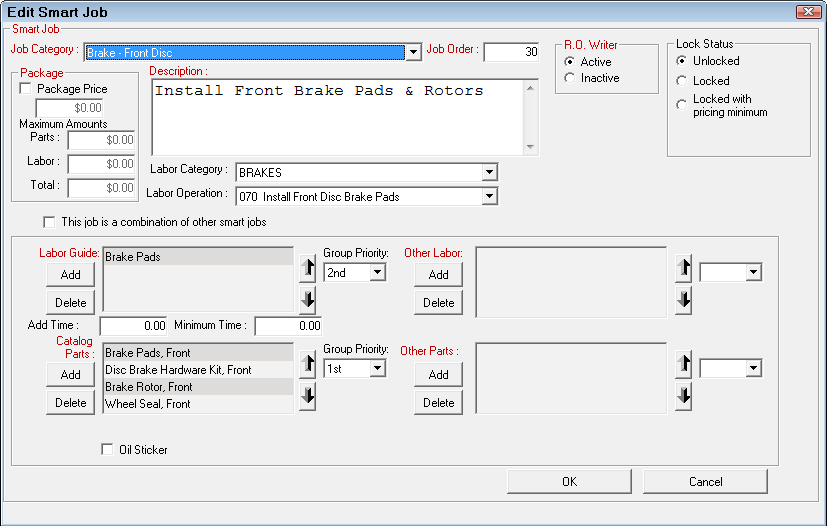
Package Price
You can assign Smart Jobs a Package Price, which is one price for all labor and parts. Select the Package Price checkbox and enter the appropriate amounts.
Maximum Amounts
To establish maximum amounts for parts, labor, or the total, enter the amounts in the appropriate area. You are warned if the totals exceed the maximum amounts. R.O. Writer does not adjust the price automatically.
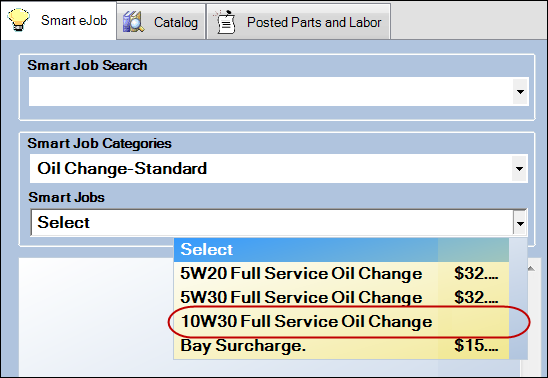
Smart Job Dropdown List in Smart eCat
The Package Price checkbox also determines if the price for the Smart Job displays in the Smart Job dropdown list in the Smart eJob tab in Smart eCat.
- When checked, the package price appears in the dropdown list.
- When not checked, the price area is blank.
Lock Status
These options enable you to lock the price.
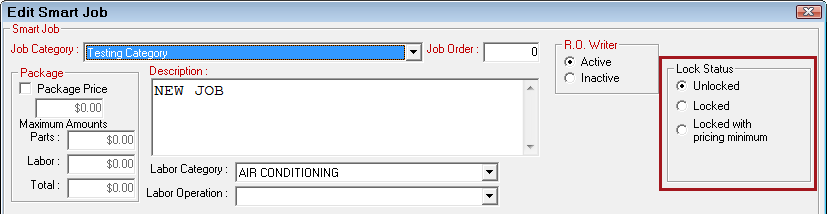
When the price is locked, it cannot be edited after being added to an open ticket. For details, click the following link: Price Locks on Smart Jobs and Smart eJobs.
NOTE: This section does not appear until after you save the Smart Job and re-open it.
Group Priority
Each section contains a Group Priority dropdown list to the right of the section.
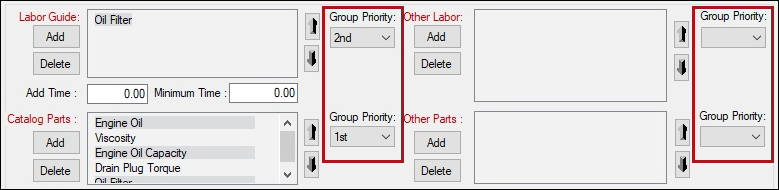
Use the numbers in these dropdown lists to determine the sequence in which Smart eCat should move through each section. For example, if you want Smart eCat to search for the catalog parts first, select 1st in the Group Priority dropdown list on the Catalog Parts section.
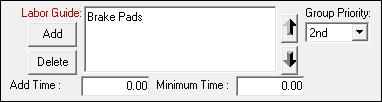
Labor Guide (Catalog Labor)
In the Labor Guide section, you can add catalog labor from Epicor.
To Add Catalog Labor
Complete these steps:
- Click the Add button in this section. The Select Labor Description window opens.
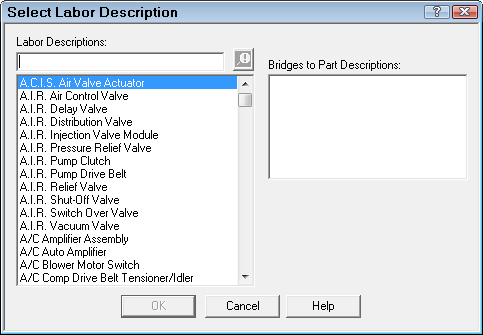
NOTE: The Help buttons on this window are from a third-party software which does not open when you click this button.
- To search, type a description in the Labor Descriptions box. The first matching item is highlighted in the list.
- To select an item for the job, you can select the item and click OK or just double-click the item. The catalog labor is added to the section.
- You can add multiple catalog labors.
- Use the up and down arrows to determine the sequence of labor searches in Smart eCat.
- You can also determine the time.
- Add Time - Type in the amount of time to add to the time specified in the Epicor labor.
- Minimum Time - Type in a time that the Epicor labor cannot go below. (Some Epicor labor items have no service times. This field inserts a time if none is entered.)
To delete an existing labor job, select the entry and press the Delete button.
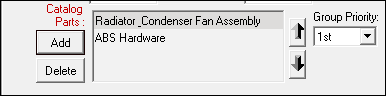
Catalog Parts
You can add multiple catalog part descriptions from the Epicor catalog.
To Add Catalog Parts
Catalog Parts use Epicor description. When the job is selected in Smart eCat, the Epicor specifications are provided for the part.
Complete these steps:
- Click the Add button in the Catalog Parts section. The Select Part Descriptions window opens.
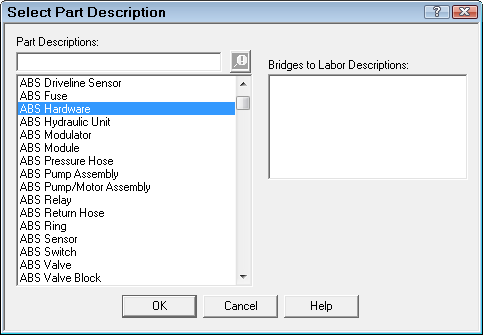
NOTE: The Help buttons on this window are from a third-party software which does not open when you click this button.
- To search, type a description in the Part Descriptions box. The first matching item is highlighted in the list.
- To select an item for the job, select it and click OK or just double-click the item.
- The catalog part is added to the section.
To delete an existing part description, select the entry and click Delete.
To Set the Workflow in Smart eCat
Set the Group Priority on the entire section to determine which section Smart eCat accesses and searches first when the job is selected.
Use the up and down arrows to determine the sequence in which Smart eCat moves through the items in this section.
Other Labor
This section allows you to add existing labor operations to Smart eJobs.
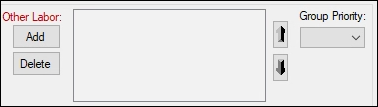
The Other Labor section is available only when the Use Smart eJob option is enabled in Configuration. Otherwise, this section is disabled.
To Add Other Labor Items
You can add multiple labor operations.
Complete these steps:
-
When this section is enabled, click the Add button. The Add Other Labor pop-up window appears.
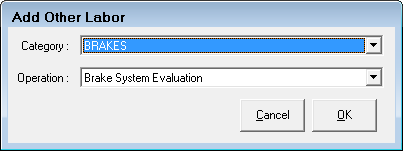
- Select the labor Category and Operation in the dropdown lists.
- These lists contains all labor categories and operations in your database.
- Click OK. The added labor appears in the Other Labor section.
NOTE: To delete labor, select it, and click the Delete button.
To Set the Workflow in Smart eCat
Set the Group Priority on the entire section to determine which section Smart eCat accesses and searches first when the job is selected.
Use the up and down arrows to determine the sequence in which Smart eCat moves through the items in this section.
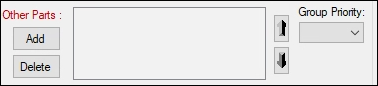
Other Parts
You can add multiple parts from Inventory in this section.
Complete these steps:
-
Press the Add button beneath Other Parts. The Smart Job popup window appears.
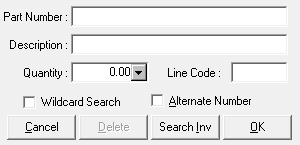
- On the Smart Job Part popup window, enter the part number or part description.
- Click the Search Inv button.
- On the Parts List, select the appropriate part from the list.
- Enter the Quantity for the job.
- Click OK. The added part appears in the Other Parts section.
NOTE: To delete an existing part, select the entry and press the Delete button.
To Set the Workflow in Smart eCat
Set the Group Priority on the entire section to determine which section Smart eCat accesses and searches first when the job is selected.
Use the up and down arrows to determine the sequence in which Smart eCat moves through the items in this section.
Oil Sticker Checkbox
Check the Oil Sticker box to set the Smart Job to print oil stickers.
When the Smart Job is added to a ticket, the Description box on the labor says, "Oil Sticker Required" until the oil sticker is printed.