Browse displays all inventory records in a list where you can review, select, and edit them.
Inventory information modified here is saved automatically. Therefore, use caution when you modify inventory here. However, when you edit the Committed and On Order quantities on the rows, those quantities are not updated until you click the Update Committed/On Order button at the bottom of the screen.
Browse
- Shows all your parts at a glance, sort by different fields, apply filters and save.
- Takes control of the inventory file. No other user can access Inventory while you are using Browse.
- Creates custom reports.
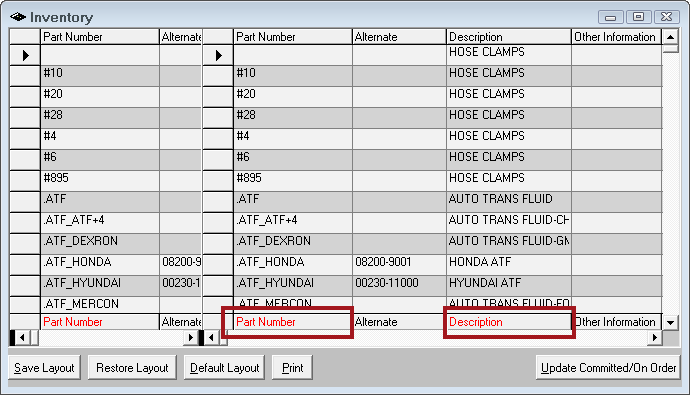
Browse Window
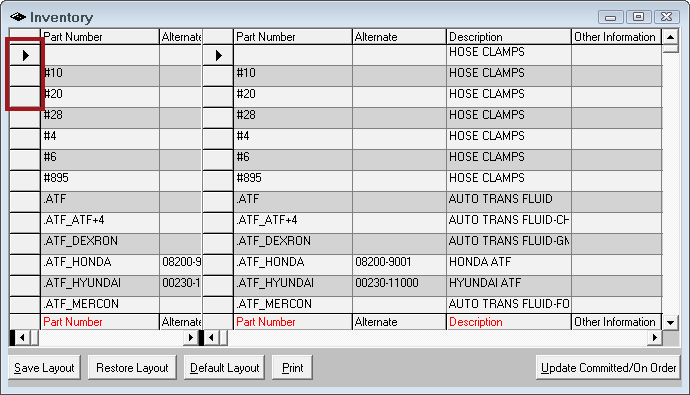
- The right arrow (
 ) in the far left column identifies the selected record.
 - Click one of the blank boxes in this column to select a record.
- Use the scroll bars along the bottom of the right section. More columns appear about the record on the right while the information on the left stays the same.
- Use the bottom row - which always appears at the bottom of the window - to search by Part Number and Description.
- Columns width can be adjusted or completely collapsed.
- Right-click on column headings to search, sort, filter, reset, and make custom reports.
To Move Columns (Fields)
Columns are often referred to as "fields" because each column is a field on the part record window.
Complete these steps:
- Select the column by moving the mouse pointer over the column heading. The pointer changes to a down arrow (
 ).
). - Click the left mouse pointer to select the field.
- Click and hold the left mouse pointer and slide the column to the desired location. Two red opposing triangles (
 ) mark the insertion point.
 - Release the left mouse pointer at the insertion point.
- The column appears in the new location.
NOTE: To return to the default setting, press the Default Layout button.
To Edit Cells
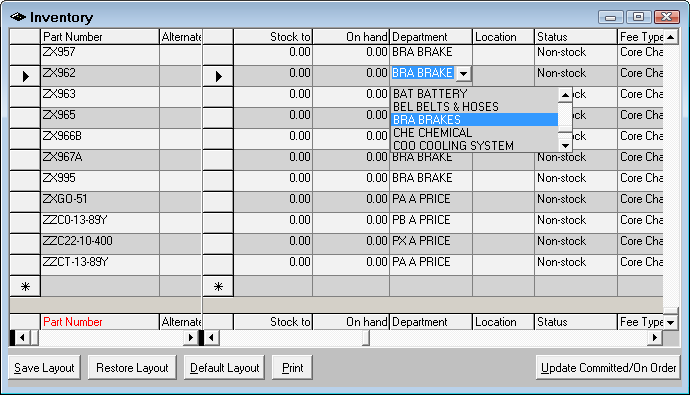
You can edit fields by highlighting a cell and typing in the new information or selecting from a dropdown box when available.
The Committed and On Order totals are not immediately updated in inventory. To be sure these numbers are correct, select Update Committed / On Order to refresh these values.
To Delete Parts
You can delete parts by highlighting the part you wish to delete by clicking the gray button to the left of the part number to highlight the entire row and pressing the delete button on the keyboard.
You can scroll to the field you want to stay stationary in the first window and then scroll through the part information in the second window.
Right-Click Menu Options on Column Headings
By right-clicking on any column heading, you have the following options:

Search
You can search any field. The scroll bar in the right section moves left and right to show more or less detail.
Complete these steps:
- Right-click on the column heading.
-
Select Search on the right-click menu. The Search fields appear.

- Enter the search criteria.
- Press the ENTER key or Click OK.
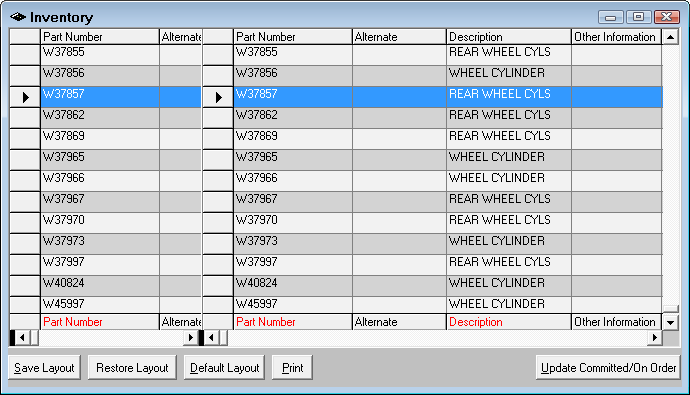
- If there is a match, the list jumps to the first match in the list. An arrow (
 ) in the far left column to indicate that the found record is selected.
 - If there is no match, a prompt appears saying that no matches were found.
- If there is a match, the list jumps to the first match in the list. An arrow (
- To see the next matching value,
- Select another row.
- Right-click the column heading and search again.
Sort
The Sort right-click menu entry sorts the records in the column in ascending or descending order. Blanks, special characters, and numbers appear first in the list.
Filter
Any field may be used to filter for desired inventory records. The scroll bar in the right section moves left and right to show more or less detail.
Complete these steps:
-
Right-click on the column heading. The filter fields appear.

- Press the ENTER key or Click OK.
- If there are matches, only the matches appear in the list.
- If there are no matches, no items appear in the list.
Special Filter Criteria
- Supplier - You have to type in the Supplier Code to search.
- Department - You have to type in the Department Code to search.
- Status - You have to type in
- S for Stock.
- N for Non-Stock.
- C for Consigned.
Reset
Reset returns the list to show all after a search, sort, or filter has been applied.
Making a Custom Report
While R.O. Writer provides a set of canned reports that anticipate the majority of a shop’s needs and covers the basics; however, because no two shops ever want or need exactly the same format or the same data, R.O. Writer provides a custom report feature in the Browse section of the Inventory module.
There are three steps:
Step 1 - Arrange the Browse Window and Select Columns
Step 2 - Choose the Custom Report Options
Step 3 - Print the Custom Report
Step 1 - Arrange the Browse Window and Select Columns
You can select up to 13 fields for the custom report. Part Number and Part Description are automatically selected for you.
Complete these steps:
- Filter and sort the columns the way you want.
- You select the column in the exact order you want them to appear on the report.
- Right-click on each column (field) heading you want to include.
-
Select Custom Report Settings menu entry. The Custom Report Criteria window opens.
Step 2 - Choose the Custom Report Options
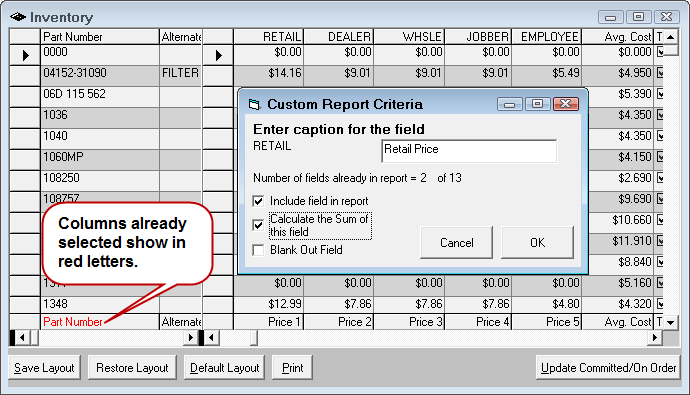
You choose the custom report options on the Custom Report Criteria window that opens when you right-click on the column heading
Complete these steps:
- Enter the Caption for the column. The caption prints on the report.
You can add a blank column with a custom header that prints "________" which is useful for doing inventory. To do so, right-click on any column, type in a new caption, or leave it blank and check the Blank Out Field option.
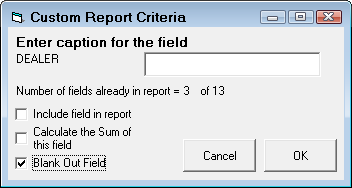
- The counter under the caption field tells you how many columns have been selected.
- Check the Include Field in Report box.
- Check the Calculate the Sum of This Field box to print a sum of the column on the report. This is useful for on-hand, cost, and price fields.
- Click OK.
-
The selected column name appears red along the bottom of the window, just above the scroll bars.
- Continue to select columns (up to 13) and set the custom report criteria on each until you have the report the way you want it.
Step 3 - Print the Custom Report
These custom reports can take a long time to run because there is so much data in Inventory.
Complete these steps:
- When all columns are selected, click the Print button (Alt + P).
- This runs the report.
- Select the Printing options and click OK.
- The report runs according to the printing options selected.
To Export the List of Part to Excel
You can export the list on the Browse window to Excel where you can further manipulate the data. For example, you can add formulas to multiply quantities times cost and sum the total number.
Complete these steps:
- Print the list to the screen.
- On the Print Preview window,
- Export the report to Excel and
- Save it to a location on a hard drive connected to the computer.
- Navigate to the location of the Excel file.
- Open the Excel file to review the data.
Layouts
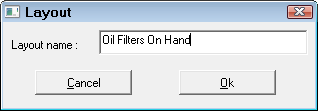
After you have used the above options and features and you want to save that exact layout, click Save Layout (Alt + S) and type in a name for your layout.
To revert to the default layout, click Default Layout (Alt + D)
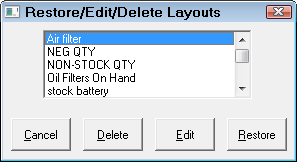
To restore a saved layout click Restore Layout and double-click or click once and click the Restore button on the layout name you wish to show.
Click Edit to edit the name of the layout.
Click Delete to delete the selected layout.