Exporting the Chart of Accounts
When you are finished editing the R.O. Writer accounts, you are ready to export the chart of accounts. The next step is to create a new company in QuickBooks with no accounts (i.e., skip the interview). Then, you can add other accounts and payroll information after the R.O. Writer chart of accounts is imported.
Exporting the Chart of Accounts
Complete these steps:
- In the Accounting Interface, click the Export Accts toolbar button
 .
. -
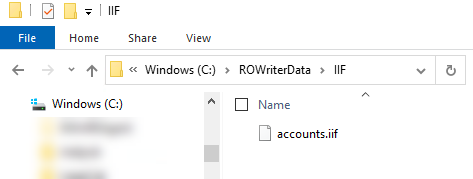
The accounts.iif is created and stored it in the Export File Directory.
-
The confirmation message appears letting you know the location of the Export File Directory.

- Click OK.
- Navigate to the Export File Directory and you will see the accounts.iff file.
Creating New Companies in QuickBooks
You may use an existing company as long as there is no preference set up as yes you charge sales tax. If this is set to yes, QuickBooks will never post sales tax from R.O. Writer to the Sales Tax Payable account even if you uncheck the option.
Also, be prepared when using an existing company that your accounts match with R.O. Writer accounts including the type. A couple of examples that would be different:
- R.O. Writer uses Other Current Asset for Accounts Receivable. QuickBooks sets up as type Accounts Receivable and will not allow us to post to it.
- R.O. Writer uses Other Current Liability for Accounts Payable. QuickBooks sets up as type Accounts Payable and will not allow us to post to it.
Change the account names in R.O. Writer to "RO-Accounts Payable" or "RO-Accounts Receivable."
The process of creating new companies in QuickBooks is different in different versions of QuickBooks.
To Create a New Company in QuickBooks 2011 and Earlier
Complete these steps:
- Open QuickBooks for Windows.
- Click File > new company.
- Click Next, then click Next again.
- Click SKIP INTERVIEW in the middle of the screen.
- Enter your Company Name, Address, etc. and click Next.
- Select (No Type) (No Accounts) and click Next.
- Click Save to create the new company.
To Create a New Company in QuickBooks 2012, 2013, and Higher
Complete these steps:
- Open QuickBooks for Windows.
- Click File > new company.
- Click the Create a new company button.
- Click the Express Start button.
- Type Other/None for Industry type.
- Click the Start Working button.
To Import the Chart of Accounts Into QuickBooks
NOTE: This only needs to be done one time on a new QuickBooks company not already used with R.O. Writer.
- Open QuickBooks for Windows.
- Click File > Import.
- Navigate to and select the accounts.iif and click OK.
- The file starts importing. The message that the file imported successfully. Click OK.
To See the Chart of Accounts in QuickBooks
Balance Forward Charges
Entering Balance Forward charges in Accounts Receivable for each customer does not transfer to QuickBooks. The only time we transfer charges is when a repair order is closed to Accounts Receivable. You would have to enter that balance into QuickBooks directly.
Entering Balance Forward charges for Accounts Payable must be done by posting invoices; therefore, all those balances are transferred to QuickBooks.
You may also wish to enter your Inventory beginning balance which you can get from the Parts Stock Value Report.
If you are not using a date range, you will most likely want to begin importing only new information to QuickBooks and will need to do a Reset.
For details, click the following link: Accounting Interface - Frequently Asked Questions.