Exporting
When you export in the Workstation Upgrade Tool, you choose the configuration settings and/or custom report files settings in the selected database. Then, you create a package file that can be imported into another database.
Something to consider when moving settings (e.g. printer settings and data locations) the settings on both workstations need to match. For example, the Term path locations will never match on both machines because of the [username] part of the path.
Creating a Package
There are several steps to creating a package. You must choose a location for the package and then choose what configuration settings and/or custom report files to include.
There are a few basic steps to creating a package:
Step 1 - Choose the Location of the Package (Required)
Step 2 - Select the Configuration Settings
Step 3 - Select the Reports Files
Step 4 - Create the Package File
Step 1 - Choose the Location of the Package (Required)
You must choose where the package you create will be saved. You must select the location each time you create a package.
Complete these steps:
- Open the Workstation Upgrade Tool. The export and import window opens.
-
Click the Export button to export.

- The Database Selection window opens.
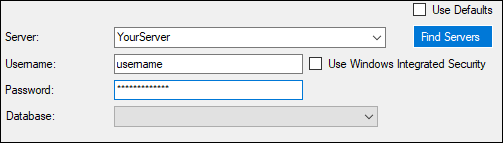
- Select a database you want to export configuration settings and/or custom report files from.
- You must enter the correct criteria to connect.
- When you are successfully connected to the database, click Next.
-
Choose a location for the package you are about to create.
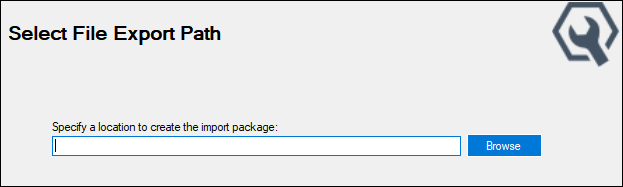
- You can choose any folder on the local drive or network drive you can write to.
To enter the folder location, you can:- Type in the name of the location.
- Copy and paste in the name of the location.
- Click the Browse button and choose a location.
NOTE: Read/Write permissions are set on the folder in Windows Explorer.
- When the folder location is selected, the Configuration tab appears.
- Select the configuration settings (user and/or machine settings) and/or report files and click Export to create the package.
Step 2 - Select the Configuration Settings
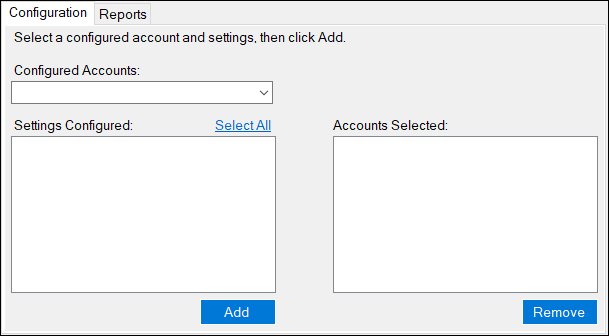
You choose the settings to include in the package file on the Configuration tab.
Complete these steps:
-
In the Configured Accounts dropdown list, select the user or machine settings you want to include.
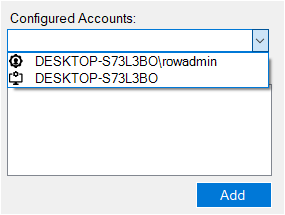
- User settings are displayed as follows:
 Machine Name\User name.
 - Machine settings are displayed as follows:
 Machine Name.
- User settings are displayed as follows:
-
The specific settings for that account appear in the Settings Configured section.
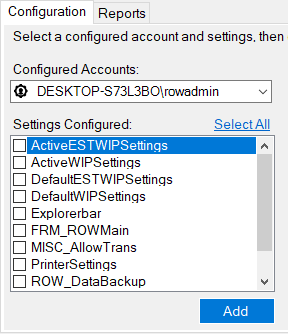
- In the Settings Configured section, either
- Click Select All to select all the settings.
- Scroll through the list and check the specific settings you want to export.
-
Click Add. The selected settings appear in the Accounts Selected section with the configured account name.
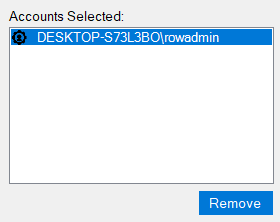
- The configured account will no longer appear in the Configured Account dropdown list.
- If you click Remove, the configured account is added back to the Configured Account dropdown list.
- To add more settings to the package, click the Configured Accounts dropdown list and repeat Steps 1—4.
- When all the settings have been added, you can
- Click the Reports tab to add report files to the package.
- Click the Export button to export only the settings in the Accounts Selected section.
- The package is created in the location you entered before exporting (if you have write permissions to that location).
- "Successfully created!" appears in green at the bottom of the window.
TIP: Navigate to the selected location and verify that the package file is located in the location you selected.
Step 3 - Select the Reports Files
Complete these steps:
-
Click the Reports tab. All custom report files appear in the middle of the window.
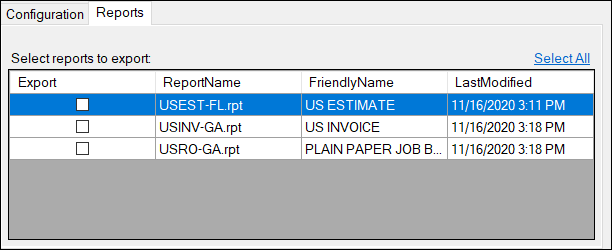
- You can
- Click Select All to select all custom reports in the list.
- Check specific report files.
NOTE: You can click the tabs to add configuration settings and/or custom report files to the package before exporting.
Step 4 - Create the Package File
After all the configuration settings and/or custom report files have been selected, click the Export button. The ROWImport.pkg is created with the settings you have selected.
The package is always named "ROWImport.pkg" and cannot be changed before exporting. You can change the name in Windows Explorer after the package file has been created.
If a package file named "ROWImport.pkg" already exist in the location you selected, that file is overwritten by the new package file just created.
NOTE: You can click the Back button to select another database.