Configuring Interchange
There are two aspects to configuring Interchange:
- Interchange must be active in your Epicor license.
-
- Search results also depend on the items that are enabled and disabled within each supplier coverage.
Check the Epicor License for Interchange
Interchange is included with your Epicor package by default. To verify that Interchange is active in your Epicor license, open LaserCat and click the Help menu > About Catalog. If Interchange is active in your Epicor license, Interchange says “Yes”.

Smart eCat Supplier Configuration
If Interchange is active in your Epicor license, Interchange is integrated with Smart eCat automatically. However, it is important to consider your supplier configuration in Smart eCat.
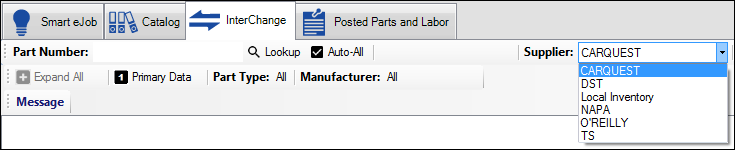
Only suppliers that have the Interchange feature enabled in their coverage can be searched in Interchange. The Supplier dropdown list in Interchange includes only the suppliers whose coverage has Interchange enabled.
For Your Existing Suppliers
For your existing suppliers in Smart eCat:
- If Interchange was enabled before you upgraded to R.O. Writer 2.3 or higher, it remains enabled after you upgrade.
- If you want to search these suppliers in Interchange, no further configuration is needed.
- If Interchange was not enabled before you upgraded to R.O. Writer 2.3 or higher, it remains disabled after you upgrade.
- If you want to search these suppliers in Interchange, you need to enable the Interchange feature in Smart eCat Configuration.
NOTE: Interchange is enabled in the coverage of the TS supplier included in Smart eCat by default.
To Enable Interchange in a Supplier Coverage
If Interchange is part of your Epicor license, but you do not see your supplier in the Supplier dropdown list in Interchange, you need to update the supplier coverage with Interchange in Smart eCat Configuration.
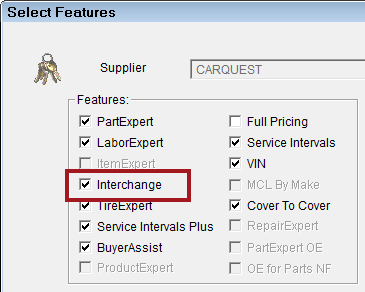
Interchange is enabled or disabled on the Select Features window in supplier coverage configuration.
Complete these steps:
- Open Smart eCat.
- Click the Configure toolbar button.
- Click the Coverages tab.
- Click the Add/Edit Coverages button
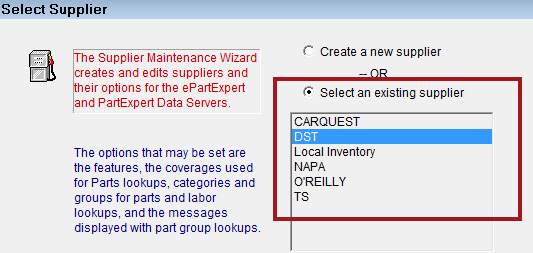
 . Epicor’s Supplier Maintenance Wizard opens.
 -
Check Select an Existing Supplier and select the supplier in the box.
- Click Next. The Select Features window opens.
-
Check Interchange.
-
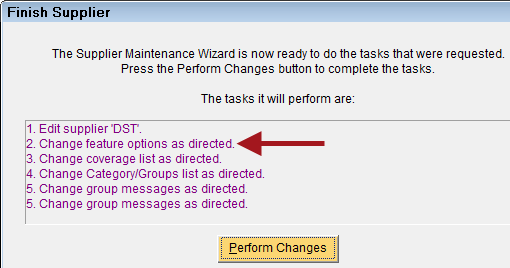
Click Finish. The Finish Supplier window opens with a list of proposed changes at the top. #2 should say “Change features options as directed.”
-
Click the Perform Changes button. The changes are applied and the results appear in the bottom section of the window.
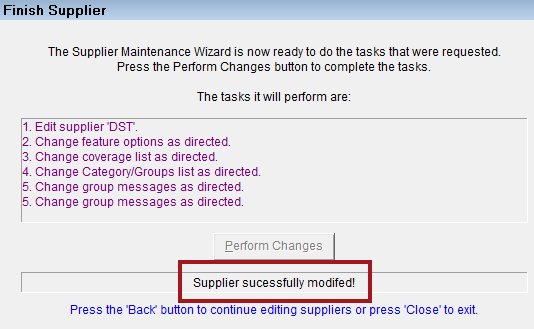
- Click Close.
- The supplier coverage is updated.
-
The next time you open Interchange in Smart eCat, this coverage appears in the Suppliers dropdown list.
To Enable and Disable Items in Supplier Coverages
By default, Interchange searches only items enabled in the supplier coverage.
When you enable or disable items in the supplier coverage, those changes apply only to the current supplier's coverage and not to the same item in other supplier coverages. Each supplier coverage must be modified separately.
Complete these steps:
- Open Smart eCat.
- Click the Configure toolbar button.
- Click the Coverages tab.
- Click the Add/Edit Coverages button . Epicor’s Supplier Maintenance Wizard opens.
-
Check Select an Existing Supplier and select the supplier in the box.
- Click Next until the Setup Coverages window opens.
-
Select a manufacturer line in the list.
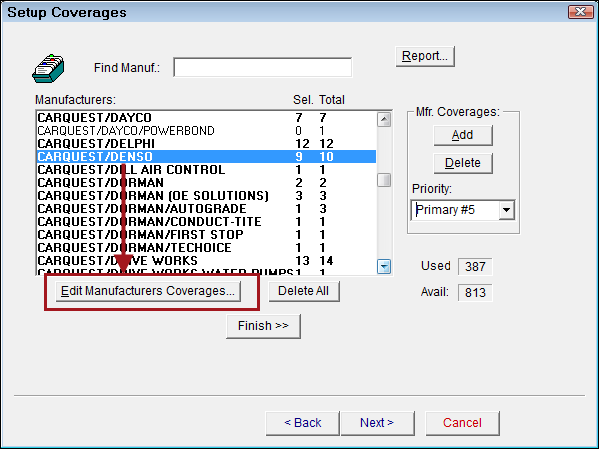
NOTE: On this window, you also determine if the Priority of the line is Primary or Secondary.
- Click the Edit Manufacturers Coverages button. The Manufacturer Edit window opens.
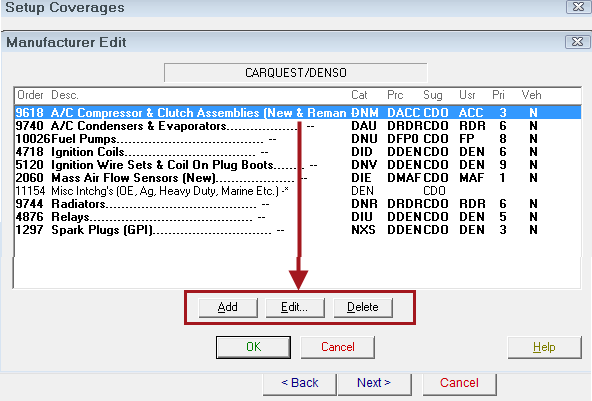
Bold items are enabled. Normal text items are disabled.
- To enable an item, select a normal text item and click Add.
- To disable an item, select a bold text item and click Delete.
NOTE: The Usr column displays the user line code, which is important because Interchange returns local inventory results. For details, click the following link: Local Inventory in Search Results.
- When all changes are complete, click OK to return to the Setup Coverages window.
-
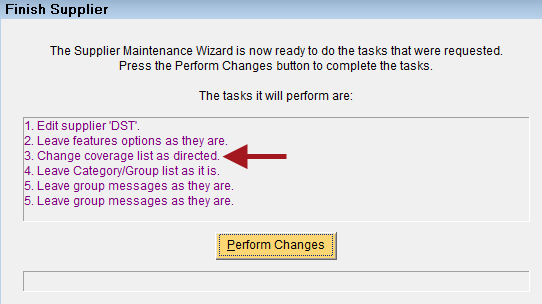
Click Finish. The Finish Supplier window opens with a list of proposed changes at the top. #3 should say “Change coverage list as directed.”
-
Click the Perform Changes button. The changes are applied and the results appear in the bottom section of the window.

- Click Close.
- The items are updated.
- The next time you search this supplier, the item changes apply.