To look at the work that is scheduled for the day, click the Calendar button  on the main toolbar.
A calendar for the current month opens. The numbers of the current day are highlighted in red.
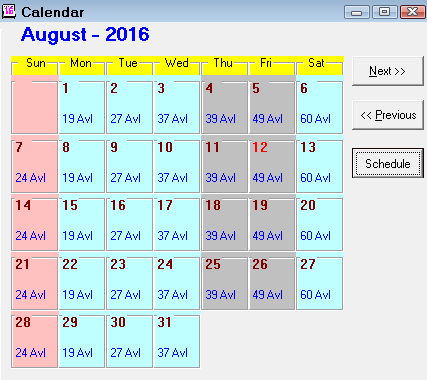
If appointments have been scheduled for the day, the number of appointments and the estimated number of scheduled hours appear on the day.
Daily Appointments
Double-click the number of scheduled hours to see appointments for that day. The appointments for the selected day appear in a separate window.

To open a specific appointment, double-click on it in the list. You can edit the appointment on the appointment window.
Daily Appointment Buttons
At the bottom of the daily appointment list there are four function buttons:
| Button | Description |
|---|---|
| Add/Edit Vacations | Click to schedule technician time off and days the shop is closed can be scheduled. |
| Print Schedule | Click to print the daily schedule of appointments at the top of the window. |
| New Appointment | Click to book a new appointment on the selected day. |
| Calendar | Click to return to the monthly calendar window. |
Scheduling Vacation, Holidays, and Shop Hours
To add vacation time for vacations and holidays for technicians, click the Add/Edit Vacations button.
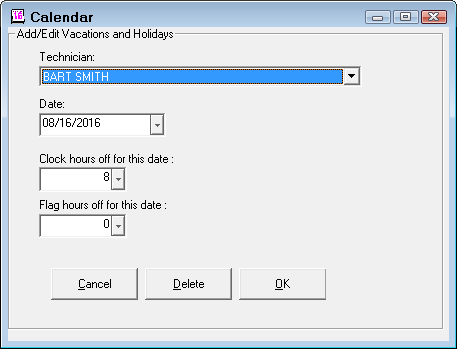
- Select the appropriate technician from the dropdown list. You can modify the date by clicking the Date dropdown list.
- Enter the clock hours that are unavailable for the technician.
- The clock hours show up in the off hours for the technician but do not affect the available hours calculations.
- If flag hours are entered, they are deducted from the available hours for the day.
- Select OK to update the transaction or Cancel to exit without updating.
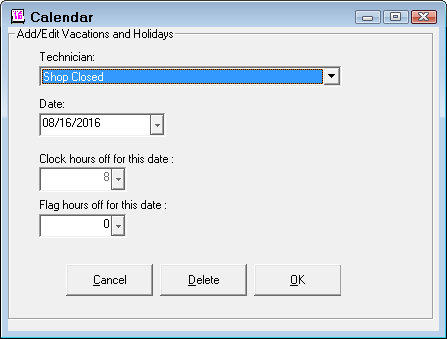
To Remove Vacations
To remove an existing scheduled vacation, select the appropriate entry from the Appointments/Vacation calendar.
- Click the Delete button to delete the entry.
- Use the Shop Closed option in the dropdown list for the technician for days when the shop is closed.
Printing the Daily Schedule
Click the Print Schedule button to print a schedule for the selected date.
Creating New Appointments
Click the New Appointments button. The customer/vehicle search opens.
When the appropriate customer and vehicle are selected, the new Appointment window opens.
Select the appropriate time for the customer for the service, and enter the estimated hours required for the service.
You can enter a description of the customer’s request as notes under the appointment information. When all of the information has been completed, click OK.
Appointment Toolbar
The Appointment window has toolbar buttons at the top of the window.
|
Button |
Description |
|---|---|
| Make RO | Click to convert the appointment to a repair order |
| Make Est | Click to convert the appointment to an estimate |
| Delete | Click to delete this appointment |
| Edit Veh | Click to edit the vehicle information |
| Edit Cust | Click to edit the customer’s information |
| Reschedule | Click to change the date of the appointment |
Rescheduling Appointments
You can reschedule appointments by clicking the Reschedule toolbar button. A window appears requesting the new date. You can enter the new date or select it from the calendar tool. Click OK and the appointment is rescheduled to the new date.
Converting Appointments
You can convert the appointment information to an estimate or repair order by clicking the Make Est or Make RO button on the Appointments toolbar. The notes are transferred to the ticket as a labor operation.