Configuration menu > Oil Sticker
R.O. Writer can print stickers for windshields that show when the next oil change should occur. Oil stickers require a special label printer; the Zebra TLP 2824 is recommended.
To configure oil sticker printing, you need to
- Design the oil sticker
- Mark the labor operations and Smart Jobs that need to print oil stickers
NOTE: Oil sticker printing is set on the labor operations for oil changes in Configuration not on the part in Inventory.
When a labor operation or Smart Job is configured to print oil stickers is added to a ticket:
- The Prompting setting in oil sticker configuration goes into effect when finalizing a repair order.
- The Print Sticker button appears on the Other Information tab of the part in Inventory.
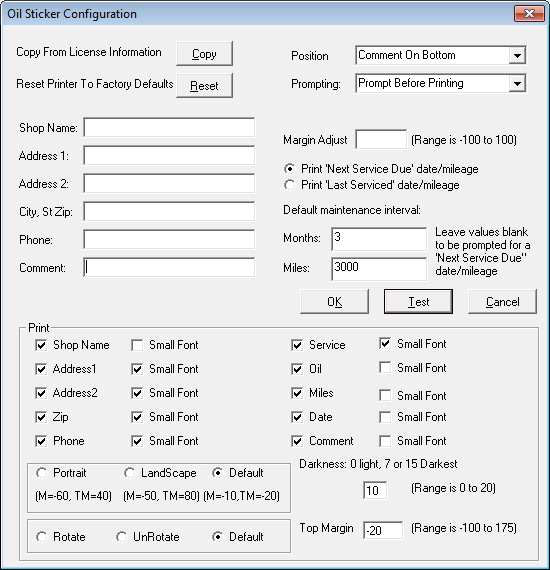
Designing the Oil Sticker
Click Configuration menu > Oil Sticker. The Oil Sticker Configuration window opens.
Configuring Labor Operations to Print Oil Stickers
- In the Configuration module, click Configuration menu > Labor > Operations.
- Select the Category that contains the labor operations that you want to print oil stickers.
- Select the Operation.
- Check the Oil Sticker checkbox.
- The Enter the Oil Type window appears. Enter a description of the oil you want to appear on the oil sticker.
This description appears in the Oil Type field on the window that opens when the system begins printing an oil sticker.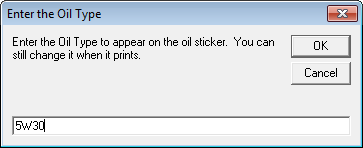
- Click OK.
If Oil Type is left blank, the Oil Type field appears red when printing oil stickers and you need to enter it manually.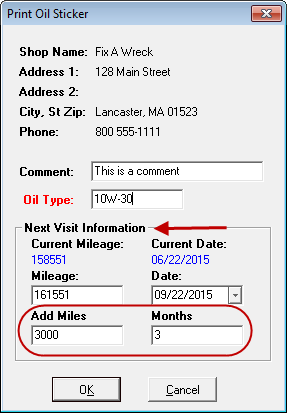

Configuring Smart Jobs to Print Oil Stickers
If Smart Jobs are used for oil changes, you need to configure those jobs as well.
- Click the Configuration menu > Labor > Smart Jobs.
- Select the appropriate Job Category that you created for oil changes.
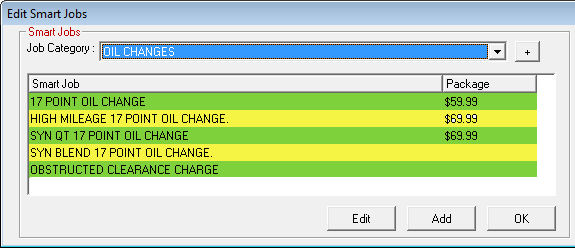
- Click on the appropriate Smart Job and click the Edit button. The Edit Smart Jobs screen for the selected Job Category opens.
- At the bottom left of the screen, check the Oil Sticker checkbox. The Enter the Oil Type appears immediately.
-
The Enter the Oil Type window appears. Enter a description of the oil you want to appear on the oil sticker.

- This description appears in the Oil Type field on the Print Oil Sticker window that opens when the system begins printing an oil sticker.
If Oil Type is left blank, the Oil Type field appears red when printing oil stickers. At this point, you can enter a description manually.
Printing Oil Stickers
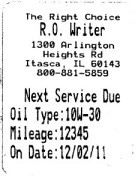
R.O. Writer can print stickers for windshields that indicate when the current oil chance occurred or the next oil change should occur.
Configuring an oil sticker to print after the oil change service is completed is basically a three-step process:
- Configure the oil sticker itself; this includes whether or not you are prompted to print an oil sticker after finalizing the repair order.
- Check the Oil Sticker option on labor operations and Smart Jobs that need oil stickers printed.
- Add one of the labor operations or Smart Jobs that needs an oil sticker printed to a ticket.
Automatic Sticker Printing
Complete these steps:
- Start a new repair order or a new estimate.
- Add Smart Job or labor operation that is configured to print oil stickers.
- The description of the labor operation includes two additional lines indicating that an oil sticker is required:

- When the repair order, work order or estimate is printed, one of two things happens (depending on the settings in Configuration):
- If the Prompting field in oil sticker configuration is set to Always, the oil sticker prints automatically. The sticker prints exactly as configured in oil sticker configuration.
- If the Prompting field in oil sticker configuration is set to Prompt, the Print Oil Sticker window opens.
- When the repair order and sticker are printed, the text on the repair order or on the finalized ticket for that labor operation displays "Oil Sticker Printed" instead of "Oil Sticker Required".
Manual Sticker Printing
Stickers may also be printed manually at any time via the Print Sticker button on the Other Information tab.

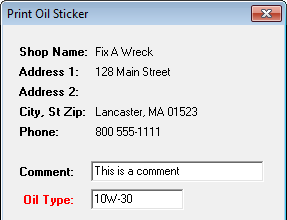
The Print Oil Sticker popup window opens.
Print Oil Sticker Window
The Print Oil Sticker pop-up window opens when you
- Choose to print an oil sticker from a prompt during finalize.
- Click the Print Sticker button on the Other Information tab.
What appears on this window depends on the oil sticker configuration. Some items can be changed and some cannot.
When the data is as you want it to appear on the sticker, click OK to print the sticker.
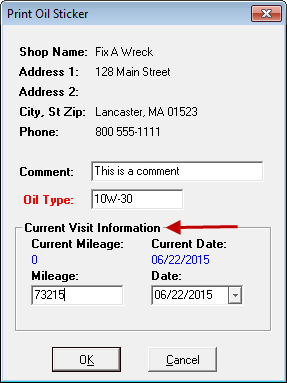
Current Service Date
If the Print Last Serviced Date/Mileage option is selected, the Current Mileage (from the vehicle record) and the Current Date prints on the oil sticker. You can edit the
- Comment
- Oil Type
- Mileage and Date of when then next oil change should occur:
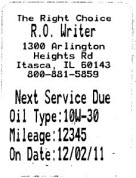
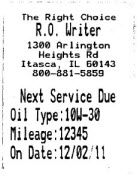
Next Service Date
If the Print Next Service Due Date/Mileage is selected, the Current Mileage (from the vehicle record) and the Current Date prints on the oil sticker. You can edit the
- Comment
- Oil Type
- Mileage and Date when then next oil change should occur:
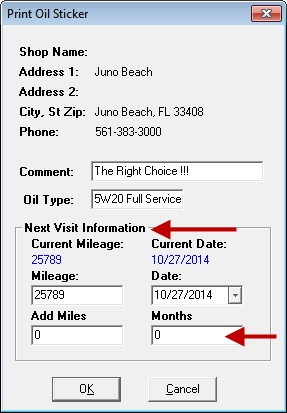
You can also enter the number of Add Miles and Months:
- Add Miles = Entering a number here increases the Mileage field by that amount. If you change the amount in the Mileage field, the difference shows up in this field - positive or negative.
- Months = Entering a number here increases the Date field by that amount. If you change the amount in the Date field, the difference shows up in this field - positive or negative.
Oil Type
If the Oil Type was left blank in oil sticker configuration, the Oil Type field is red. You can type in a value before printing.