Matrix Pricing for Outside Purchases
R.O. Writer has seven different methods to assist you in pricing outside purchases of non-stock parts.
Configuring Matrix Pricing for Outside Purchases
In the Outside Purchases section, select the pricing method you wish to use.
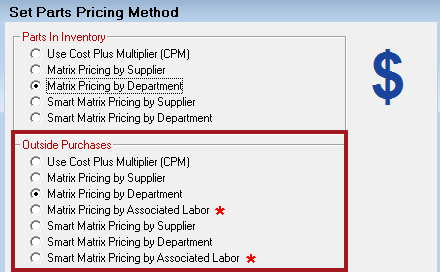
NOTE: The options with a red star are not supported in the NAPA catalog, Nexpart, or ACDelco Connect interfaces.
The options are:
-
Use Cost Plus Multiplier (CPM)
-
Matrix Pricing by Supplier
-
Matrix Pricing by Department
-
Matrix Pricing by Associated Labor
-
Smart Matrix Pricing by Supplier
-
Smart Matrix Pricing by Department
-
Smart Matrix Pricing by Associated Labor
Depending on the pricing method you select, there are additional options available.
Setting up Matrices
When you have selected a pricing method for Inventory parts and Outside Purchases, you will want to set up matrices.
For outside purchases, select Configuration > Parts > Default Outside Purchase Pricing. The setting appear for the option selected on the Set Pricing Method window.

Required Entries
If you have any required entries set up that can affect part prices when finalizing the repair order, you can choose to have R.O. Writer
- Automatically recalculate the prices based on your selected pricing method,
-
Never recalculate prices,
OR
- Prompt the user to choose whether or not to recalculate prices.
These options are important because the total price of the repair order can change during finalization if prices are recalculated.
Associated Labor
When using a pricing method based on associated labor, the prices can be affected when
-
Cutting and pasting parts between labor operations
OR
- Selecting a different existing labor job from the add part screen.
Select whether you want R.O. Writer to automatically recalculate the price based on the new labor operation associated, never recalculate the price, or prompt the user whether or not to recalculate the price.
When There is an Inventory Record But Zero On Hand
When you have an inventory record but zero on hand when posting outside purchase parts,
- You can select whether or not you want to use the outside purchase pricing method or the inventory pricing method. (Of course, if the part has an on hand number greater than zero, it will use the retail price currently in inventory regardless of this option.)
- Selecting the last option will use the retail price currently in inventory if the calculated price is less.
Overriding Matrix Pricing
You can
- Override the suggested price created by matrix pricing
- Toggle matrix pricing on or off
- Use the default pricing mark up
Complete these steps:
1. On the Editing Part Window, deselect the smart pricing checkbox if checked and manually enter the new price.
2. If you click Yes, the Part Price Calculator will be displayed. The mark up will be based on your default set up.
- If you click No, the current price will be posted to the ticket.
- If the retail price was not calculated using a smart pricing matrix, the smart pricing box would not be checked.
To Post the Original Price Back to the Part
Complete these steps:
- If the part number is in your inventory file, you can post the original part Cost and Price back to the part.
- Open the part on the ticket.

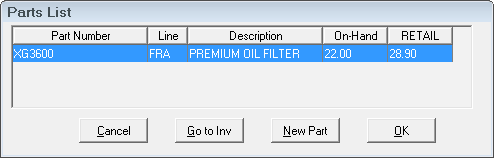
- Select the part number and click OK to post the original prices back to the part.
If the retail price brought over from inventory was calculated using an inventory smart pricing matrix, the Smart Pricing box would be checked.
Using the Pricing Matrix to Analyze Parts Purchases
When using the following pricing methods, you can also use the pricing matrix, to analyze the parts purchases:
-
Matrix Pricing by Supplier
-
Matrix Pricing by Department
-
Smart Matrix Pricing by Supplier
-
Smart Matrix Pricing by Department
The analysis shows the amount of your purchases and the margin.
Complete these steps:
- Start the Configuration module
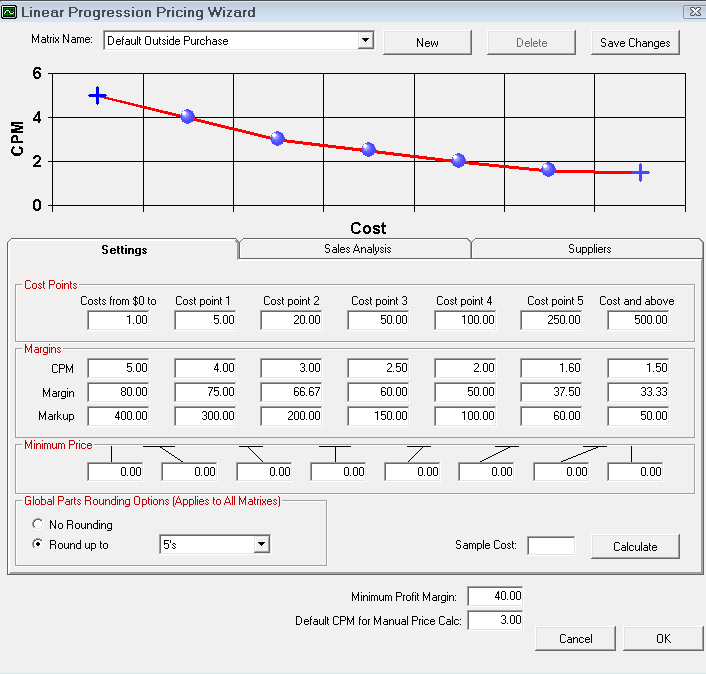
- Click on Configuration > Parts > Default Outside Purchase Pricing. The default matrix appears.
- The current cost ranges or cost points will be displayed depending on the price method selected either matrix or linear. You can either use these ranges or edit them as needed.
- Do not select Save Changes or OK to avoid saving any changes to your existing matrix.
- Click the Sales History tab for matrix pricing or the Sales Analysis tab for linear pricing.
(These options are not available when using Smart Matrix Pricing or Matrix Pricing by Associated Labor.) - The date range defaults to one year. Adjust the date range if needed.
- Click the Run Analysis button.
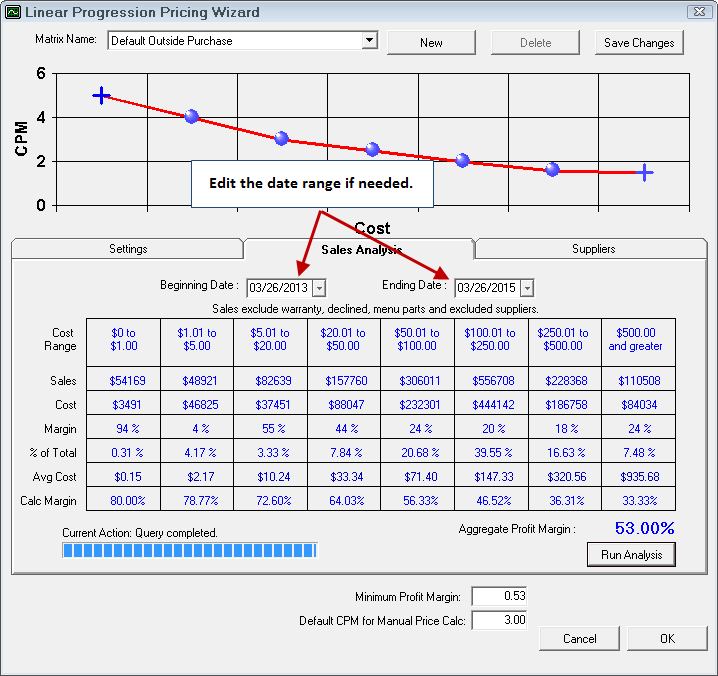
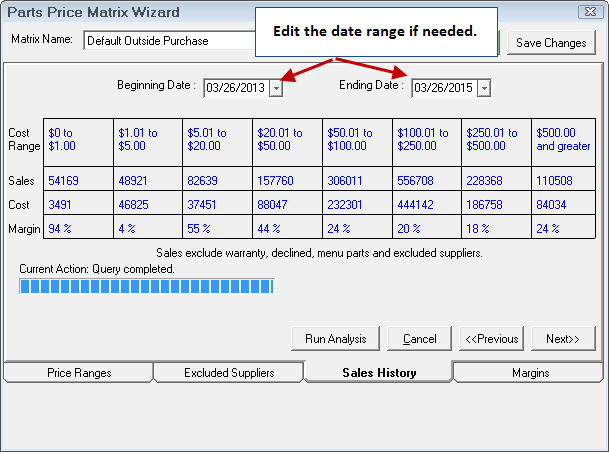
- The wizard will display your purchases based on cost range.
- Here you can determine the cost range(s) where you purchase most of your parts.
- This is where you need to focus to improve margin.
- Click the Margins tab if using matrix pricing.
- If you had used the mark ups displayed during the above time period, your margin would be the Aggregate Profit Margin.
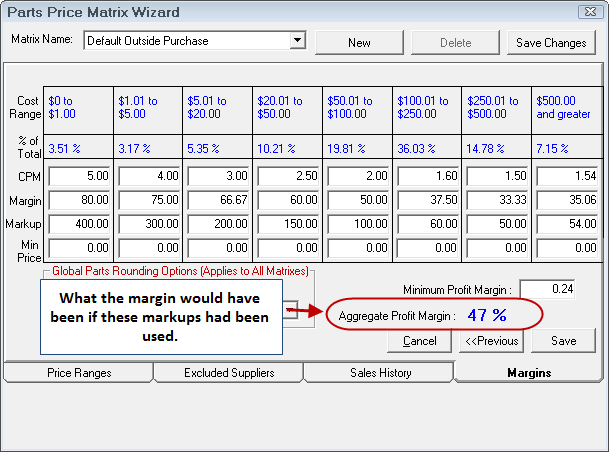
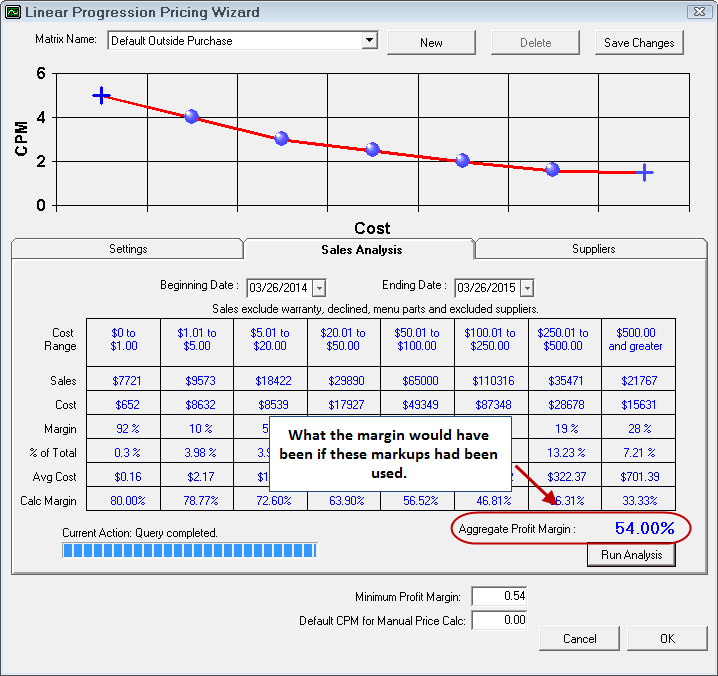
- You can do "what if" scenarios by adjusting the mark ups or changing suppliers and/or departments depending on the matrix you selected and clicking the Run Analysis button again.
- When you are done running your analysis, click Cancel so that your default pricing matrix does not change.