Authorizing Tickets (Estimate Authorization)
Some states require a repair shop to obtain authorization from the customer for the amount before starting work. R.O. Writer documents these authorizations and prints each of them on the customer invoice.
Entering a Customer Authorization
If the ticket needs to be authorized, the Est Auth toolbar button appears with a red line:  .
.
You need to reach out to the customer using their preferred contact method. You need to communicate the details of - or the changes to - the ticket. If the customer approves, enter the authorization information.
To Enter an Authorization
Complete these steps:
-
Click the Est Auth toolbar button
 . The Estimate Authorization window opens.
For the first authorization, all the fields are active.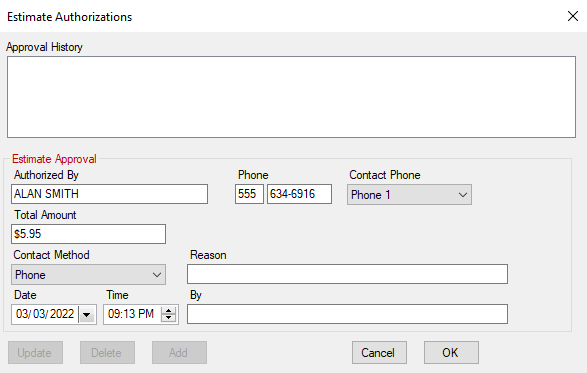
For each additional authorization, the fields are inactive until you click the Add button.
- The customer's name appears in the Authorized By field by default.
- Verify the information in the Authorized By field; it must be completed with the correct name before you can click OK.
- Information is transferred from the ticket but can be modified as needed.
-
Enter the other information.
The following table describes the information you must enter. Information
Description
Select the method you used to contact the customer.
Phone is selected by default. The dropdown list contains additional options, including an option for in-person authorizations.
Reason
Type in the reason for the authorization.
Date
Defaults to the current date. You can type in a different date.
Time
Defaults to the current time. You can type in a different time.
By
Type in the name or initials of the person who received the authorization from the customer.
- To save the information, click OK. The window closes. The Est Auth toolbar button changes to indicate that the ticket has been authorized
 .
.
|
Item |
Description |
|---|---|
|
Phone |
The customer's phone number. |
|
Contact Phone |
The type of phone number (e.g., home, work, cell, etc.). |
|
Total Amount |
The total Balance Due (as displayed on the Calculations tab) for the repair order. The Amount and Difference amounts always include taxes and fees. |
|
Difference From Last Authorization |
This field appears only if there has been a previous authorization. It displays the difference between the current amount and the most recent authorization. The amount is red if the new total amount is less than the previously authorized amount. |
Editing Previous Authorizations
If the ticket has been authorized previously, the Est Auth toolbar button appears gray with no colored line  .
.
If the total Balance Due is different from the most recent authorization, the Est Auth toolbar button appears red .
To Edit Authorizations
Complete these steps:
-
Click the Est Auth toolbar button to re-authorize the current ticket.
Each previous authorization appears in the Approval History section at the top of the window. The most recent authorization begins with "*CURRENT*."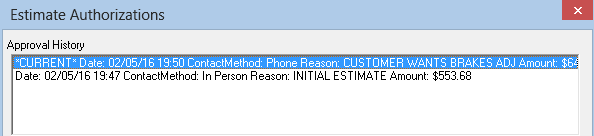
- Double-click on the authorization you want to edit. The information appears in the Estimate Approval section but is disabled.
- Click the Update button to activate the fields. The following information is updated from the ticket:
- The Amount (and Difference amount), including taxes and fees.
- The Date/Time
- Edit the fields as necessary.
- Click OK to save changes.
In-Person Authorizations
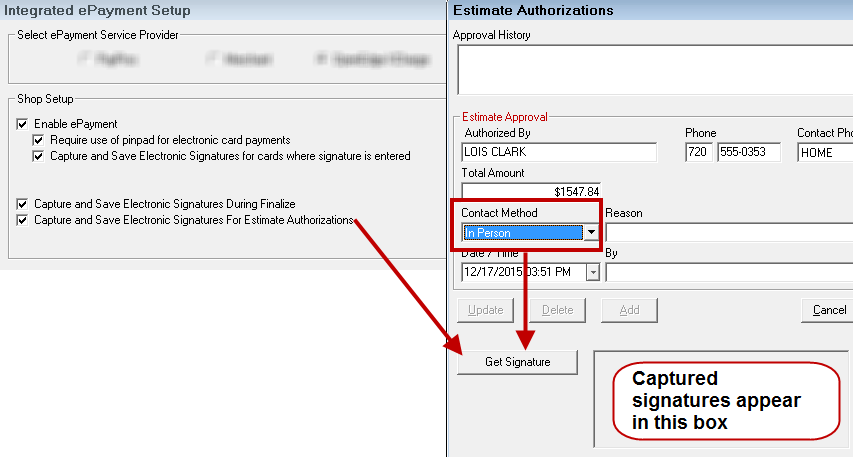
The Contact Method dropdown list contains an In Person entry. Select In Person when you obtain the authorization when the customer is physically present in the shop. This selection activates the ability to obtain an electronic signature from the customer.
Select the In Person item in the list. A Get Signature button appears below all options if
- A signature capture device is connected to R.O. Writer and
- R.O. Writer is configured to capture signatures for estimate authorization in Electronic Payment Setup.
Click the Get Signature button to capture an electronic signature to approve the repair order.
Authorizations on Printed Repair Orders
All authorizations print on the customer invoices in the Estimate Authorization section. If an electronic signature was captured for the authorization, the captured signature prints with each authorization.
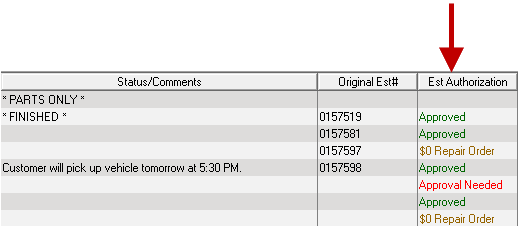
Estimate Authorization Column on the Progress Windows
An estimate authorization column can be added to the Work in Progress (WIP) and Estimates in Progress windows. The Est Authorization column shows the status of the authorization for each ticket.
Statuses in this column include
- "Approval Needed" in red
- "Approved" in green
- "$0 Repair Order" in yellow
To Make the Est Authorization Column Visible
If you do not see the Est Authorization column, right-click on the WIP window and select Est Authorization in the Visible Columns section.
Click Save and the Est Authorization column appears on the progress windows. This column displays the estimate authorization of each ticket.
Requiring Authorization
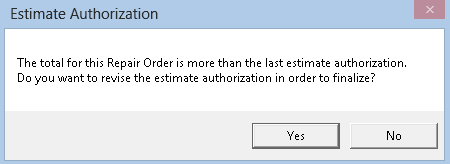
You can require that the estimate be authorized before the repair order can be finalized. Click Configuration module > Configuration menu > Repair Orders > Required Entries > Finalize section > Require Estimate Authorization.
When selected, you are prompted as follows when finalizing repair orders whose total amount does not match the previous estimate authorization:
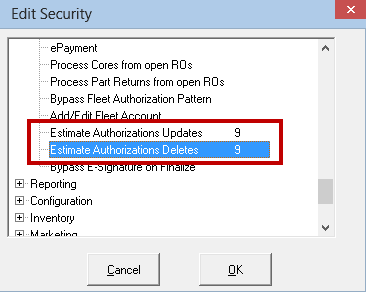
Security Settings
You can password-protect the ability to update or delete estimate authorizations in Configuration: Configuration menu > Security > Security Levels > Repair Orders/Estimates section.