Configuring ALLDATA Connect
There are three steps to configuring ALLDATA Connect in R.O. Writer:
Step 2 - Enter Your Login Credentials (Username and Password)
Step 3 - Add ALLDATA Connect to the Quick Launch
Step 1 - Check Your License
To verify that you are licensed to use ALLDATA Connect, click the Help menu > About > Display License Details button. You should see Identifix in the Licensed Options section.
If this feature is not included in your Licensed Options, you may need to refresh your license.
If you would like to add this feature, please contact the R.O. Writer Sales team to update your license.
Step 2 - Enter Your Login Credentials (Username and Password)
R.O. Writer cannot provide you with your account information; you must obtain your account information directly from the supplier.
Complete these steps:
- Open Configuration.
-
Click Configuration menu > ALLDATA Catalog > ALLDATA Setup.

-
Enter your login credentials.

- Click OK.
Step 3 - Add ALLDATA Connect to the Quick Launch
You need to make ALLDATA Connect available in the Quick Launch and Smart eCat.
Complete these steps:
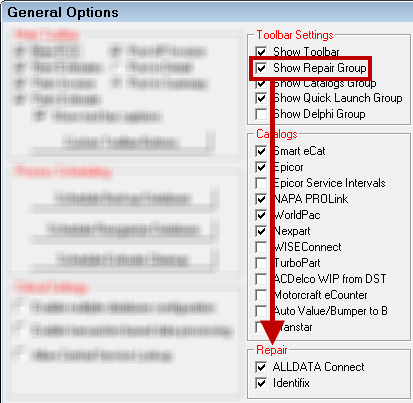
- Open the Configuration module, click the File menu > General Options.
- In the Toolbar Settings section, select Show Repair Group.
-
In the Repair section, select ALLDATA Connect.