General Options
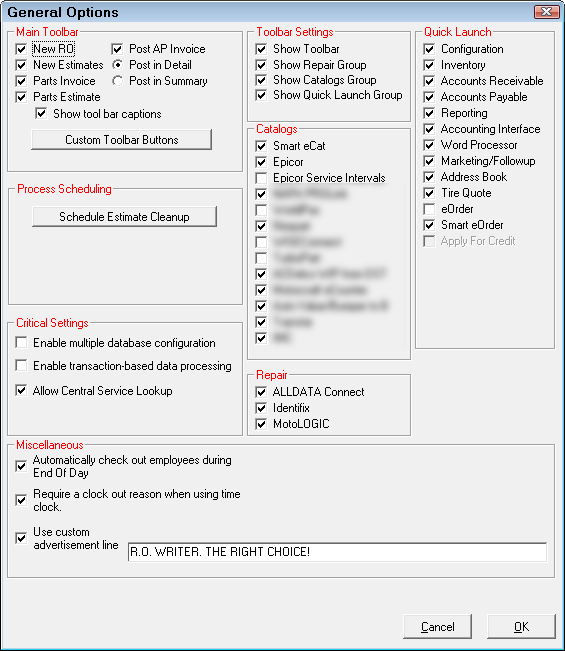
Main Toolbar
Each item represents an button on the main toolbar. Select an item to make its button appear on the main toolbar.
NOTE: If you are not licensed for an item, the entry for that item is unchecked and disabled on the General Options window.
NOTE: If you are using the Accounts Payable module, select Post AP Invoice and select Summary or Detail.
Show Toolbar Captions
This option affects the appearance of the main toolbar. When selected, the text describing the button appears below each button. If not selected, only the picture of each button appears. This option is selected by default and it is best to keep it selected.
To Create Custom Toolbar Buttons
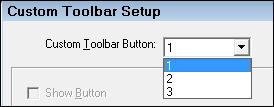
You can configure up to three toolbar buttons independently. You need to assign each custom toolbar button a number to keep track of how many you have:
Complete these steps:
- On the General Options window, click the Custom Toolbar Buttons button.
-
Select 1, 2, or 3 in the Custom Toolbar Button dropdown list.
- The Edit button activates.
- Remember which number you assign to each button so that you can select it when you want to edit its attributes.
-
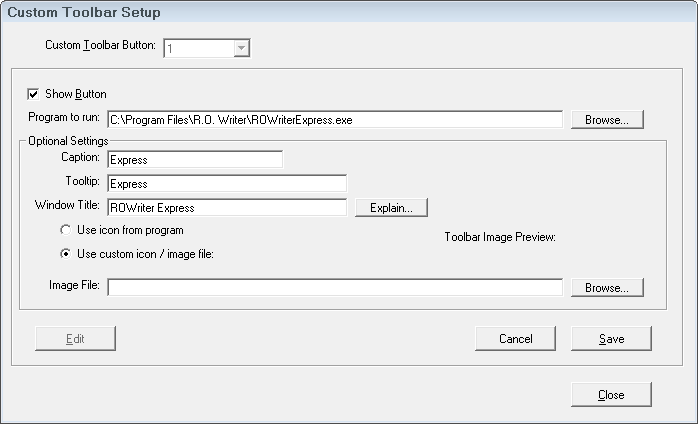
Click the Edit button. The fields become active.
-
Select the options that apply to the toolbar button you are creating.
The following table describes the options for creating a toolbar button. Option Do this: Show Button Select this option to show the button on the main toolbar.
The button appears after the Post AP button (if it's visible) or after the Notes button (if Post AP is not visible).
Program to Run (Required) Type in the full location and name of the EXE file you want to run when the button is clicked.
You can specify a program that does not exist when you program this setting without a problem. If the file does not exist when you launch R.O. Writer, however, this toolbar button will not display in the main toolbar.
Caption Type in the text that displays under the custom toolbar button.
If no text is entered here, only the button displays.
Tooltip Type in the text that displays when the mouse hovers over the custom toolbar button.
If no text is entered here, nothing displays when the mouse hovers over the button.
Window Title Type in the name of the program the new function should open.
When the custom toolbar button is clicked, R.O. Writer searches through the open windows of all running programs. If a program is found with a window title that begins with the text entered here, that window opens.
If no text is entered here, when the custom button is clicked, a new, separate copy of the program launches.
Use Icon From Program Select to tell R.O. Writer to use the program's button.
Check the Toolbar Image Preview field to see what this looks like before saving.
Use Custom Icon Select to choose the button in the Image File field.
Check the Toolbar Image Preview field to see what this looks like before saving.
Image File Select the image to use as the toolbar button.
- The image file can be any of the following types: .ICO, .JPG, or .BMP.
- The optimal size is 32 x 32 pixels. If you use a graphic larger than that, the full size appears in the toolbar.
If no image is selected, the built-in button for the EXE (if it exists) displays.
If no image file is selected and the EXE does not contain a valid button, a default image displays.
- Click Save to save your settings.
- Click Close to return to the General Options window.
Toolbar Settings Section
These options activate other sections on the General Options. Those sections appear but remain inactive until the option is selected in the Toolbar Settings section.
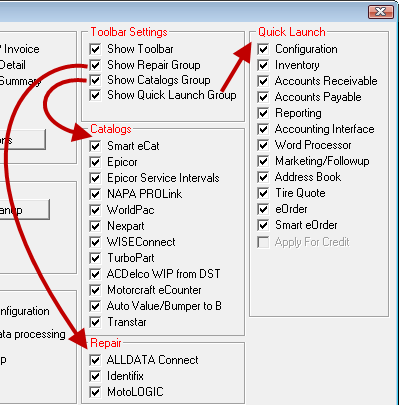
This section determines which sections appear in the Quick Launch on the left side of the main window.
Show Toolbar Checkbox
Check this box to display the Quick Launch on the left side of the main window.
Show Repair Group Checkbox
Check this box to
- Activate the Repair section on the General Options window.
- Display the Repair section at the top of the Quick Launch.
Show Catalogs Group Checkbox
Check this box to
- Activate the Catalogs section on the General Options window.
- Display the Catalogs section in the middle of the Quick Launch.
Show Quick Launch Group Checkbox
Check this box to
- Activate the Quick Launch section on the General Options window.
- Display the Quick Launch at the bottom of the Quick Launch.
NOTE: If you check a box in this section and do not check boxes in its corresponding section that section will appear empty in the Quick Launch.
Repair Section
R.O. Writer has built direct interfaces with repair diagnostic databases.
NOTE: If you are not licensed for an item, the entry for that item is unchecked and disabled on the General Options window.
You add the repair diagnostic database to the Quick Launch by checking the box in the Repair section in General Options.

For more information, click one of the following links:
Catalogs Section
R.O. Writer has programmed special interfaces for the catalogs in this section.
NOTE: If you are not licensed for an item, the entry for that item is unchecked and disabled on the General Options window.
When you select a catalog in the Catalog section and click OK to save your selection, a button for the supplier appears in the
-
Quick Launch and
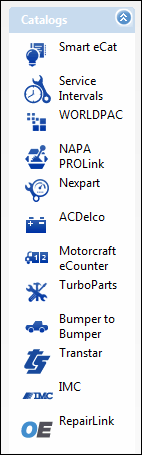
-
Smart eCat Catalog toolbar.

If the catalog is not integrated with Smart eCat, its button will not appear on the toolbar.
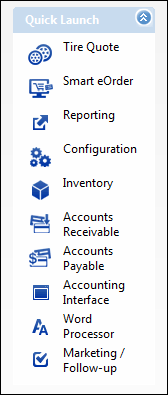
Quick Launch Section
The Quick Launch section contains all R.O. Writer modules.
NOTE: If you are not licensed for an item, the entry for that item is unchecked and disabled on the General Options window.
When you select a module and click OK to save your selection, a button for that module appears in the Quick Launch.
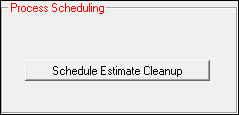
Estimate Cleanup
Quotes and estimates are created as part of customer intake. Some are converted to repair orders but some are never converted and just sit in the database, remaining open and clogging up the Estimates in Progress Window.
NOTE: This option does not appear if you are running R.O. Writer on the Central Office server.
Scheduling estimate cleanup helps you save and delete quotes and estimates automatically, which removes them from the Estimates in Progress Window.
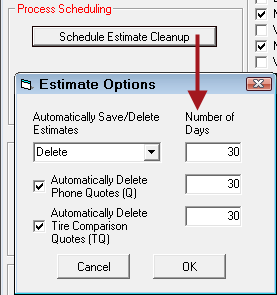
Automatically Save or Delete Estimates
In the dropdown list, select what you want to do with estimates - save or delete - and the number of days.
- Save - Estimates are saved to History after the selected number of days.
- Delete - Estimates are deleted from the database after the selected number of days.
Automatically Delete Phone Quotes (Q)
Phone quotes are those that don't have customer information and are usually used to give estimates over the phone.
The ID of phone quotes begin with a “Q”.
Select this option to delete phone quotes after a selected number of days.
Automatically Delete Tire Comparison Quotes (TQ)
Tire comparison quotes are quotes that were created from the tire comparison.
The ID of tire comparison quotes begin with a “TQ” to distinguish them from regular phone quotes.
Select this option to delete phone quotes after a selected number of days.
Critical Settings
The critical settings enables important functionality in R.O. Writer.
Enable Multiple Database Configuration
Check this box to use multiple locations (which means multiple databases) that have already been established. This option is necessary if you are using Central Office.
Enable Transaction-Based Data Processing
Check this box only if you would like to be able to cancel or undo a detailed invoice when posting to Accounts Payable. When posting detailed invoices, the Invoice Details window has an Undo Inv. button.
WARNING! If you turn this option on, DO NOT click Continue on any error messages in R.O. Writer. Always choose to Exit R.O. Writer instead. If you choose Continue on an error message, everything you do afterward will be lost.
Allow Central Service Lookup
Check this box to activate the Central Service Lookup button when searching for customers and vehicles. For details, click the following link: Checking History in Other Stores.
Miscellaneous
The Miscellaneous section contains various checkboxes you can use to customize R.O. Writer.
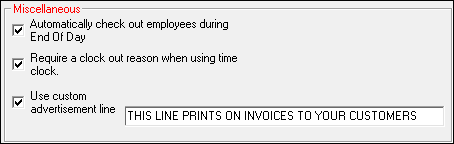
Automatically Check Out Employees During End of Day
Checking this box prompts you to clock out all employees that are still clocked into the Employee Time Clock when End of Day Processing is launched.
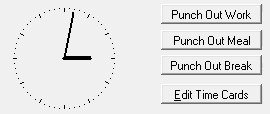
Require a Clock Out Reason When Using Time Clock
Checking this box displays more reason buttons on the Employee Time Clock window. Employees must select one of these buttons to clock out; there is no plain Punch Out button.
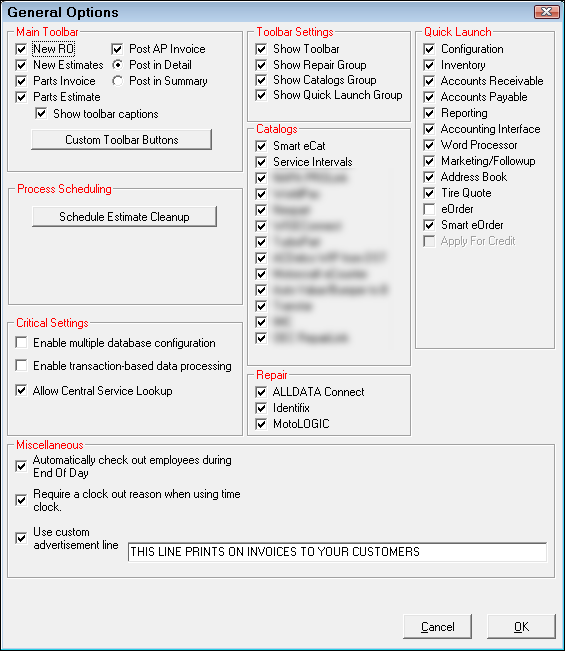
Use Custom Advertising Line
Check Use Custom Advertising Line to replaces the 5th line in the shop header in your license. The 5th line prints below the shop name and address on estimates, work orders, repair orders, customer invoices, and reports. As a result, this line is often used to market your shop.
When checked, you can type in the text you want. You are limited to 50 alphanumeric characters.
The information in your shop header appears on the Setup Stores window in Data Locations (Configuration > File menu > Data Locations > Setup Stores button).