Main Window
The main window of R.O. Writer is where you manage the daily activity in your shop. You create tickets for each customer interaction and track all activity regarding those tickets on the main window.

This topic covers the main parts of the window:
- The main toolbar
- The menu bar
- The Quick Launch
Two windows in the center show you the current activity in your shop:
Watch the following video to see an introduction to the R.O. Writer main window.
Main Toolbar
The main toolbar accesses the most common functions of the main window.

| Button | Name | Description |
|---|---|---|
|
|
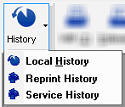
History is an archive of saved estimates and closed and voided repair orders.
When the History dropdown menu appears, you can:
|
|
|
|
Click to open the Work in Progress (WIP) window, which displays all open repair orders. Repair orders are removed from the WIP window when they are finalized or voided. |
|
|
|
Click to open the Estimates in Progress window, which displays all active estimates and quotes. Estimates and quotes are removed from the Estimates in Progress window when they are saved, deleted, or converted to a repair order. |
|
|
|
Click to begin a new repair order. |
|
|
|
Click to begin a new estimate. |
|
|
|
Click to begin a new phone quote. Quotes allow you to add parts and labor to a ticket without entering a customer or a vehicle. |
|
|
|
Click to begin a new parts-only invoice. Parts-only invoices appear in the WIP window. This button appears only if it is selected in the Main Toolbar section of General Options in Configuration. |
|
|
|
Click to begin a new parts-only estimate. Parts-only estimates appear on the Estimates in Progress window. This button appears only if it is selected in the Main Toolbar section of General Options in Configuration. |
|
|
|
Click to open Quick Parts, which accesses all stock, non-stock, or consigned parts that have been entered as inventory items. You can search for parts by part number, description, or alternate part number. |
|
|
|
Click to open the calculator installed with the Microsoft Windows calculator. |
|
|
|
Click to open a monthly calendar that helps you manage customer appointments. This button appears if Scheduler is not enabled in Configuration. |
|
|
|
Click to open the Scheduler that helps you manage customer appointments. This button appears only when Scheduler is enabled in Configuration. |
|
|
|
Click to open shop notes. If this button has a red check, there are notes for the current day. |
|
|
|
Click to open the Accounts Payable posting window, which allows you to post parts from all open repair orders to the Accounts Payable module. |
|
|
|
Click to open the Time Clock where all shop employees can check in and check out. This is the time clock where employees punch in and punch out - not the Labor Time Clock that tracks time on jobs on repair orders. |
|
|
|
Click to see a daily summary of your current activity. |
|
|
Custom Buttons |
You can add up to three custom toolbar buttons in the Configuration module in the File menu > General Options > Custom Toolbar Buttons section. These buttons appear after the Post AP button (if it's visible) or after the Notes button (if Post AP is not visible). |


NOTE: For the toolbar on the ticket windows, click the following link: Ticket Toolbar.
Menus
The menu bar includes four dropdown menus:
- The File menu
- The Quick Functions menu
- The Windows menu
- The Help menu
TIP! Menu items often have hotkeys that access the same functions. These hotkeys display on the menus.
File Menu
The File menu contains the most used buttons on the main toolbar.

| Item |
Description |
|---|---|
|
Search History |
Click Search History to access the History options. This is the same as clicking the History toolbar button. |
|
WIP |
Click WIP to make the WIP screen appear again if you closed it. If you click WIP while the WIP screen is already open, nothing happens. This is the same as clicking the WIP (Z) toolbar button. |
|
Estimates |
Click Estimates to make the Estimates in Progress window appear again if you closed it. If you click Estimates while the window screen is already open, nothing happens. This is the same as clicking the Estimates toolbar button. |
|
New RO |
Click New RO to create a new repair order. This is the same as clicking the New RO toolbar button. |
|
New Est |
Click New Est to create a new estimate. This is the same as clicking the New Est toolbar button. |
|
Phone Quote |
Click Phone Quote to create a new quote. This is the same as clicking the Phone Quote toolbar button. |
|
New Parts Only RO |
Click New Parts Only RO to create a parts-only repair order. This menu item appears only if it is selected in the Main Toolbar section of General Options in Configuration. This is the same as clicking the Parts Inv toolbar button. |
|
New Parts Only Estimate |
Click New Parts Only Estimate to create a parts-only estimate. This menu item appears only if it is selected in the Main Toolbar section of General Options in Configuration. This is the same as clicking the Parts Est toolbar button. |
|
Exit |
Click Exit to close R.O. Writer. |
Quick Functions Menu
The Quick Functions menu provides access to functions available on the main window.
| Item | Description |
|---|---|
|
Quick Parts |
Click Quick Parts to open the Quick Parts search window. This is the same as clicking the Quick Parts toolbar button. |
|
Calculator |
Click Calculator to open the calculator installed with Microsoft Windows. This is the same as clicking the Calculator toolbar button. |
|
Calendar |
Click Calendar to open the calendar. This menu item appears only if the Calendar toolbar button is on the main toolbar. This is the same as clicking the Calendar toolbar button. |
|
Notes |
Click Notes to open the Daily Notes for R.O. Writer. These notes are for the entire shop where as ticket notes apply only to the ticket. This is the same as clicking the Notes toolbar button. |
|
Post AP |
Click Post AP to open the be able to post items from all open repair orders to Accounts Payable. This is the same as clicking the Post AP toolbar button. |
|
Time Clock |
Click Time Clock to open the Employee Time Clock. This is the time clock where employees punch in and punch out - not the Labor Time Clock that tracks time on jobs on repair orders. This is the same as clicking the Time Clock toolbar button. |
|
Open Cash Drawer |
Click Open Cash Drawer to open the cash drawer attached to the machine. This menu item appears only if the cash drawer is enabled in Configuration. If this menu entry appears when no physical cash drawer is connected to the current machine, nothing happens when you click Open Cash Drawer. |
|
Daily Summary |
Click Daily Summary to see a daily summary of your today's activity in the shop. A popup window opens displaying the numbers for today's activity. This is the same as clicking the Daily Summary toolbar button. |
Windows Menu
The Windows menu contains items that control how certain functions appear and allows you to save your window settings.
A checkmark appears on an item only when it is selected and applied. In the image below, the Job Based Repair Orders item has a check, which means it is selected.

| Item | Description |
|---|---|
|
Job Based Repair Orders |
Click Job Based Repair Orders to switch the Jobs area of the Parts/Labor tab to the Job-Based View. This is the default and the recommended view. Certain functionality works only in the job-based view. |
|
Auto-Hide Toolbar |
Click Auto-Hide Toolbar to hide the Quick Launch from view. The Quick Launch slides out only when you hover your mouse over the left side of the screen. |
|
Click Hide Parts and Labor Cost to hide the parts and labor cost. Click again to display the cost again. This also hides the Cost column in Quick Parts search results. This menu item appears only if the Display Costs option is selected in Configuration. |
|
|
Click Hide Package Discounts to hide Package Discounts. Click again to display package discounts again. |
|
|
The tile and cascade menu items control how the Estimates in Progress Window and the Work in Progress (WIP) Window are arranged on the screen. |
|
|
Tile Horizontally |
Click Tile Horizontally to arrange the windows with one above the other. Both windows appear on the screen. This is the default arrangement. |
|
Tile Vertically |
Click Tile Vertically to arrange the windows side by side. Both windows appear on the screen. |
|
Cascade |
Click Cascade to stack the windows on top of each other. |
|
Work in Progress Settings |
Click this menu to access the side menu that enables you so save the appearance of the main window.
Click the Windows menu > Work in Progress Settings to save your adjustments to the columns, filters, and general appearance of the Work in Progress (WIP) Window and Estimates in Progress Window.
The settings you save apply to both windows at the same time.
For more information about customizing these windows, see: |

Help Menu
The Help menu provides access to this help system among other functions.

- Click Help (F1) to open this Help system.
- Click About (F2) to see version information.
- Click Licensing System to access the details about your license to use R.O. Writer.
- Click Release Notes to open the release notes for the version of R.O. Writer you are currently using.
Quick Launch
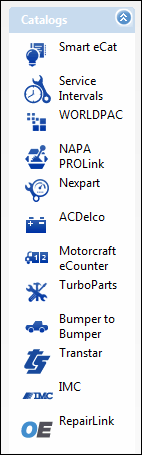
The Quick Launch provides access to repair lookup tools, online catalogs, and modules such as Reporting, Configuration, and Inventory.
In each section, the Quick Launch displays only the items on your license that have been configured. Items are added to the Quick Launch in General Options in Configuration.
- Click the double arrow button
 to expand and collapse each section.
 - Click the Windows menu > Auto-Hide Toolbar to hide the Quick Launch.
| Repair | Catalogs | Quick Launch |
|---|---|---|
|
Includes the configured repair lookups. |
Includes the configured Supplier catalogs. |
Includes the modules in your R.O. Writer license. |
|
|
|
|


The topics in this section include (each link opens a new topic):