Adding ACES Vehicle Information on the Vehicle Tab
The Vehicle Tab of the Edit Vehicle window allows you to
- Review ACES information already added.
- Add ACES information before it is requested by the ACES Vehicle Selector window.
If Epicor is Installed and Configured
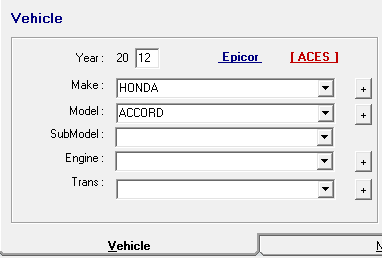
If you have Epicor installed, there are two links on the Edit Vehicle window: one for ACES and one for Epicor. The Epicor link is selected by default. You need to click the ACES link to enter ACES vehicle information.
Epicor and ACES Links
The Epicor and ACES links allow you to review and enter Epicor information and ACES information for the same vehicle. These links also:
- Appear in brackets [] to indicate which vehicle information you are using.
- Appear in green when the vehicle information is valid.
- ACES vehicle information is validated when you select the engine.
- ACES vehicle information is validated when you select the engine.
- Have a ≠ between them if there is a mismatch between Epicor and ACES information.
If Epicor is NOT Installed and Configured
If Epicor is NOT installed and configured, ACES is the default for vehicle information on the Edit Vehicle window and the Parts/Labor tab.
- The vehicle dropdown lists on the Edit Vehicle window are populated with ACES Vehicle Information automatically.
- The Epicor and ACES links do not appear on the Vehicle tab.
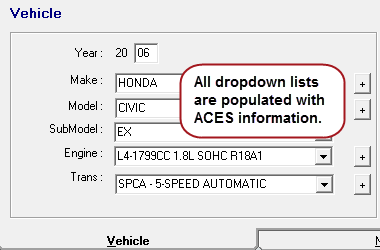
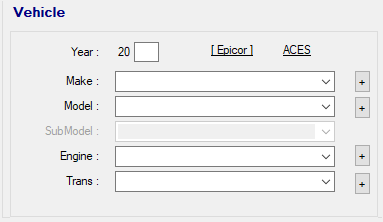
Vehicle Information Dropdown Lists
When entering ACES vehicle information, the following dropdown lists are available for ACES:
- Year
- Make
- Model
- SubModel
- Engine
- Trans
These dropdown lists are the same for every vehicle. New lists are not added or removed based on the vehicle. The ACES Vehicle Selector may ask you for more information even if the vehicle is valid for ACES.
These dropdown lists are populated by the ACES database that installs with R.O. Writer Client.
To View or Add ACES Vehicle Information
After you add ACES information on the Edit Vehicle window the first time, the ACES information is added to the vehicle record in your database permanently. The vehicle is then valid for ACES for all online catalogs and repair databases going forward. The ACES Vehicle Selector will not appear the next time you access an online catalog or repair database.
Complete these steps:
- Open the vehicle.
- On the Edit Vehicle window, click the ACES link.
- The fields clear and the ACES indicator appears in brackets.
- If Epicor vehicle information has already been entered, R.O. Writer tries to enter the Year, Make, and Model using the ACES information.
- Select the Sub-Model.
- Select the Engine.
- The vehicle is validated for ACES when the engine is selected. The ACES link turns blue. Vehicles are not valid for ACES until the engine is selected.
- If the vehicle was not valid for Epicor when you clicked the ACES link, the vehicle is validated for both Epicor and ACES when the ACES engine is selected. Both Epicor and ACES links turn blue.
- Click OK to close the Edit Vehicle window. The vehicle appears in the vehicle section of the Parts/Labor tab as valid for ACES.
- Epicor information still displays; however, the ACES information is stored in the database.
- You can see it by clicking the ACES link on the Edit Vehicle window at any time.
- If you enter ACES vehicle information before you enter Epicor information, the ACES validation process also validates the vehicle for Epicor as well.