There are two kinds or reprint history:
- One that runs a general, system-wide reprint of all repair orders, estimates, or both within a date range
- One that runs a history for one customer
Running a System-Wide Reprint History
When printing in batch, you cannot change the date on the printed form. Estimates print the date they were created and repair orders print the closed date. The created date is used for estimates because they cannot be closed.
Complete these steps:
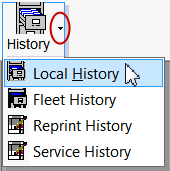
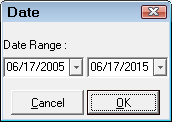
- In the main toolbar, click the down arrow q on the History button and select Reprint History.
![]()
- The Reprint enables you to batch print all repair orders and estimates between a certain date range.
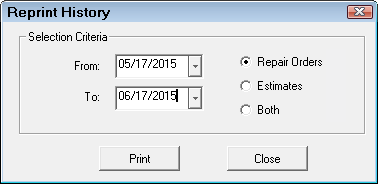
- When you click the Print button, you can choose to print to the screen or the printer on the Printing window.
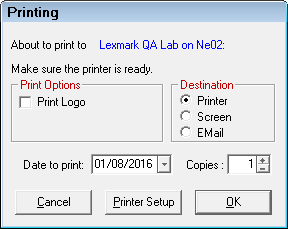
NOTE: The Date to Print field is ignored. Estimates print the created date and repair orders print the closed date.
- All the repair orders, estimates, or both that were printed within the date ranges selected start printing one after the other.
- If printed to the screen, a print preview window opens for each one.
- If printed to a printer, each items prints to the default or selected printer.
- While the documents are printing, the Reprint History shows the progress:
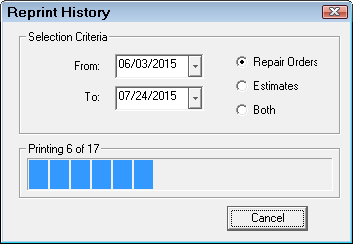
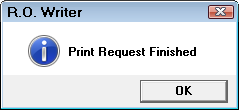
- When all items have finished printing, the following prompt appears on the window to let you know the print job is complete.
NOTE: The system applies the form type currently selected for repair orders and estimates in Configuration, NOT the form type that was selected when the repair order or estimate was originally printed.
To Reprint One Estimate or Repair Order
When reprinting an individual estimate or repair order, you can change the date on the printed form.
Complete these steps:
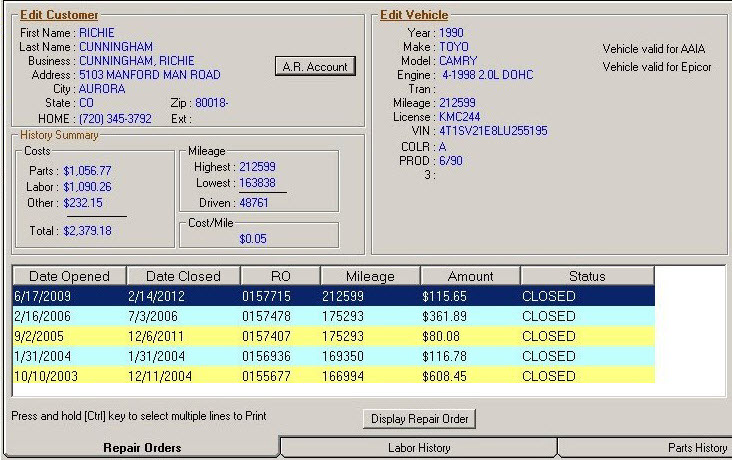
- Open the customer history for a vehicle.
There are two ways to do this:
On the main toolbar, click the down arrow q to the right of the History button and select Local History.
Search for and select the customer and the vehicle and the customer's history for that vehicle opens.
In an open estimate or repair order, click the History button ![]() . The customer's history for the vehicle in the ticket opens.
. The customer's history for the vehicle in the ticket opens.
- Select an item in the list at the bottom of the window and click this button.
You can select multiple repair orders by pressing and holding the CTRL and/or SHIFT keys while selecting items. - Click the
 button in the History Summary toolbar.
 - The Printing window opens.
The date in the Date to Print field shows the default date:
- For estimates, the default date is the date the estimate was created.
- For repair orders, the default date is the date the repair order was closed.
You can type in a new date and that date appears in the Date field on the printed form.
- The selected estimate or repair order prints.
Running a Customer History Report
The Customer History Report compiles all the closed repair orders (called "invoices") or estimates into one report. Each Customer History Report is all the invoices or estimates for one vehicle.
- If the customer has more than one vehicle, you need to run a separate report for that vehicle.
- You cannot run one report for both estimates and invoice; you must choose one or run a report for each.
Step 1 - Access the Customer's History
There are two ways to do this:
On the main toolbar, click the down arrow q to the right of the History button and select Local History.
Search for and select the customer and the vehicle and the customer's history for that vehicle opens.
In an open estimate or repair order, click the History button ![]() . The customer's history for the vehicle in the ticket opens.
. The customer's history for the vehicle in the ticket opens.
Step 2 - Run Print History
Complete these steps:
- Once the customer's history for the vehicle is open, click the Print History button.
![]()
- Select Invoices (closed repair orders) or Estimates (all estimates).

- Click Yes to print a history for all vehicles.
- Click No to print history for only the selected vehicle.
- Select the date range to print.
- Click OK.
- The Printing window appears.
You cannot select a Date to Print on this window because it is a report. The date is today's date. - The Customer History Report prints.
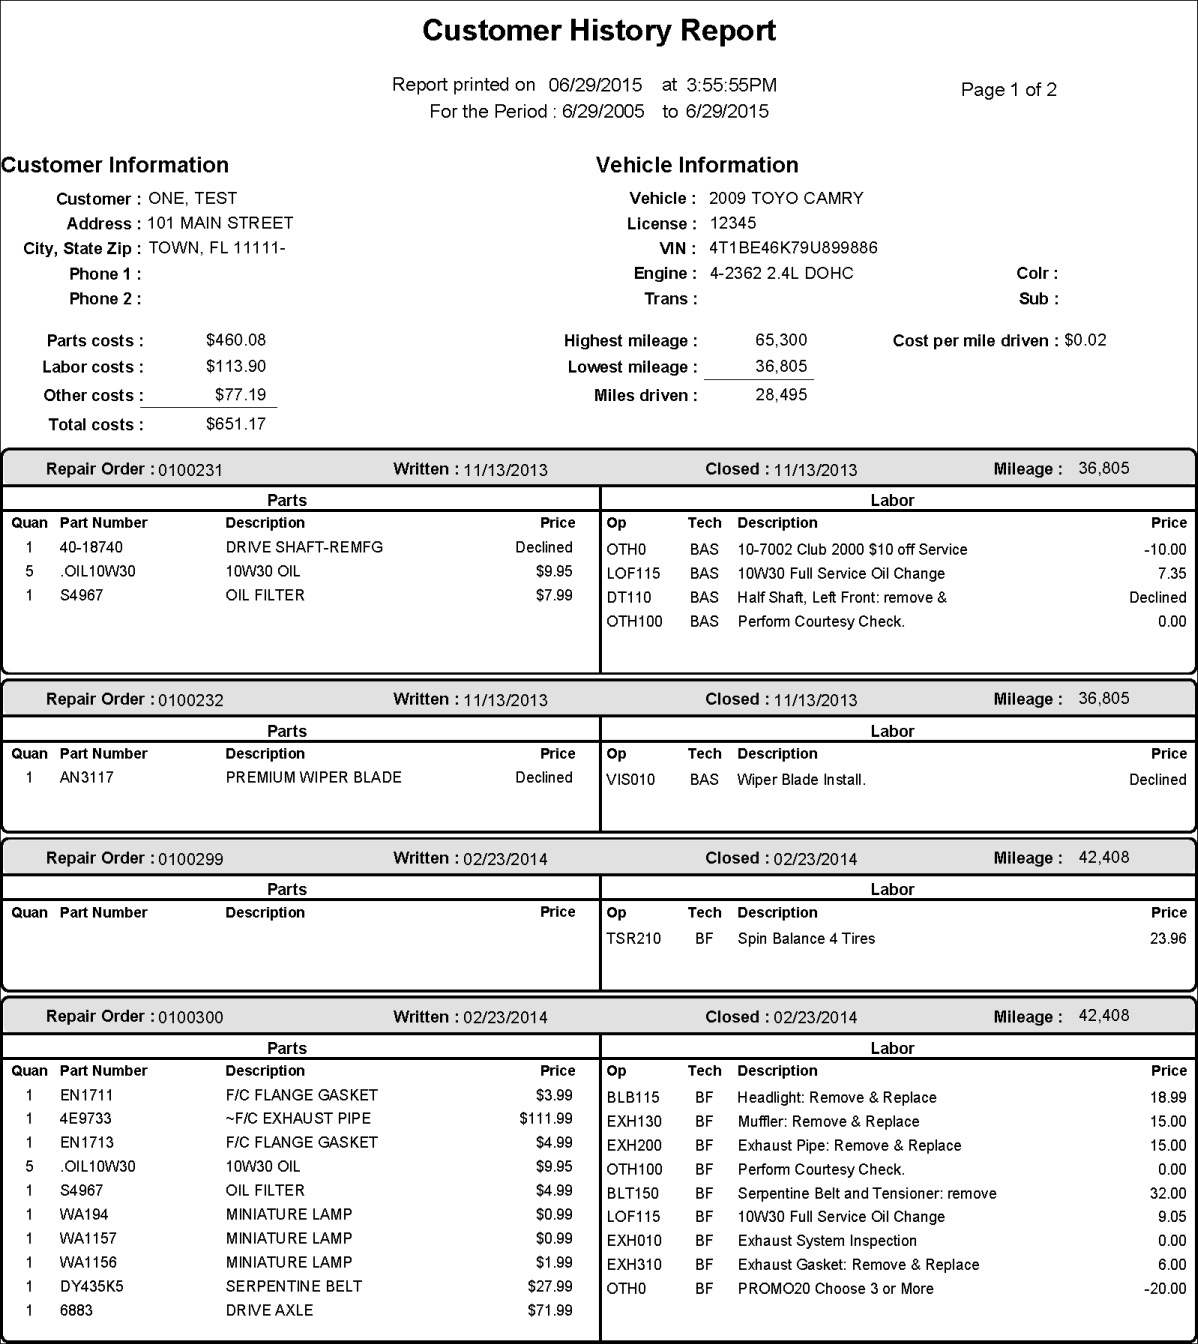
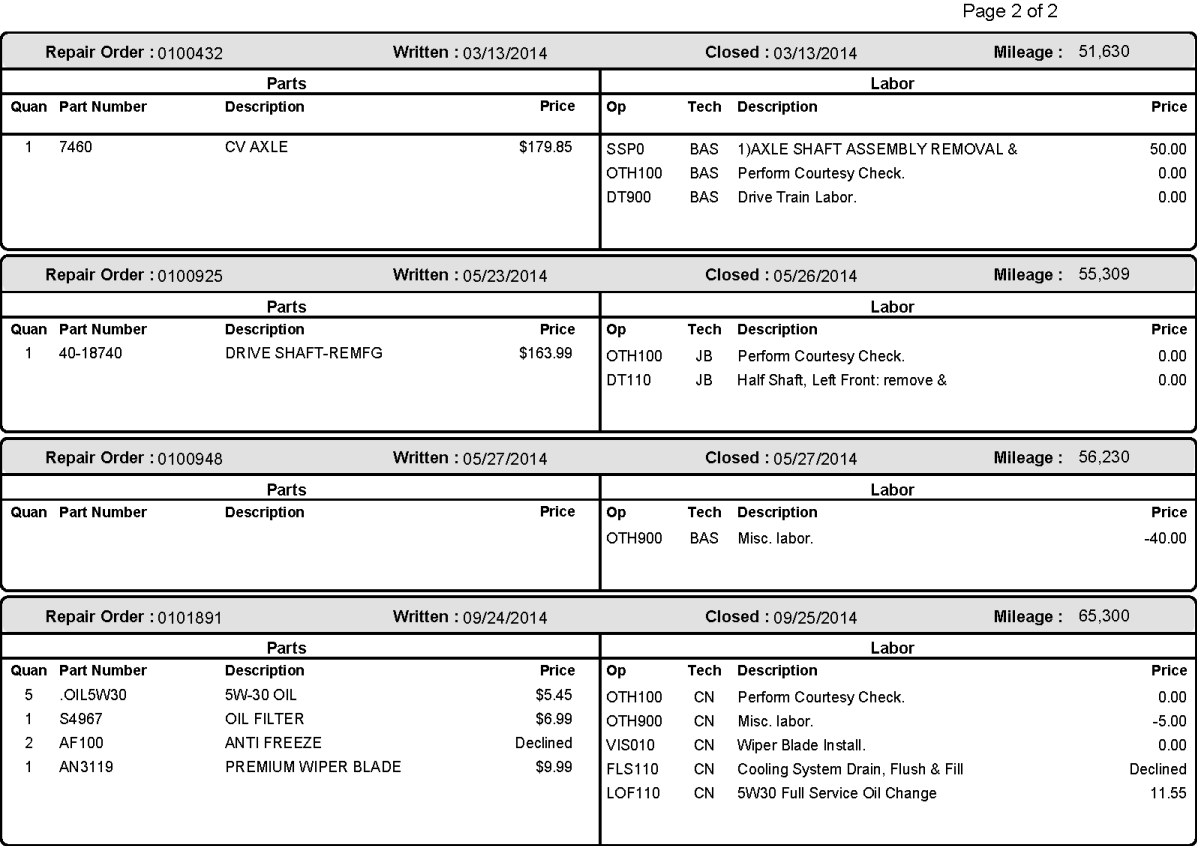
Customer History Report
The top of the report shows a summary of the customer's history.
- The Report Printed On date is today's date.
- The date range is the one selected for the report. The entire customer history prints only if the date range you selected matches the entire customer history.
- The customer and vehicle information appears as entered.
- The parts, labor, and other costs listed are totals for the entire report.
- The mileage calculations are for the date range selected for the report.
There is a section for EACH invoice or estimate that includes:
- The dates of the estimates and repair orders are the default dates:
- For estimates, the default date is the date the estimate was created
- For repair orders, the default date is the date the repair order was closed
- Repair order or estimate number
- Mileage of the vehicle
- Parts that were required, including number, description, and quantity
- Labor operations that were performed, including the operation number
- Technician code for the technician performing the work