Returning Parts
For a video overview of returning parts, watch the video below. (This video was recorded using R.O. Writer 1.31.)
When a part is purchased and posted to the repair order through Accounts Payable and that part needs to be returned to the supplier for any reason, check the Returned box and select a reason for return.
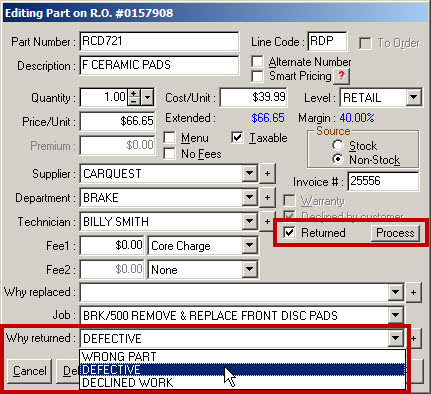

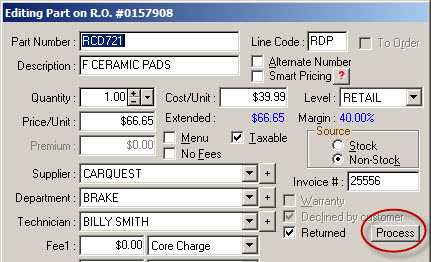
When the Process button is selected, the part is placed into the Part Returns feature in inventory before the repair order is finalized.
If the part was processed in error and the repair order is still open, the part can be recalled by clicking the Recall button. This will remove the part from the Part Returns feature.
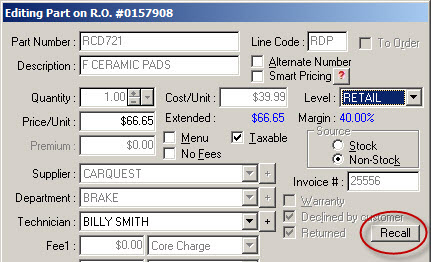
If the part has already been marked as returned or posted to inventory from the Part Returns in the Inventory module, you will receive a prompt that the core is not available for recall because it has already been returned.
To view parts marked as returned and mark them as sent and process credits, click the Parts Return button in the Inventory module.
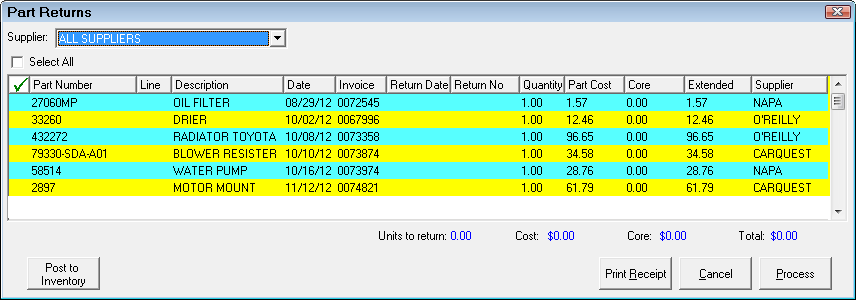
A specific supplier must be selected before processing parts using the dropdown list at the top.
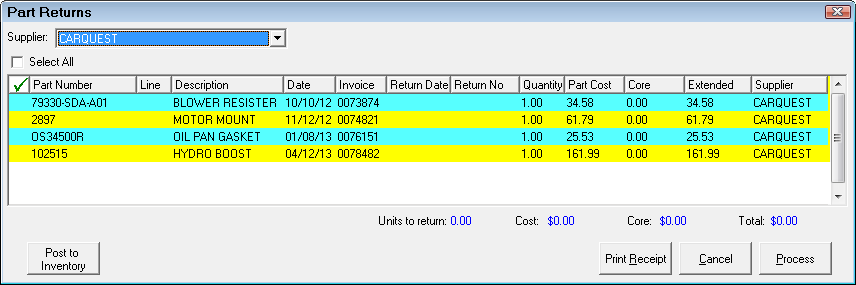
When you select a specific supplier, only parts marked returned for that supplier will display. You can check the Select All box to select all parts or double-click on a part to select it. Parts selected are indicated with a Green check mark in the first column.
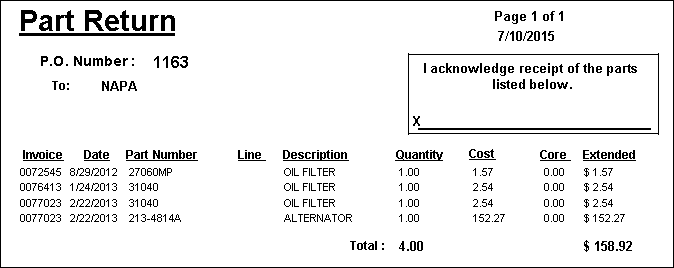
When you have selected the parts, you can print a receipt by clicking the Print Receipt button.
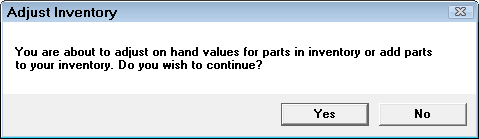
Before using the Post to Inventory feature, you may want to set up an adjustment reason (see Inventory Adjustment Descriptions).
You can post the part to inventory if it’s being placed on your shelf by clicking the Post to Inventory button. You will see the following prompt to remind you that the on-hand values for the selected parts will be adjusted. Select Yes to continue.
Select an adjustment reason using the dropdown list and click OK.
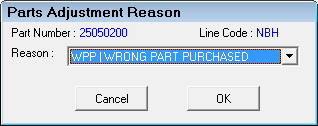
If the part number does not exist in inventory, it will be added to your inventory as a stock part and the on-hand will be increased by the quantity returned. If the part number already exists in your inventory, the on-hand will be increased.
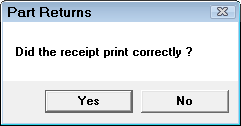
You can mark selected parts as returned when they are shipped back to the supplier by clicking the Process button. When this button is selected, you will be prompted to print a return receipt. Select Yes to print a return receipt; select No to continue marking parts as returned but skip printing a return receipt; or select Cancel to exit without marking parts returned.
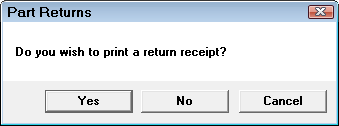
After selecting Yes to print the receipt, select Yes or No to the following prompt. If you select Yes, processing continues and if you select No, the print dialog box will appear again.
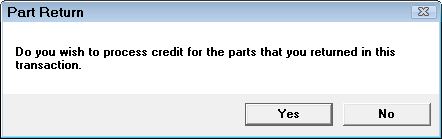
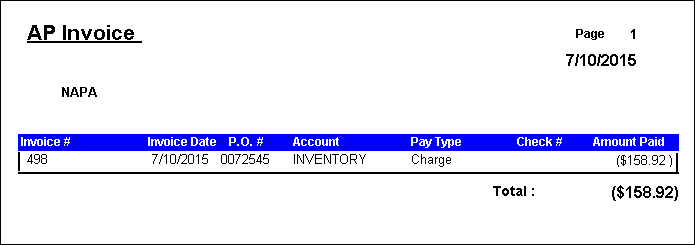
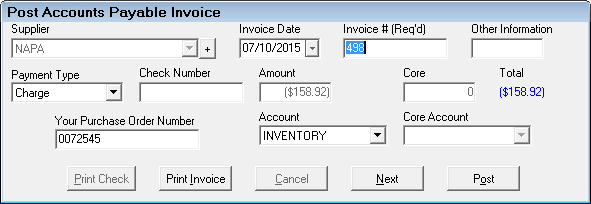
If you wish to post an Accounts Payable credit invoice, select Yes and then click the Post button and an AP credit will be posted and you will be prompted to print an invoice.
When the credit is posted, the part will be removed from the Parts Return.
If you do not want to post a credit invoice until the credit is received at a later date, select No and the part will be marked as returned but will remain in the part returns. To process the credit at a later date, select the supplier and the part(s) and click the Process button again and an AP credit will be posted and you will be prompted to print an invoice. When the credit is posted, the part will be removed from the Parts Return.
To print a report showing your returned parts, see Parts Returned Report.