To post a payment on an account, click the Post Payment button from the Accounts Receivable toolbar. A search screen appears (see Searches). Search for and select the customer to whom the payment will be posted. When the customer has been identified, the Post A/R Payments screen appears displaying the customer's name.
Enter the amount of Payment, change the date if desired, and either click the Auto Apply button to allow the system to select which invoices to pay or select the invoices in the window below by double clicking on it and entering the amount to pay until the Allocated Payments equal the amount of the payment and the Payment Balance is 0.00.
- Click the Post Payment button. The following window appears.
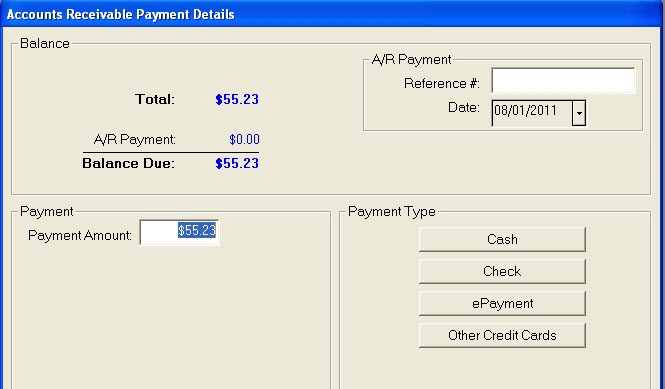
- Click the ePayment button.
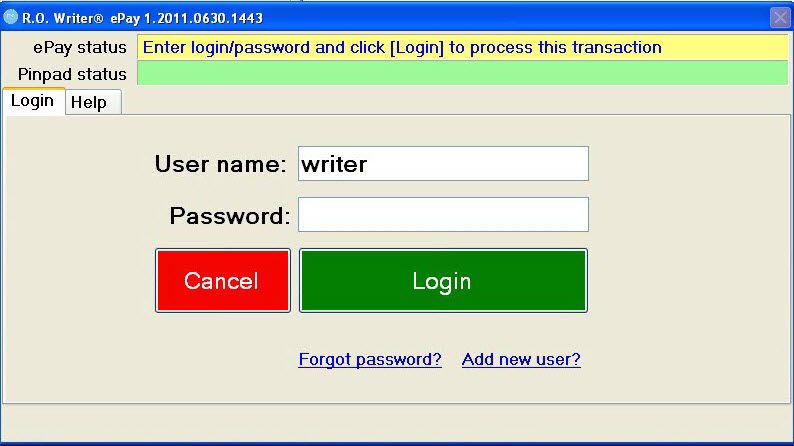
- When the ePay login screen is displayed, enter your User name and password and click the Login button. Selecting Cancel will exit and return you to the finalize window.
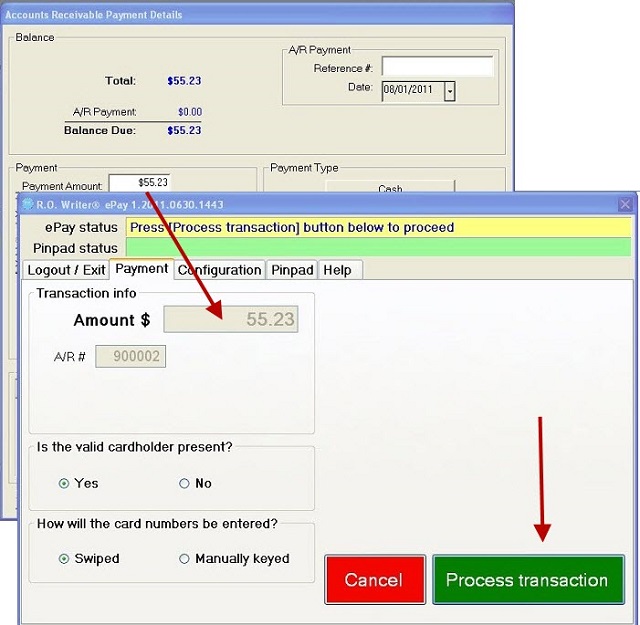
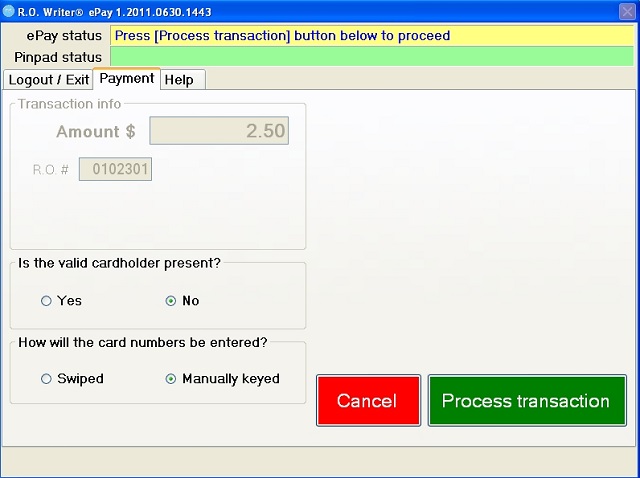
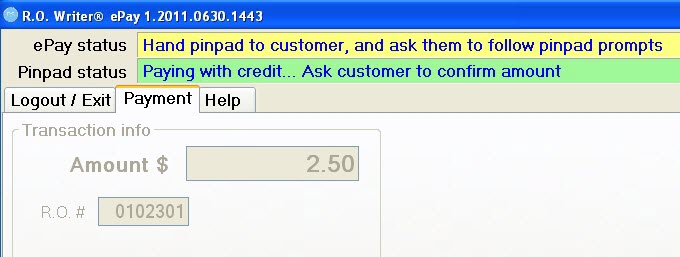
- The ePay status will walk you through the steps to completing the transaction. Select if the cardholder is present and if the card will be swiped using the pin pad or manually typed and click the green Process transaction button.
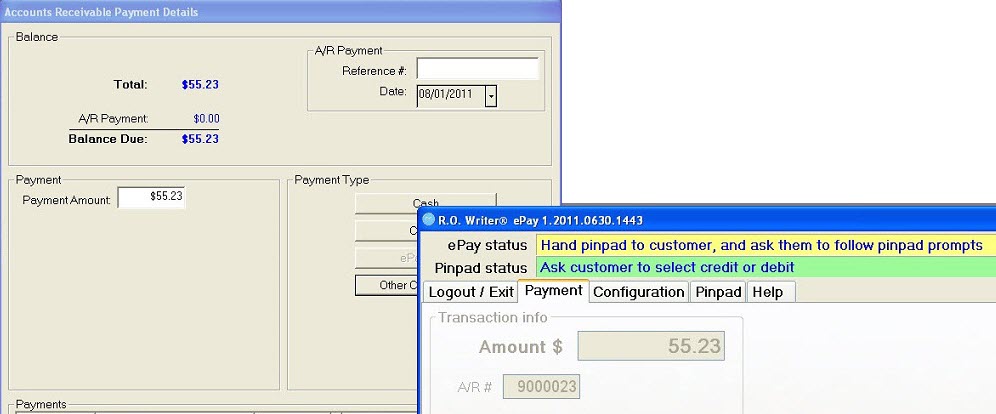
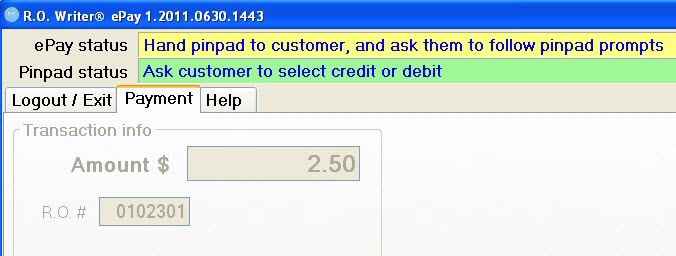
- The customer will select credit or debit and confirm the amount.
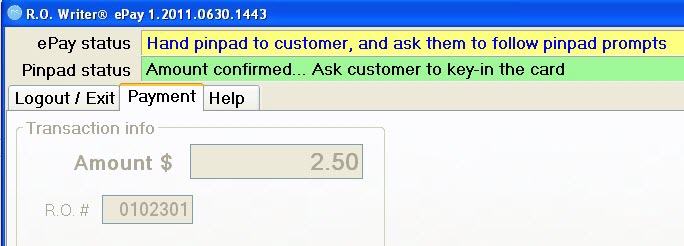
- The customer should then swipe their card on the pin pad. When the swipe is confirmed, the customer should sign the pin pad and press the pin pad’s green button.
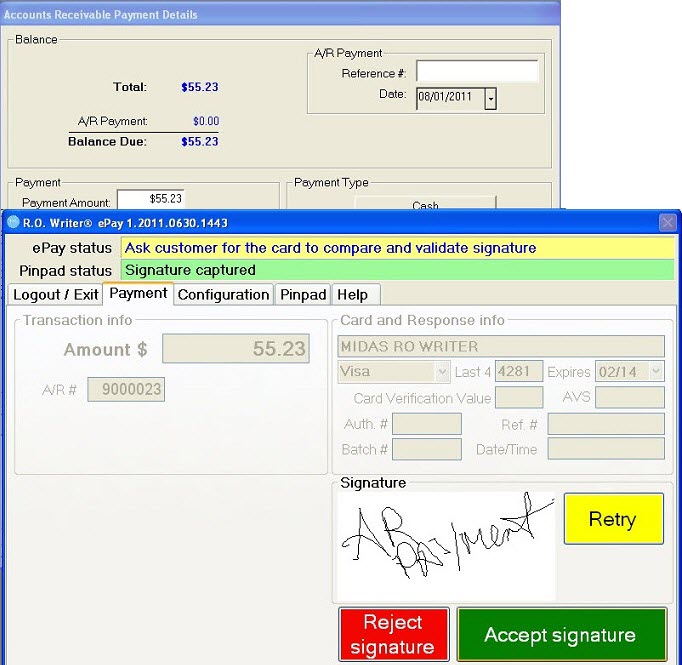
- If the Require Electronic Signature Validation is selected in PayPros Configuration, you will be required to press the green Accept Signature button to continue or the red Reject signature button to exit. If that option was not selected, the process will be continued automatically once the signature is captured.
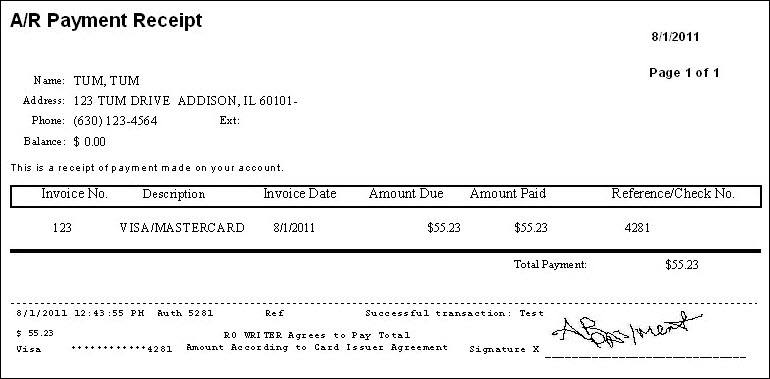
- You will be prompted to print a payment receipt and the signature will appear on the receipt.
Manual Card Entry
If the card holder is not present and you are manually entering the credit card number, you would have selected No to the question “Is the valid cardholder present” and Manually keyed to the question “How will the card numbers be entered” and click the Process transaction button.
You would then select debit or credit.
Continue following the instructions on the pin pad to complete the transaction. Confirm the amount on the pin pad.
Manually key in the card number and the expiration date.
When the signature capture appears on the pin pad, you can enter a standard signature or simply press the green accept button on the pin pad without entering a signature.
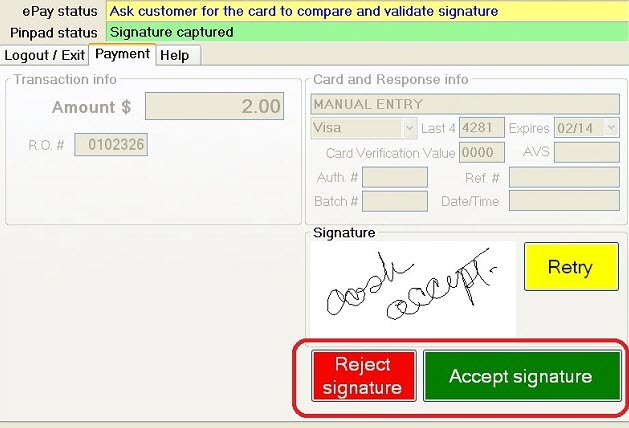
If the option “Require Electronic Signature Validation” was selected in ePayment Configuration, you will be required to press the green Accept Signature button to continue or the red Reject signature button to exit. If that option was not selected, the process will be continued automatically once the signature is captured. When the signature is accepted, you will be prompted to print the receipt.
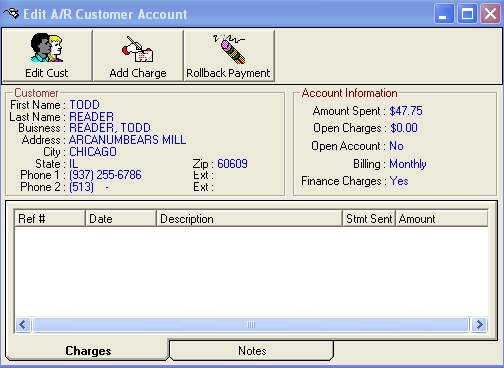
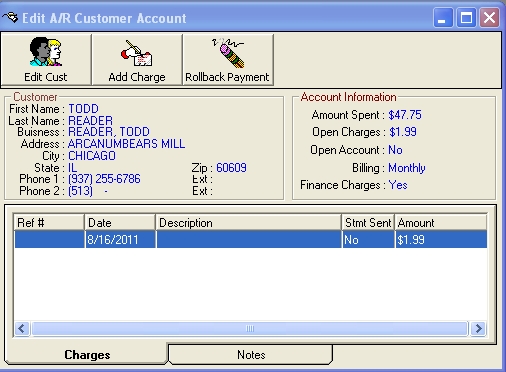
Rolling Back Payments to Customer Accounts
To undo or “roll back” a payment processed through ePayment in Accounts Receivable, select the customer from Edit Accounts. Click the Rollback Payment button.
Enter the date the payment was posted.
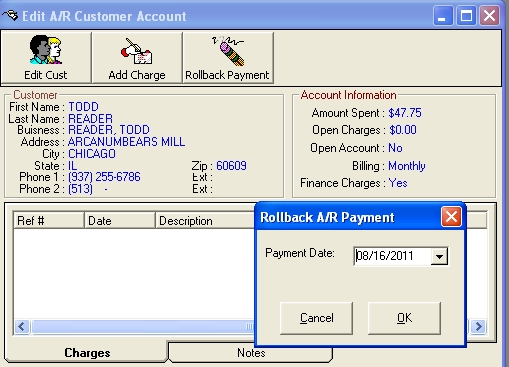
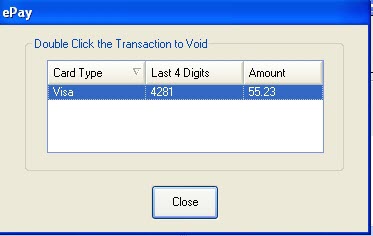
Double click on the transaction you wish to reverse.
The steps are different if the batch has been closed or not (see ePayment Batch Settlement).
If the Batch has not Been Closed
Double click on the transaction you wish to void.
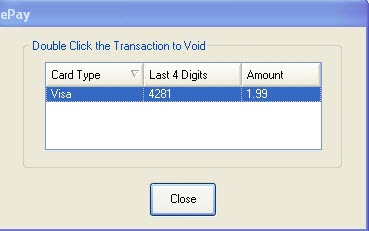
Wait for the voided transaction to process.
When the transaction is processed, you will be returned to the list of transactions for that customer on that date.
Select another transaction to void or click the Close button to continue to the customer’s account window.
The payment will then be recalled.
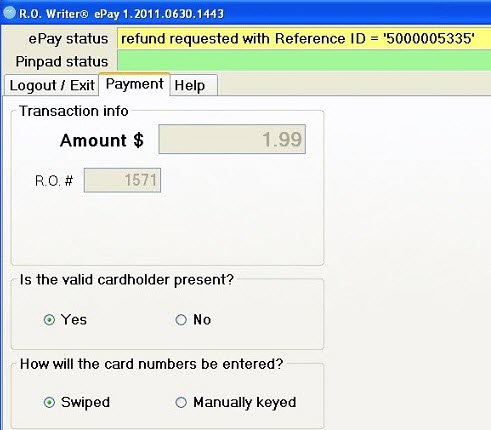
If the Batch has been Closed
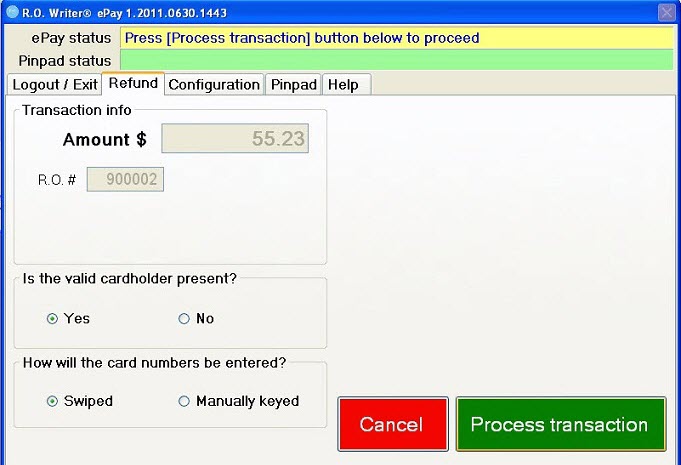
Double click on the transaction you wish to void. Select whether the cardholder is present or if the card will be swiped or manually keyed. Press the green “Process transaction” button.
If the option “Require Electronic Signature Validation” was selected in ePayment Configuration, you will be required to press the green Accept Signature button to continue or the red Reject signature button to exit. If that option was not selected, the process will be continued automatically once the signature is captured.
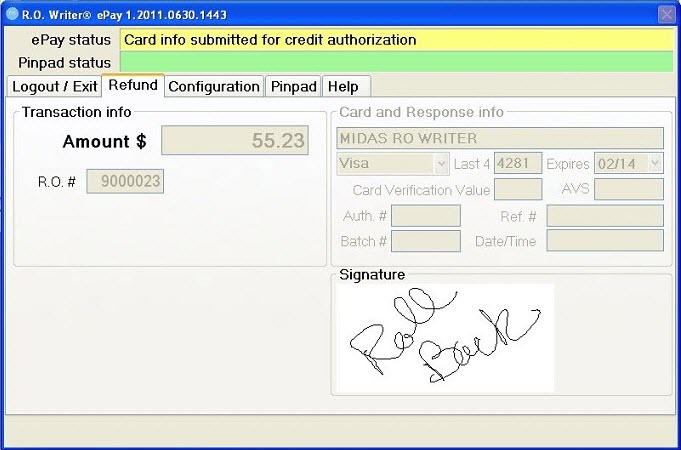
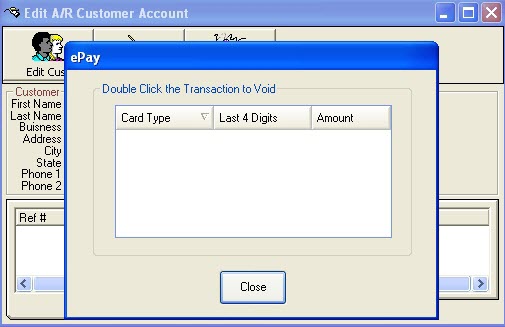
When the signature is captured, you will be returned to the list of transactions. Select another transaction to void or click the “Close” button.

The payment will then be recalled.