With the Advanced Word Processor, you can customize, save templates and it includes many advanced features such as:
- Spell check
- Font formatting
- Bullets and numbers
- Additional merge fields
- Attach files
- Images, logos, web links, etc. can be embedded.
Security Settings
Security settings are available in Configuration > Security > Security Levels > Word Processor. You can set up security levels for Basic Word Processor, Advanced Word Processor, and Save File in Advanced Word Processor (This secures the ability to save changes to templates).

Menu Bar

The File menu contains many of the same functions as the Menu bar.
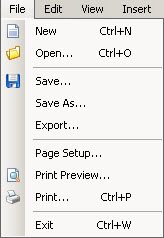
Select New or press CTRL+N to open a new document.
Select Open or press CTRL+O to open an existing document. You can also use the Working document dropdown list to select existing documents.
Select Save to save the current document with the same file name.
Select Save As to save the current document with a different file name while retaining the original file name that was opened.
Select Export to export the document as it appears to a PDF file.
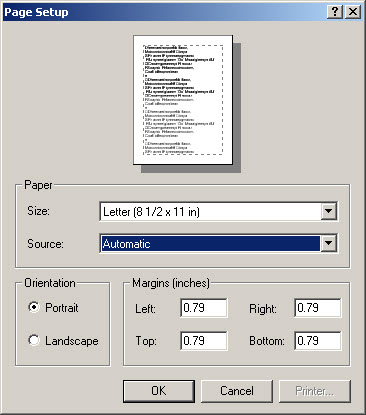
Select Page Setup to change paper size, paper source, orientation, and margins.
Select Print Preview to view how your document is printed.
Select Print or press CTRL+P to send the document to the printer.
Select Exit or press CTRL+W to exit the Word Processor.
Edit Menu
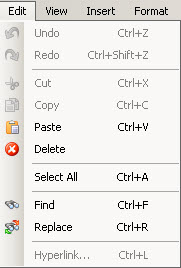
Select Undo or press CTRL+Z to undo the last edit.
Select Redo or press CTRL+Shift+Z to redo the last undo.
Select Cut or press CTRL+X to delete selected text or images.
Select Paste or press CTRL+V to paste cut or copied text or images to the cursor position.
Select Delete to delete selected text or images.
Select All or press CTRL+A to select the entire screen.
Select Find or press CTRL+F to search for text.
Select Replace or press CTRL+R to replace selected text with different text throughout the document.
View Menu
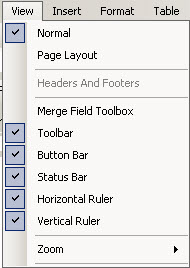
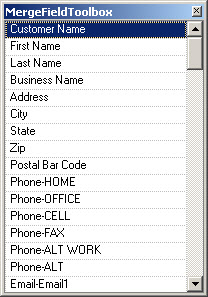
Select Merge Field Toolbox to display the merge fields in a floating window for easy access. The toolbox can be moved by clicking the title bar and dragging it to a different position. To insert merge fields, double-click on the merge field in the toolbox and it is inserted at the cursor position.
You are able to select or deselect each of the following items to view: toolbar, Button Bar, Status Bar, Horizontal Ruler, or Vertical Ruler.
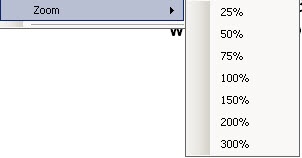
Select Zoom to change the size of the document on the screen. This does not affect printing.
Insert Menu
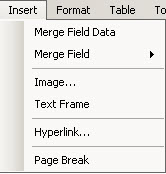
Select Merge Field Data when a document template is accessed from the customer edit screen or scheduler to populate the merge fields with the available information.
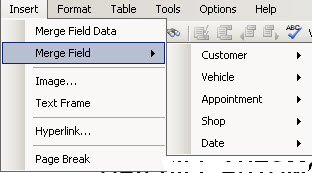
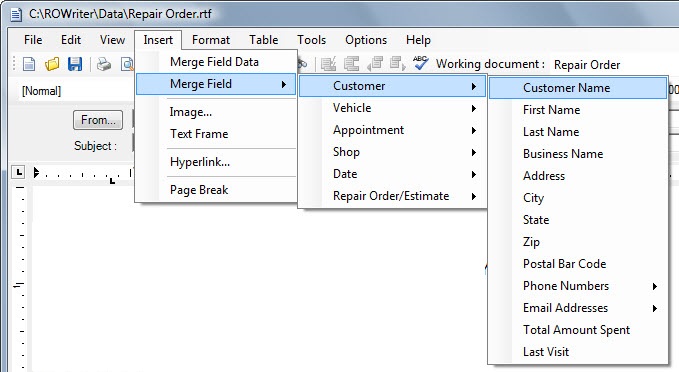
Select Merge Field to insert a merge field at the cursor position. Select the category and then the field.
Select Image to insert an image located on your computer.
Select Text Frame to insert a text box.
Select Hyperlink to insert a link to a website.
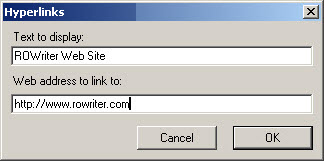
Enter the Text that will display and the web address (Example: http://www.rowriter.com) you wish to link to. When the customer clicks on the text in the email they receive, it should open their default web browser to that web address. The hyperlink is inserted at the cursor position.
Select Page Break to insert a page break at the cursor position.
Format Menu
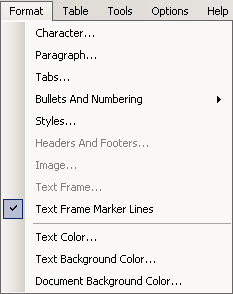
Select Character to change formatting for selected text such as font and text color.
Select Paragraph to change formatting for the selected paragraph such as alignment and spacing.
Select Tabs to change the spacing of the tabs.
Select Bullets and Numbering to use bullets or numbering.
Select Text Color to edit color of selected text.
Select Text Background Color to edit the color of the background of the selected text.
Select Document Background Color to edit the color of the document background.
Table Menu
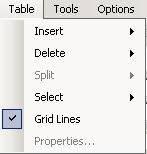
The Table Menu allows you to insert and format tables into your document.
Tools Menu
This is where you are able to access the Spell Check feature. You can also access spell check by pressing the F7 key.
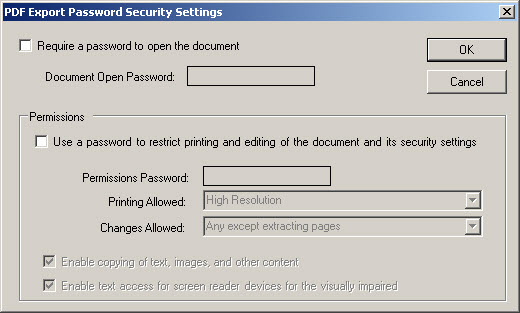
Options Menu
This is where you are able to access security options that is applied when you export the document to a PDF file.
Formatting a Document
Formatting an Advanced Word Processor document is the same as formatting a Basic Word Processor document.
Inserting Information into Documents
Inserting Data Fields
There may be instances when information pertaining to a customer or a vehicle is needed in a document, or perhaps a date. Instead of entering this information for each customer, data fields may be entered.
To enter a data field in a document, position the insertion point at the location in the document where the field is to be inserted. Click Insert menu > Merge Field > select the category > select the field name and format if needed.
Data fields may also be entered by positioning the insertion point at the location in the document where the field is to be inserted, and double-clicking on the desired field from the MergeFieldToolbox. For more information see the section for the View Menu.
The following data fields are available:
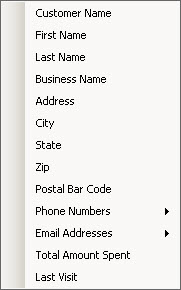
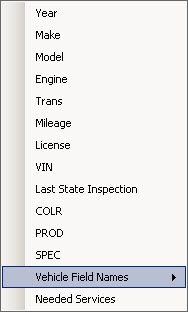
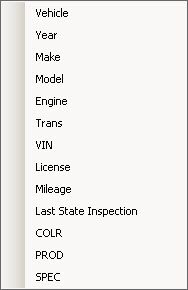
Customer Vehicle
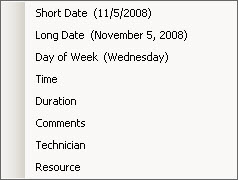
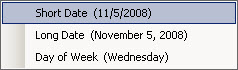
Appointment Date
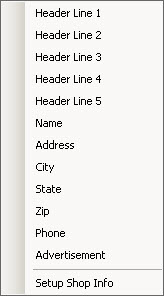
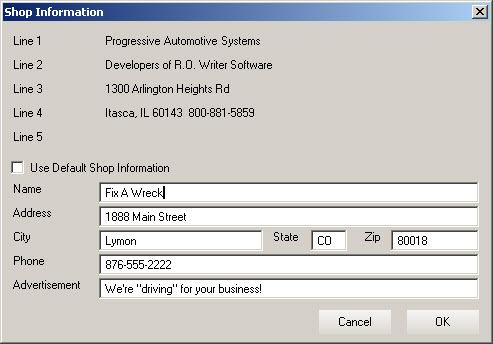
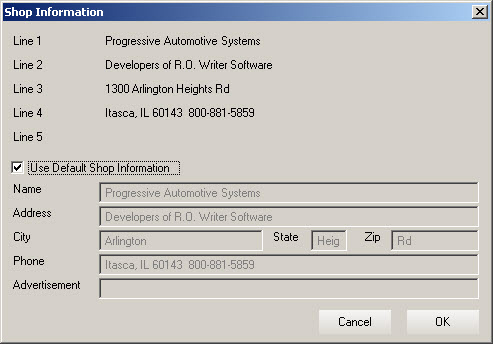
Shop
The default shop information is taken from the software license and becomes the header that prints on reports and repair orders. By selecting Setup Shop Info, you are able to edit the information that is used with the Advanced Word Processor and enhanced emails. To use the default shop header, check the Use Default Shop Information checkbox.
NOTE: The Repair Order/Estimate fields are useful on the Estimate PDF or Repair Order PDF templates used when emailing estimates and repair orders to customers. The type is to identify either an estimate or a repair order.
Inserting Merge Field Data
If a document template is accessed from the customer edit screen or scheduler and modified, merge field data can be selected to populate the merge fields with the available information.
Inserting Images
To insert an image from a saved file, position the insertion point at the location in the document where the image is to be inserted. Click Insert menu > Image from the menu, and identify the file to be inserted. You may need to change the Files of Type in the dropdown list if the file you are inserting is a different type than is shown. You will need to use a picture editing program to re size the image if needed.
Inserting Hyperlink
Click Insert menu > Hyperlink.
Enter the Text to Display and the Web Address to Link to.
Inserting Text Frame
You can frame text in order to emphasize it. Text frames work the same as text boxes in Microsoft Word and can be moved by dragging the text frame to a different location.
Insert Page Break
If more than one page is required, a Page Break can be inserted.
To Create a Post Card
Click File > Page Setup > Size dropdown list and select the size of the postcard you want to use.
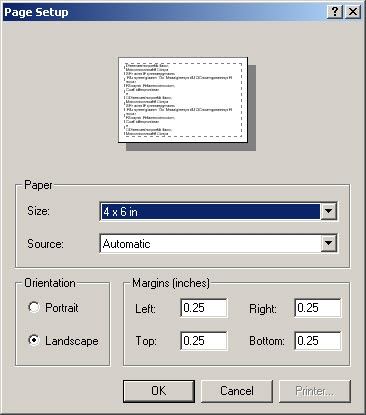
We cannot support a sheet of postcards at this time. Only single postcards stacked in a tray or DOT matrix continuous feed has been known to work.