Suppliers
Configuration menu > Parts > Suppliers
There are two Supplier windows: one for the basic supplier information and another to add or edit the supplier interface that connects R.O. Writer to the supplier's online catalog.
Although generally used for companies that supply parts, a supplier can be any company or individual that provides labor or materials. The Suppliers setting is a convenient place to store information about the supplier, such as their address, telephone numbers, email addresses, and other contact information.
R.O. Writer recommends gathering your supplier information - contact, account, and interface information - before or just after installing R.O. Writer. It is not absolutely necessary to have all suppliers set up before using R.O. Writer, but it is a good idea.
TIP: You can see a list of all your suppliers by running a Supplier List report in the Reporting module.
Creating a New Supplier
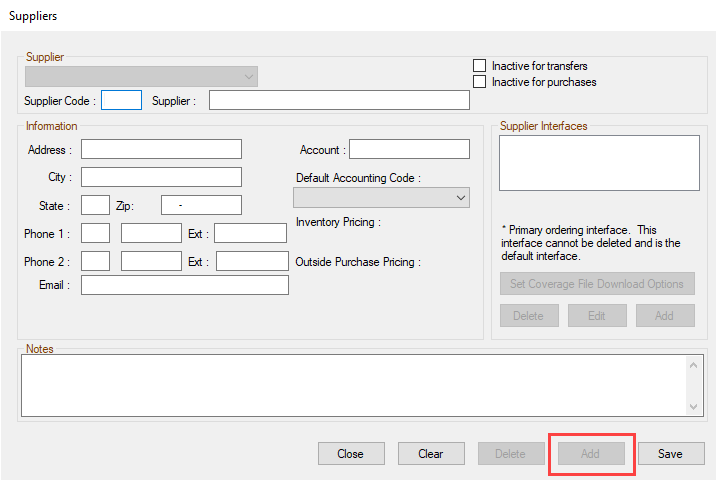
You enter basic supplier information on the Supplier window. After you save a supplier, it is available to select throughout R.O. Writer.
To Create a New Supplier
Complete these steps:
- Click Configuration menu > Parts > Suppliers. The Suppliers window opens.
-
Click the Add button at the bottom of the window. The Add button deactivates and the supplier fields activate.
- Type in the Supplier Code and Supplier name. (Required)
- Complete the rest of the supplier information. (Optional)
-
Click Save. The fields clear and deactivate except for the Supplier dropdown list.
- The new supplier is created. At this point, you can select the supplier in the Supplier dropdown list, and add an interface.
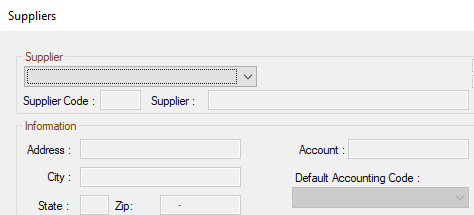
Supplier Section
The Supplier Code and Supplier are required to create a supplier.

The Supplier dropdown list contains all the saved suppliers.
Supplier Code and Name
- The supplier code is a three-digit code that identifies the supplier throughout R.O. Writer. Enter something that is easily recognizable as the supplier.
- The supplier name appears wherever there is a list of suppliers in R.O. Writer.
Inactive for Purchases
Check Inactive for Purchases to make this supplier inactive for purchases. You can establish another store within the your organization as a supplier, in which case you would transfer parts between stores.
Inactive for Transfers
Check Inactive for Transfers to make this supplier inactive for transfers between stores in the same organization.
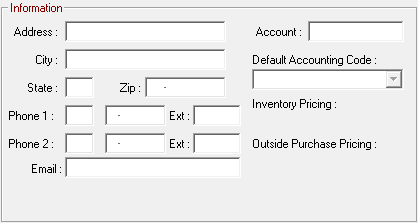
Information Section
You enter the basic information in the Information section.
|
Setting |
Description |
|---|---|
| Address and Email | The physical and email addresses. |
| Account Number | This is your account number with the selected supplier. |
| Default Accounting Code |
If you are using the Accounts Payable module, R.O. Writer orders from this supplier default to this account when posting invoices to this supplier. However, you can choose a different account when you actually post the invoice; see Post Summary Invoice or Post Detail Invoice. Most suppliers should be coded to an inventory account because all part purchases are received in inventory before being charged out as the cost of goods sold. |
| Pricing | The retail price is calculated using the default matrix pricing method. If this supplier has a separate matrix for Inventory or Outside Purchases, that name displays here. |
| Notes | Enter notes about this supplier. |
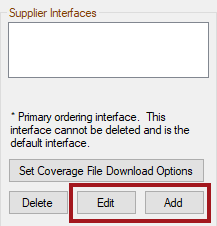
Supplier Interfaces Section
The
| Item | Description |
|---|---|
|
White box |
Interfaces that have been configured appear in the white box. The name is the Interface Name entered for the interface. To edit an interface, select the name here and click the Edit button. |
|
Set Coverage File |
Click to set up the coverage file download for the supplier. This button is disabled for NAPA, Nexpart, Autoi, and ACDelco. For details, click the following link: Configuring the Coverage File Download for Suppliers. |
|
Delete |
Click to delete an interface selected in the white box. |
|
Edit |
Click to edit the interface selected in the white box. The interface window opens displaying the details of the selected interface. |
|
Add |
Click to add an interface. The interface window opens with all fields blank. |
NOTE: You save the interface information when you click Save on the main Suppliers window.
Notes Section
In the Notes section, type in any information about this supplier that you want to appear when you open this window. This section is optional.

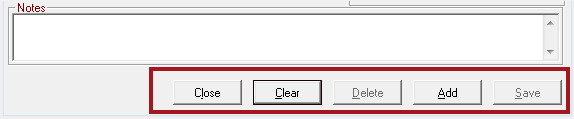
Buttons at the Bottom of the Window
The buttons at the bottom of the window apply to the supplier overall.
|
Button |
Description |
|---|---|
| Close | Click this button to close the window. If you have made any changes, click Save before you click Close. |
| Clear | Click Clear to clear the selections on the window. If you have entered a supplier and saved the information, click this button to clear the fields so that you can create or edit another supplier. |
| Delete | Click Delete to delete a selected supplier. |
| Add | Click Add to create a new supplier. |
| Save | Click Save to save a new supplier or edits to an existing supplier. |
Inventory and Accounts Payable Modules
You can access the Suppliers setting and add or edit suppliers from the toolbar of the Accounts Payable and Accounting Interface modules.
If you are using the Inventory module or the Accounts Payable module, each part entered on a repair order should have the supplier selected so that purchases from every supplier can be tracked and reported.