Labor Time Clock
The technician’s time on labor operations is recorded by starting and stopping the time clock on each labor operation.
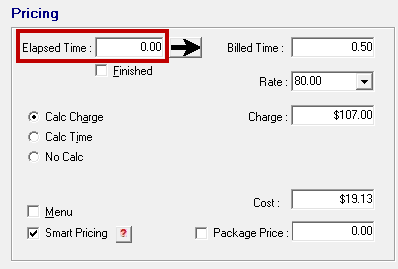
The Elapsed Time field on the Edit Labor window records the time between the starting and stopping of the time clock.
To Start the Labor Time Clock
Select the appropriate labor operation on the Parts/Labor Tab and press the letter "t" on the keyboard.
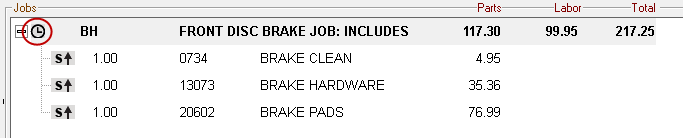
- A small clock appears to the left of the technician’s code to indicate that the clock is running.
- The labor time clock starts in the Elapsed Time field of the Edit Labor window. The Elapsed Time accumulates until the labor time clock is stopped.
NOTE: You can also start and stop the labor time clock when editing the appointment in Scheduler.
To Stop the Labor Time Clock
Select the appropriate labor operation on the Parts/Labor Tab and press the letter "t" on the keyboard.
- The small clock to the left of the technician’s code no longer appears.
- The time is recorded in the Elapsed Time field of the Edit Labor window.
NOTE: The labor time clock is stopped automatically when the job is finished.
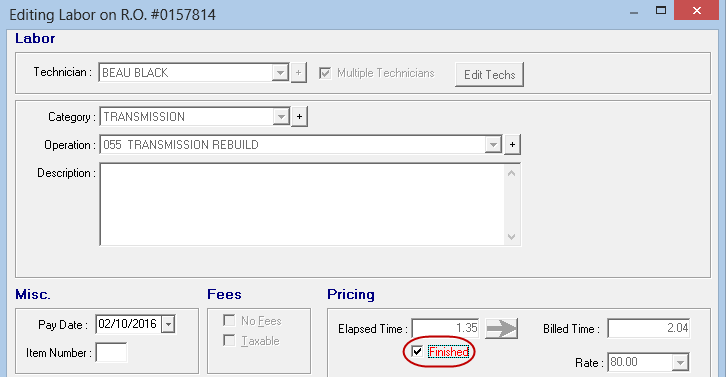
To Finish the Job
Double-click the labor operation on the Parts/Labor Tab to open it. Then, check the Finished box.
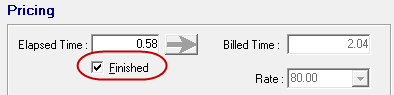
- The labor time clock stops.
- The Elapsed Time field updates to show how much time has passed since the labor time clock was started.
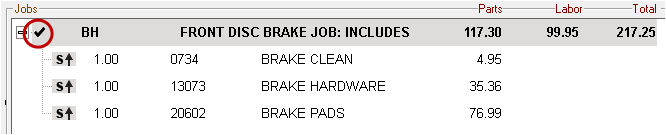
When you save and close the window, a checkmark appears on the technician’s code on the labor line in the Jobs section.
NOTE: You can also finish the job when editing the appointment in Scheduler.
Billing the Elapsed Time
To charge the customer for the time it took the technician to complete the job, click the black, right arrow on the Elapsed Time field  . This moves the Elapsed Time to the Billed Time. The Billed Time is then added to the total charge for the labor.
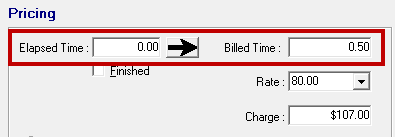
To Calculate Cost Based on Elapsed Time
The cost is then calculated based on the Billed Time multiplied by the technician's rate.
Labor cost can be configured to calculate based on the Elapsed Time instead of the Billed Time after Finished is checked. For more information, review the Calculate Labor Cost setting in Configuration.
Elapsed Time Reporting
Elapsed Time is used in the following sales reports:
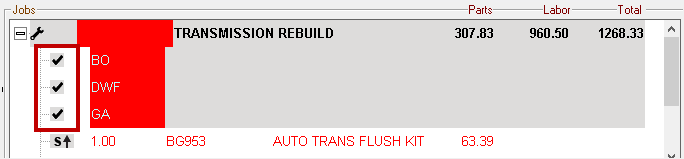
Tracking Time for Multiple Technicians on the Same Job
When multiple technicians are assigned to one job, a sub-row appears for each technician under the main labor row. Each row must be updated individually by the service writer and technician.
![]()
To Start the Time Clock
To start the labor time clock, select the sub-labor row and press the letter "t" on the keyboard. A clock appears on the line to indicate that the clock is running for that labor line.
To Finish the Sub-Labor
When the technician is finished with the sub-labor, he or she should stop the labor time clock by selecting the sub-labor line and pressing the letter "t" again. Then, open the sub-labor and check Finished.
To Calculate Cost
When all sub-labor operations are marked as Finished, the cost is calculated on each sub-labor operation based on the Elapsed Time or Billed Time. This is configured in the Calculate Labor Cost setting in Configuration.
When the master labor operation is finished, the Edit Labor window for the master labor operation shows the total Elapsed Time of all the sub-labor operations as well as the total cost.

When Elapsed Time is Greater Than the Billed Time
If the Elapsed Time is greater than the Billed Time, the following prompt appears when you try to save the master labor operation.
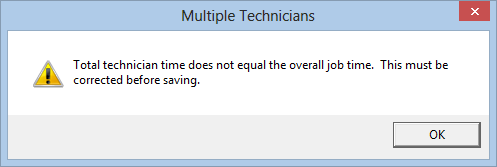
Complete these steps:
- Click OK and then click the Edit Techs button.
-
Select Override Total Billed Time and click Save.
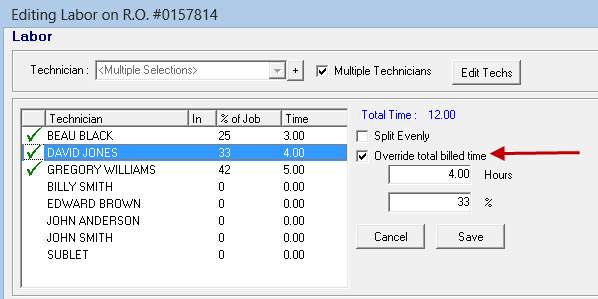
- Click OK.