Text Message Windows
The text messaging window appears whenever you click the Text Message toolbar button  .
.
There are two versions of the text messaging window:
- Ticket Text Message Window - Opens when you click the Text Message button in the ticket toolbar.
- All Text Messages Window - Opens when you click the Text Message button in the main toolbar.
NOTE: The text messaging windows show the entire text history between your shop and the customer.
Ticket Text Message Window
When you click the Text Message button in the ticket toolbar , the shop’s texting history with the customer in the ticket opens.
The ticket number appears in the title bar.

| Item | Description |
|---|---|
|
Title Bar |
The title bar always displays the information about the customer and ticket.
|
|
Message Bubbles |
The message bubbles show a record of the text interaction with the customer.
NOTE: The entire text history with the customer appears. The message history is not limited to the open ticket. |
|
Refresh
|
Click to refresh the window and check for new incoming messages. |
|
Attach
|
Click to attach items to the text message.
|
|
Delete Attachment
|
Click to delete the attachment from the current message before sending it. This button appears only if an item has been attached. |
|
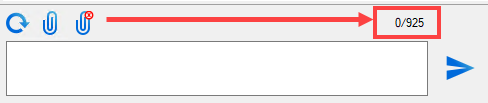
A character counter appears above the text box to show you how many characters you can type. The text box is limited to 1,000 characters per message. The format is: “[# of characters typed]/[# of characters remaining]”
Some settings in texting configuration add text to messages by default. That text does not appear in the text box. However, the counter includes the inserted text in the number of characters remaining. In the example above, 75 characters will be inserted when the message is sent. The counter subtracts 75 characters from the number of characters remaining. As a result, the counter starts at “0/925” instead of “0/1000”. The inserted text will appear in the bubble in text history after you click Send. TIP: The customer’s cell phone carrier may or may not parse the message content into multiple messages. |
|
|
Text Box |
Type the text of the message in this box. Text is spell-checked as you type. Right-click to see and select the correct spelling.
You can save the misspelled word to a local dictionary. Words added to the dictionary are saved to the User.dic file, which is located in the C:\Users\31Admin\AppData\Roaming\Progressive Automotive Systems, LLC\R.O. Writer\ folder. |
|
Allow Texting |
If Allow Texting is unchecked, the message cannot be sent. You must obtain consent from customers before you can text them. If Allow Texting is checked when texting from a ticket, then it will be checked when you select the customer in the list. |
|
Mobile Phone |
This is the customer phone number the text message will be sent to. R.O. Writer populates this field with the number in the phone field selected in texting configuration. You can type in a different number. If you send the text, the phone field for the customer is updated with the new number. |
|
Message |
This static message always appears: “Only send texts after obtaining the applicable proper express written consent of the customer.” |
|
More Information Link |
Click to open the R.O. Writer End User License Agreement (EULA) here: https://info.rowriter.com/EULA/. The EULA contains information about texting. |
|
Send button
|
Click to send the text. The text goes out to the customer and the message bubble appears above the messaging area. NOTE: You can also press the ENTER key on your keyboard. |


All Text Messages Window
When you click the Text Message button in the main toolbar , the shop’s texting history for all customers opens to the Unread tab.
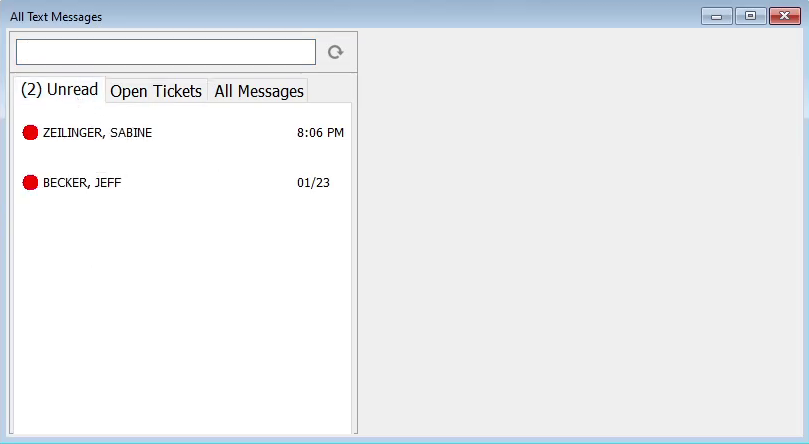
There are three tabs:
- (#) Unread – Includes only unread text messages.
- The counter shows how many unread messages there are.
- This is the tab the window opens to by default.
- Open Tickets – Includes only text messages on open estimates and repair orders.
- All Messages – Includes all text messages.
When you click any tab, the unread messages appear at the top with a red indicator.
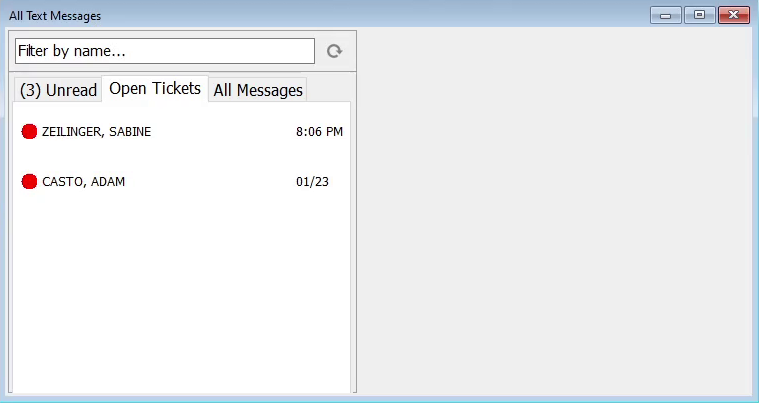
You can use the search box to search by name on any tab.

To check for new messages, click the Refresh button  .
.
NOTE: If a customer does not appear in the list or cannot be found, that means your shop has never texted the customer. The first text to a customer must be sent from an open ticket.
To See a Message
When you click a customer’s name, the messaging history between your shop and the customer appears in the right column. The most recent and unread message appears first.
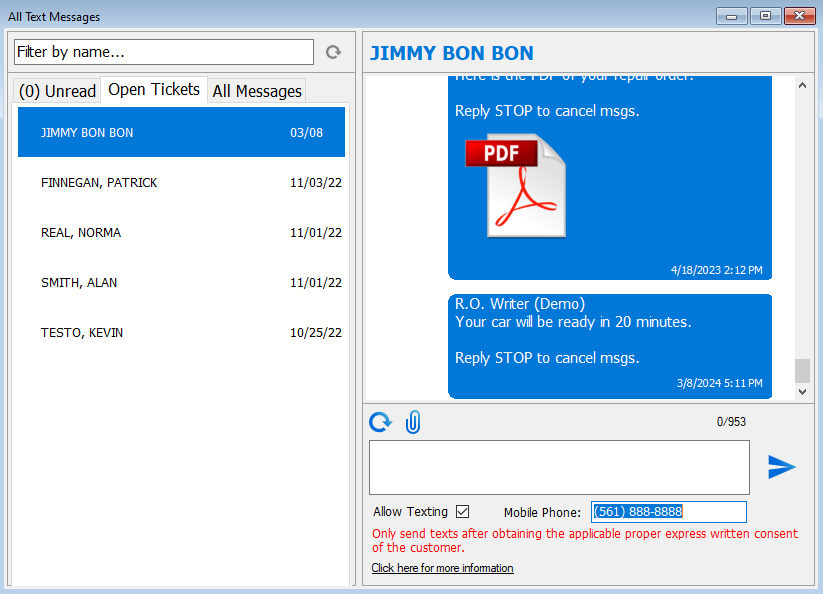
The right column is the same as the ticket text messaging window for that customer.
Allow Texting
The texting fields are also the same. If Allow Texting was checked when texting from a ticket, then it will be checked when you select the customer in the list.

NOTE: The right column does not display any ticket information.
Attachments
When you attach an image or PDF and send it,
- PDFs are not saved to the Reference tab of any ticket for the customer.
- Images are saved to the C:/ROWriterData/Images folder (or the data path set in Configuration).