When you click the Print button on a reports window, R.O. Writer begins compiling data based on the selected report and criteria. When the report has finished compiling, the standard printing window opens.
|
Output |
Link for Details |
|---|---|
|
Printer (default) |
|
|
Screen |
Printing to the Screen (Print Preview) - The Print Preview window opens. |
|
|
|
|
Email (if available) |
You cannot print to email unless email is configured properly for |
NOTE: The date that prints on reports is always today's date.
Shop Header
The shop header from your software license prints at the top of all documents automatically. You can add a custom advertising line to the shop header in General Options (Configuration > File menu > General Options > Use Custom Advertising Line).
The information in your shop header appears on the Setup Stores window in Data Locations (Configuration > File menu > Data Locations > Setup Stores button).
NOTE: If you need to change your shop header, please contact the R.O. Writer Sales team to update your license.
Shading on Each Row
When printing reports, R.O. Writer provides the option to shade on every other row of the report. Alternate shading makes it easier to distinguish rows from each other.
NOTE: While shading can make printed reports easier to read in person, shading can also make reports harder to read when faxed or scanned. Shading also uses more printer ink when physically printed.
Report Sample With Shading

Report Sample With No Shading

To Set the Default Shading for Printed Reports
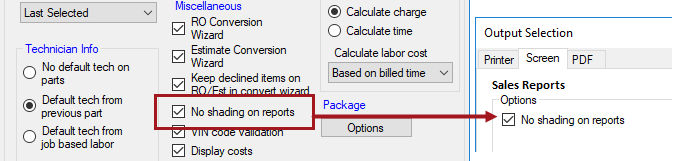
You set the default shading in the R.O. Options Configuration setting (Configuration menu > Repair Order > R.O. Options > Miscellaneous section > No Shading on Reports.
-
If No Shading on Reports is checked in R.O. Options, No Shading on Reports is checked by default on all print windows.
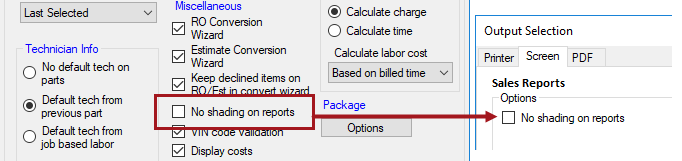
-
If No Shading on Reports is unchecked in R.O. Options, No Shading on Reports is unchecked by default on all print windows.
To Set the Shading on Individual Printed Reports
You can check or uncheck No Shading on Report on any of the output tab windows before you click OK to print the report.