General Options
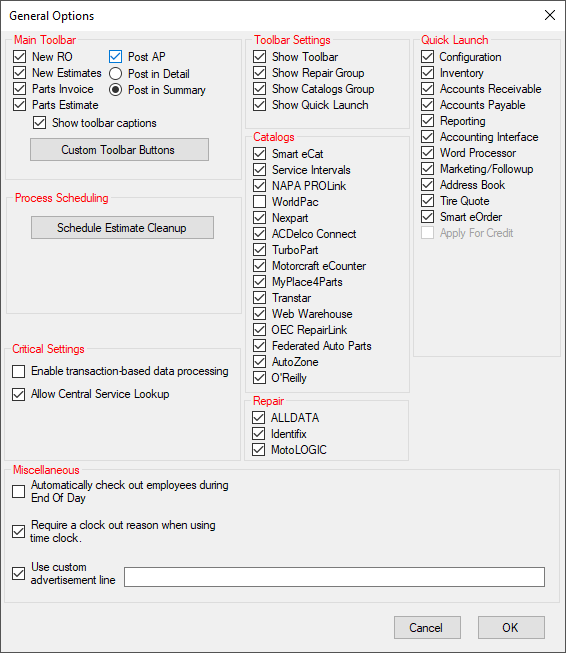
Main Toolbar
Each item represents an button on the main toolbar. Select an item to make its button appear on the main toolbar.
If you are not licensed for an item, the entry for that item is unchecked and disabled on the General Options window.
NOTE: If you are using the Accounts Payable module, select Post AP Invoice and select Summary or Detail.
Show Toolbar Captions
This option affects the appearance of the main toolbar. When selected, the text describing the button appears below each button. If not selected, only the picture of each button appears. This option is selected by default and it is best to keep it selected.
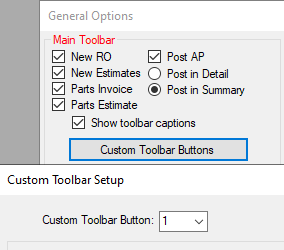
To Add Custom Toolbar Buttons
You can configure up to three toolbar buttons independently. You need to assign each custom toolbar button a number to keep track of how many you have:
Complete these steps:
- On the General Options window, click the Custom Toolbar Buttons button.
-
Select 1, 2, or 3 in the Custom Toolbar Button dropdown list.
- Remember which number you assign to each button so that you can select it when you want to edit its attributes.
- The Edit button activates. Click the Edit button. The fields become active.
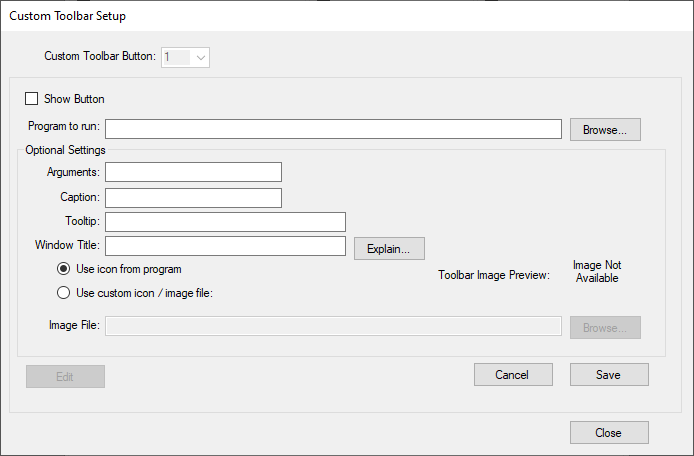
-
Select the options that apply to the toolbar button you are creating.
- Click Save to save your settings.
- Click Close to return to the General Options window.


Toolbar Settings Section
The Toolbar Settings determine which sections
- Are active on the General Options window.
- Appear in the Quick Launch on the left side of the main window.
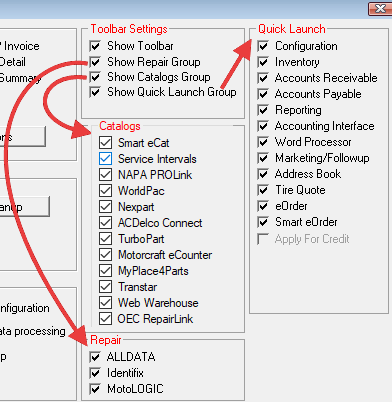
Show Toolbar Checkbox
Check Show Toolbar to display the Quick Launch on the left side of the main window.
Show Repair Group Checkbox
Check Show Repair Group to
- Activate the Repair section on the General Options window.
- Display the Repair section at the top of the Quick Launch.
Show Catalogs Group Checkbox
- Activate the Catalogs section on the General Options window.
- Display the Catalogs section in the middle of the Quick Launch.
Show Quick Launch Group Checkbox
Check Quick Launch Group to
- Activate the Quick Launch section on the General Options window.
- Display the Quick Launch at the bottom of the Quick Launch.
NOTE: If you check a box in this section and do not check boxes in its corresponding section that section will appear empty in the Quick Launch.
Repair Section
R.O. Writer has built direct interfaces with repair diagnostic databases.
NOTE: If you are not licensed for an item, the entry for that item is unchecked and disabled on the General Options window.
Each item checked in the Repair section appears in the Repair section of the Quick Launch.
For more information, click one of the following links:
Catalogs Section
R.O. Writer has programmed special interfaces for the catalogs in this section.
NOTE: If you are not licensed for an item, the entry for that item is unchecked and disabled on the General Options window.
Each item checked in the Catalogs section appears in the Catalogs section of the Quick Launch.
-
Smart eCat Catalog toolbar. (If the catalog is not integrated with Smart eCat, its button will not appear on the toolbar.)

-
Quick Launch
Quick Launch Section
The Quick Launch section contains all R.O. Writer modules. If you are not licensed for an item, the entry for that item is unchecked and disabled on the General Options window.
When you select a module and click OK to save your selection, a button for that module appears in the Quick Launch.
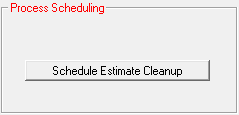
Estimate Cleanup
Quotes and estimates are created as part of customer intake. Some are converted to repair orders but some are never converted and just sit in the database, remaining open and clogging up the Estimates in Progress window.
NOTE: This option does not appear if you are running R.O. Writer on the Central Office server.
Scheduling estimate cleanup helps you save and delete quotes and estimates automatically, which removes them from the Estimates in Progress window.
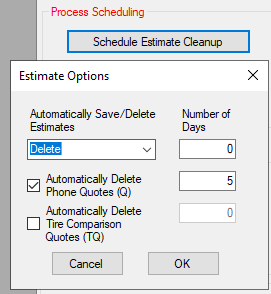
Automatically Save or Delete Estimates
Select what you want to do with estimates:
- Save - Estimates are saved to History after the Number of Days you enter in the field.
- Delete - Estimates are deleted from the database the Number of Days you enter in the field.
Automatically Delete Phone Quotes (Q)
Select to delete phone quotes after the Number of Days you enter in the field. Phone quotes are those that don't have customer information and are usually used to give estimates over the phone. The ID of phone quotes begin with a “Q”.
Automatically Delete Tire Comparison Quotes (TQ)
Select to delete phone quotes after the Number of Days you enter in the field.
Tire comparison quotes are quotes that were created from the tire comparison. The ID of tire comparison quotes begin with a “TQ” to distinguish them from regular phone quotes.
Critical Settings
The critical settings enable important functionality in R.O. Writer.
Allow Central Service Lookup
Check to activate the Central Service Lookup button when searching for customers and vehicles. For details, click the following link: Checking History in Other Stores.
Miscellaneous
The Miscellaneous section contains various checkboxes you can use to customize R.O. Writer.
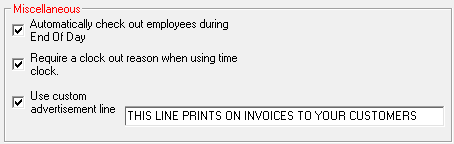
Automatically Check Out Employees During End of Day
Check to configure the End of Day (EOD) process to verify that all employees are clocked out in when End of Day Processing before running the EOD. If any employees are clocked in, the Employee Time Clock appears where those employees can be clocked out.
Require a Clock Out Reason When Using Time Clock
Check to display more reason buttons on the Employee Time Clock window.
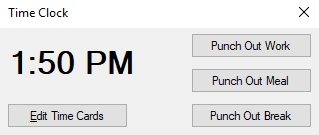
Employees must select one of the reason buttons to clock out; there is no plain Punch Out button.
Use Custom Advertising Line
Check Use Custom Advertising Line to replaces the 5th line in the shop header in your license. The 5th line prints below the shop name and address on estimates, work orders, repair orders, customer invoices, and reports. As a result, this line is often used to market your shop.
When checked, you can type in the text you want. You are limited to 50 alphanumeric characters.
The information in your shop header appears on the Setup Stores window in Data Locations (Configuration > File menu > Data Locations > Setup Stores button).