Oil Group
You can create one oil Parts Department Group - referred to as the "oil group" - to manage your oil parts as a group. With the oil group, you can,
- Enter, manage, and track required oil information on oil parts.
- Manage and update tax and disposal fee information for all oil parts.
Only one parts department group can be the oil group.
One of the advantages of putting oil parts in an oil group is that you can change the fees and click Update Fees in Inv to update all the parts in Inventory at one time. This is the best way to manage fees for oil parts globally.
First, you need to create the oil group and then open the parts in it to add the oil information.
Creating the Oil Group
The oil group is a grouping of parts departments that contain oil parts. Before creating the oil group, you might want to check your parts departments to make sure they contain only the oil parts you want to manage in the oil group. For example, you wouldn't want to manage windshield wipers the same way you manage oil, so verify that the parts departments you add to the oil group do not include windshield wipers.
Only one parts department group can be the oil group.
Complete these steps:
- In the Configuration module, click Configuration menu > Parts > Parts Department Groups.
- On the Departments Group window, either
- Click the Add button to create a new parts department group.
- Select an existing parts department group from the dropdown list.
- Select the Oil Group option.
If you do not see this option on the window, a oil group already exists. - Add the departments that include the parts you want to add oil information to. These departments should include only oil products.
- You can set up the oil fees as necessary in Fee1 (and based on), Fee2 (and based on), or No Supply Fee.
- Click the Save button to save the oil group.

Adding Oil Information to Oil Group Parts
If you want comply with National Conference of Weights and Measures (NCWM) for vehicle engine oil labeling standards you need to add oil information to oil parts in your system. Any part without oil information is out of compliance. Oil information must be printed on customer receipts (repair orders) to comply with the standards issued by the NCWM.
Complete these steps:
- Open the Inventory module and click the Inventory button > View/Add/Edit.
- Search for a part included in the oil group.
- Click Edit and the part activates.
- Click the Oil Information tab.
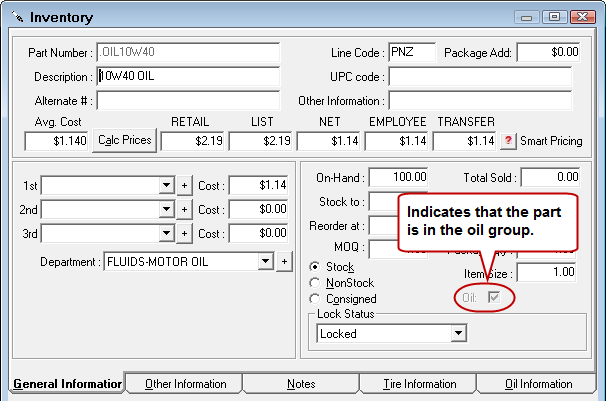
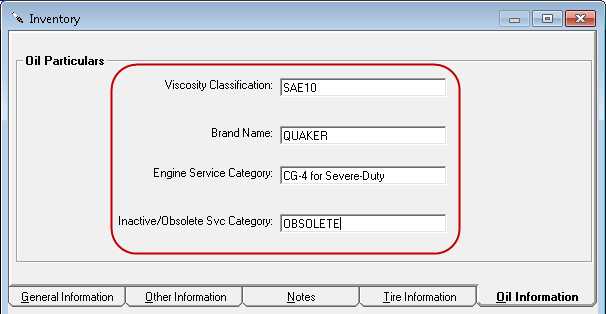
- Enter the required oil information in the following fields:
- Viscosity Classification
- Brand Name
- Engine Service Category
- Inactive/Obsolete Svc Category
NOTE: Only parts in an oil group display the oil information fields. The Oil Information tab appears for all parts but remains blank for non-oil group parts.
- Click Save to save the oil information to the part record.
Where Oil Information Appears
Oil information appears
- On the Edit Parts window via the Oil Info button.
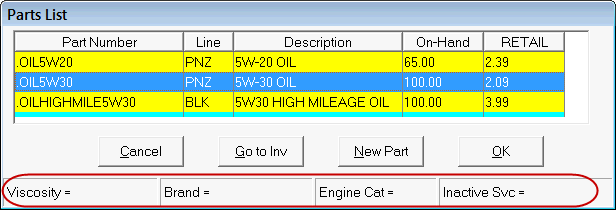
- At the bottom of the Parts List window that comes up during part searches throughout the system. If an oil part is part of an oil group, the oil information fields display.
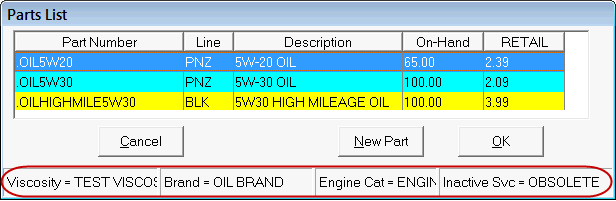
- If the part is in the oil group but no information is entered, the fields at the bottom of the parts list window are blank.
- On estimates, work orders, and repair orders with the oil part.
NOTE: Oil information does not appear on reports with the oil part.
Reviewing Parts Departments for Oil Parts
Before creating the oil group, we recommend that you review which parts are in the parts departments you want to include in the oil parts department group. The fastest way to do this is to run an Inventory List report by parts department.
Complete these steps:
- Open the Inventory module.
- Click the Reports button
 .
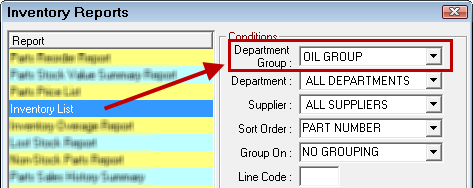
. - In the Inventory Reports list, select the Inventory List.
- In the Department dropdown list, select the parts department whose parts you want to review.

- Select the other options as applicable.
- Click Print.
- On the Printing Options window, select Screen and click OK. The print preview window opens displaying the parts in the selected parts department.
- At this point, you can
- Click CTRL + F and search for parts that you may want to check on.
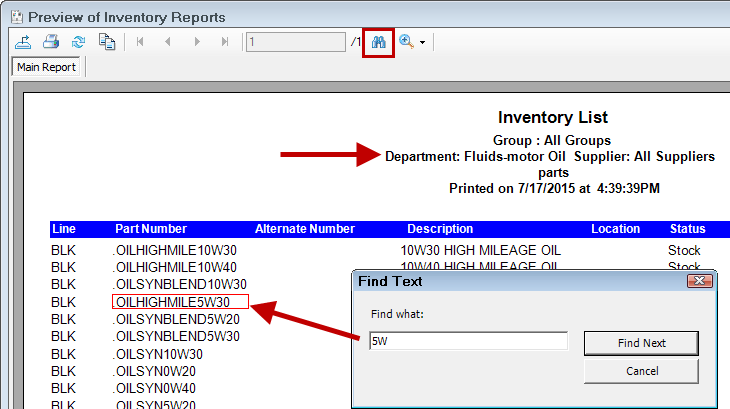
- Print the list and review it thoroughly.
Reviewing Parts in the Oil Group
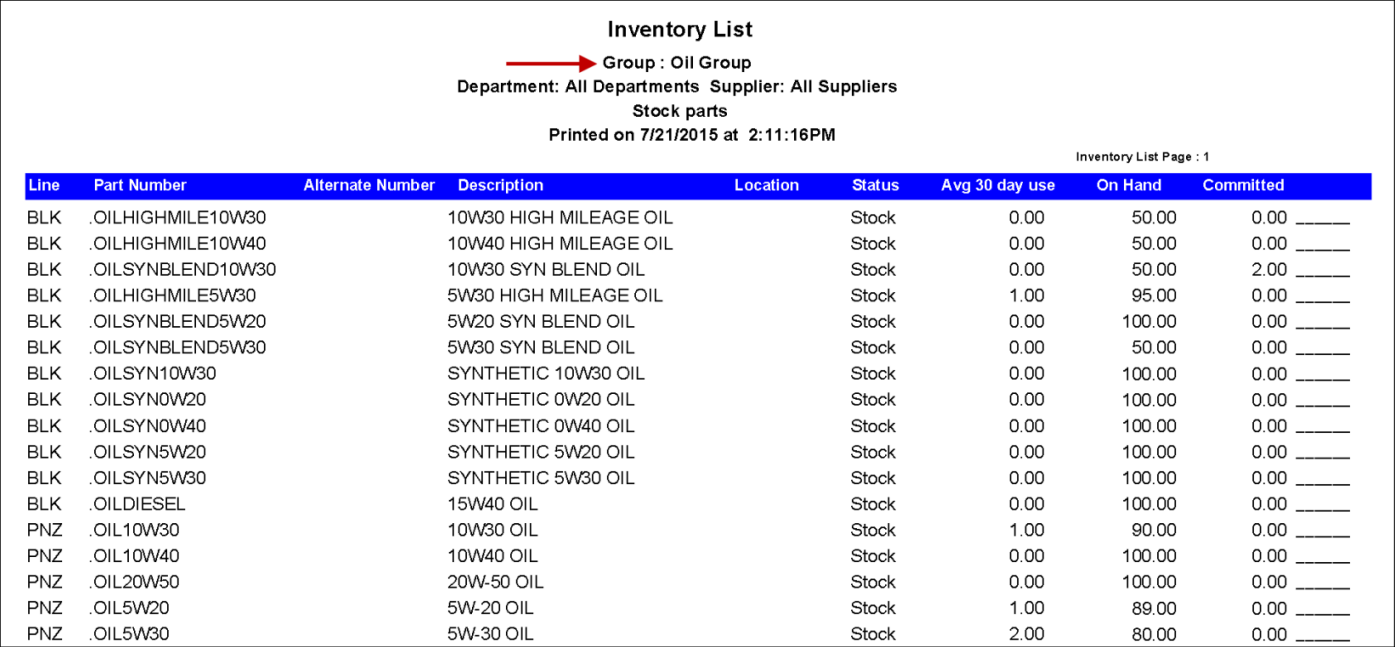
If the oil group already exists, you can run an Inventory List report by the oil parts department group.
If you select a grouping in the Group On dropdown list, a subtotal appears for each grouping.
Changing the Parts Department Group
The Oil Group option is active only on new parts department groups and only when there is no active oil group.
If you want to make another parts department group the oil group, you need to
- Inactivate the current oil group,
- Create a new parts department group,
- Check the Oil Group option, and
- Add parts departments to the new group.
Keep in mind, that a parts department can be in one and only one parts department group. You may need to modify other parts department groups to remove parts departments from them so that those departments become available to select for the new oil group.
Deleting the Oil Group
You cannot delete the oil group, but you are able to make it inactive in R. O. Writer and Express by selecting the Inactive option on the Parts Department Group window.
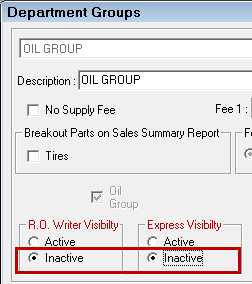
After the oil group has been inactivated, the Oil Group option is active only for new parts department groups.
You cannot
- Add new parts departments to an inactive oil group.
- Select the oil group in any other part of R.O. Writer.
- Run a report for an inactive oil group in Inventory. (The oil group does not appear in the Department Group dropdown list in Inventory Reports.)
Inactive Oil Group Parts
Inactivating the oil group has no impact on the parts in it.
- The Oil Information Tab is still active in Inventory.
- The Oil Info button still appears on the Edit Parts window.
- Oil information - if entered - still prints on tickets with the part.