Smart eCat can be accessed without having an estimate or repair order open if you just wish to view the catalog without posting labor or parts.
For a tour of the Smart eCat window, watch the video below. (This video was recorded using R.O. Writer 1.31.)
Building Repair Orders with Smart eCat
Watch the video below to see an overview of this functionality.
Identifying the Vehicle Information
When you open Smart eCat from an open ticket - estimate or repair order - the vehicle information in the ticket automatically passes to Smart eCat.
- If Smart eCat recognizes the vehicle, it selects is automatically and you can begin searching for parts for that vehicle immediately.
- If Smart eCat does not recognize the vehicle, you need to select it.
The vehicle must be identified accurately so that Smart eCat can search for and find the correct parts.
To Select a Vehicle and Search for Parts
Complete these steps:
- Open Smart eCat.
- If the Vehicle Selection categories appear, you need to select the Year, Make, Model, and Engine in the columns.
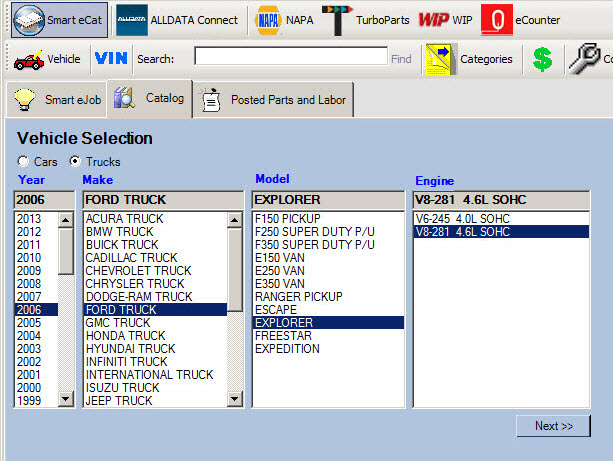
- To select the vehicle information for the search, click Next or double-click on the engine.
- The part categories for that vehicle appear.
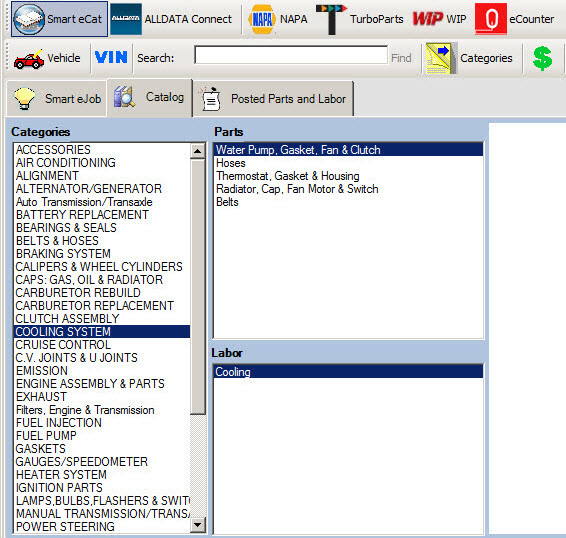
- Now, you can search for the part:
- To narrow the search, you can click on the Category and Parts columns.
- To search by keyword, type in the keyword in the Search box and click Find.
- Select an item from parts to view parts.
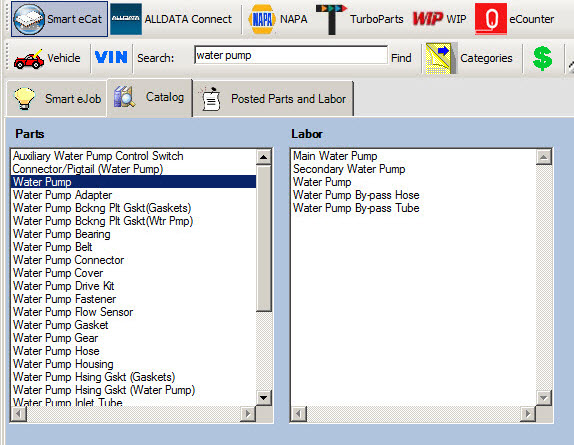
- To search for a part, double-click it in the Parts column. The search results appear.
To Select Another Vehicle
To select another vehicle, click on the Vehicle button in the toolbar ![]() .
.
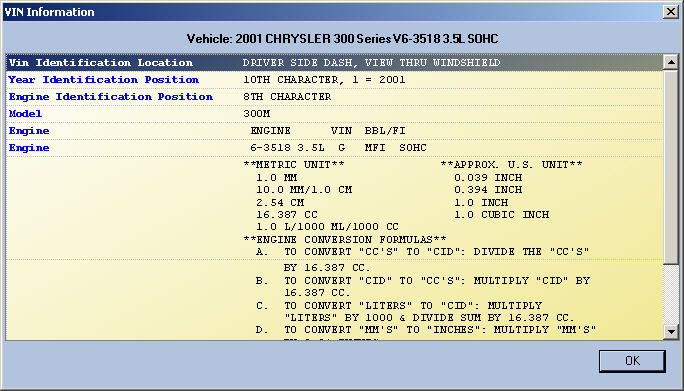
To See VIN Information
To see VIN information for the selected vehicle, click the VIN button ![]() .
.
Vehicle Condition Questions
You may need to answer one or more vehicle condition questions. The answers you select will be saved the next time you access Smart eCat for this vehicle. You can edit the answers under edit vehicle, Epicor tab from the repair order or estimate.
Epicor Parts Specifications
Whenever you've selected part specifications in a smart job or Epicor Information specifications are shown when performing a category search, all specifications are selected automatically if Automatically Post Specifications is checked in Smart eCat Configuration on the Options tab.
Specifications
- Appear on the Notes tab of the Posted Parts and Labor tab.
- Are appended to the labor operation when transferred to R.O. Writer.
You are still able to manually select or deselect specifications regardless of whether this option is selected or not.
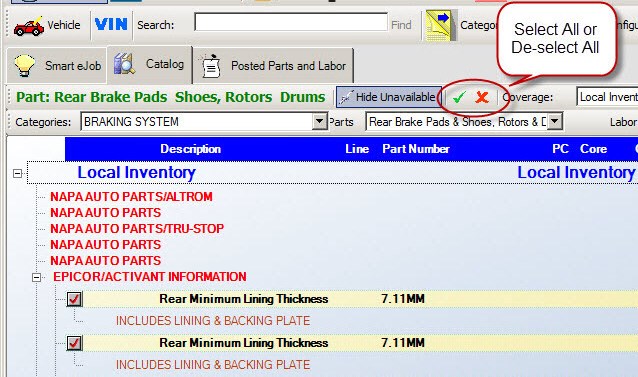
You can de-select the specification you don't want to include manually by clicking the boxes or use the red X button in the toolbar to de-select all of them. Use the green check mark button to select them all again.
NOTE: If you are viewing Epicor information and it is on the same window as parts, clicking the green check mark button to select all selects all specifications as well as all parts. An alternative option would be to create a separate coverage list just for Epicor Information and remove that coverage from all your other coverages.
Working With Search Results
The search results window contains many options that enable you to find the appropriate part as quickly as possible.
To Post Found Parts
Click ![]() to add the selected items to the Posted Parts and Labor tab but stay on the Catalog tab.
to add the selected items to the Posted Parts and Labor tab but stay on the Catalog tab.
Click ![]() to add the selected items and move to the Posted Parts and Labor tab.
to add the selected items and move to the Posted Parts and Labor tab.
How Parts are Searched
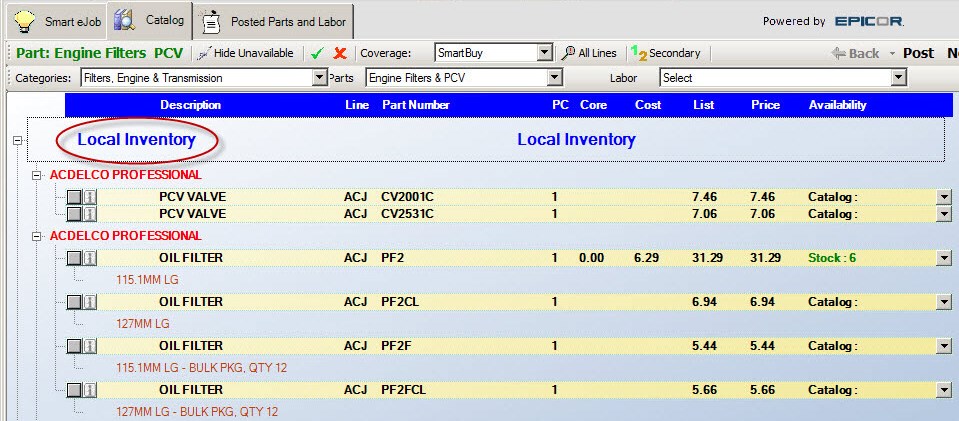
When Smart Buyis selected in the Coverage dropdown list, all coverages included in your Smart Buy are searched automatically. Local Inventory should appear first at the top of the list.
If parts are found and in stock in your local inventory, the Local Inventory section is open at the top of the window.
If no parts are found or are found but not in stock in your local inventory,
- The Local Inventory section is closed.
- The primary (first) supplier section is open.
- The window is scrolled down so that the primary supplier is at the top.
To Show/Hide Unavailable Parts
You are able to hide parts that are not available by clicking the Hide Unavailable button in the toolbar.
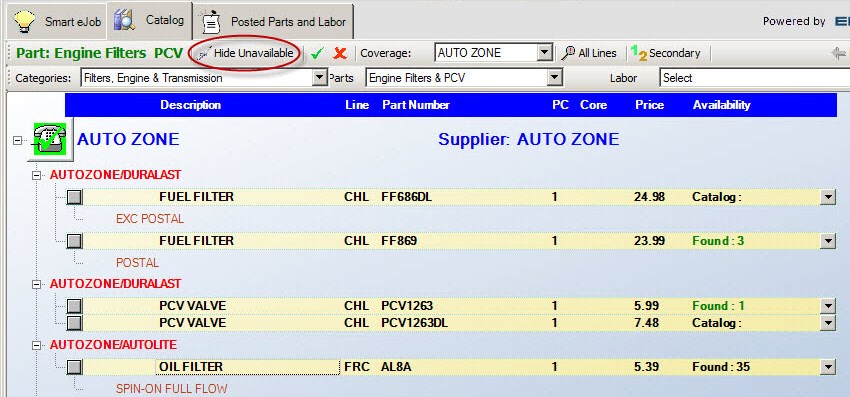
To show all parts again, click the Show Unavailable button.

To Select Different Categories After a Search
After a search has been completed, you can select different categories, parts, and labor in two ways:
- To return to the window with the columns, click the Categories button
 .
. - To stay on the search results window, you use the Categories, Parts, and Labor dropdown lists:
Use the Categories dropdown list to change categories.

Use the Parts dropdown list to view different types of parts.

Use the Labor dropdown list to view labor.

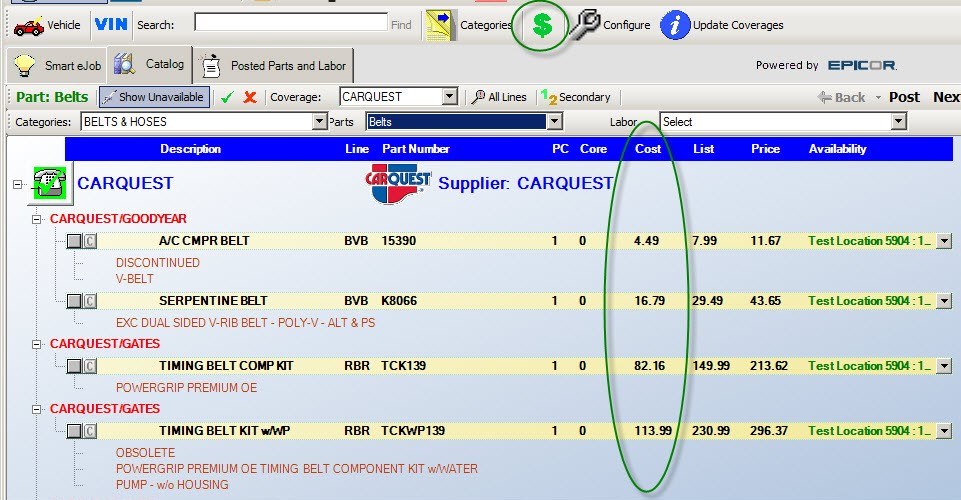
To Show/Hide the Cost
Select the ![]() button to turn on or off the display of costs. This is useful if you need to show the customer his options on the screen. The graphic below shows the costs toggled on.
button to turn on or off the display of costs. This is useful if you need to show the customer his options on the screen. The graphic below shows the costs toggled on.
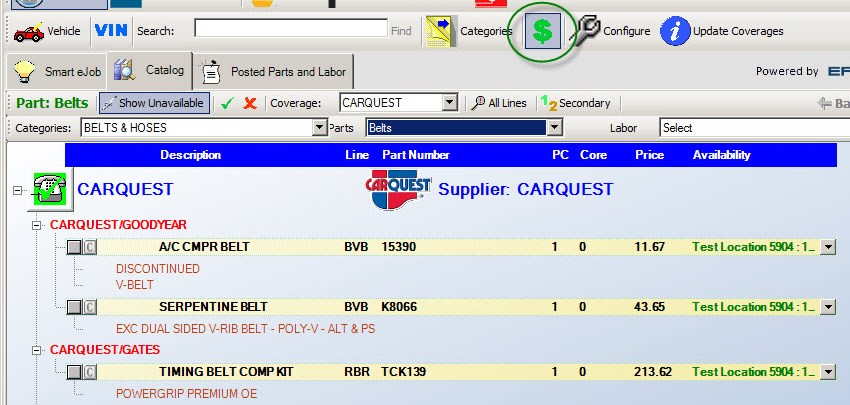
This shows the costs toggled off.
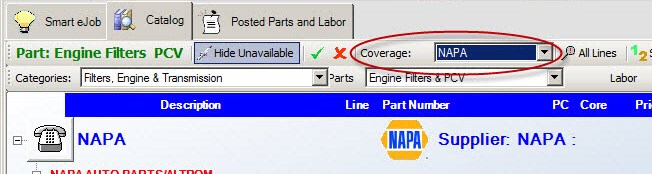
To Select a Different Coverage
If you wish to select one specific coverage (other than the Smart Buy coverage which includes multiple suppliers), select it in the Coverage dropdown list. The search results are narrowed to show only the lines included in that coverage list.
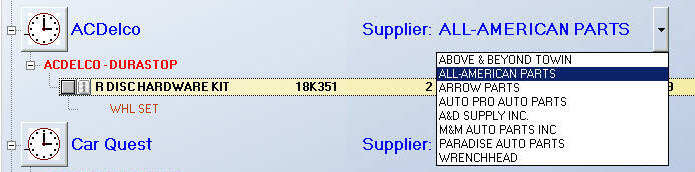
Whenever you see a drop down arrow next to a supplier, there are several suppliers available for that coverage to select from.
To Select Specific Lines
If you only wish to see selected lines of parts, click the All Lines button.
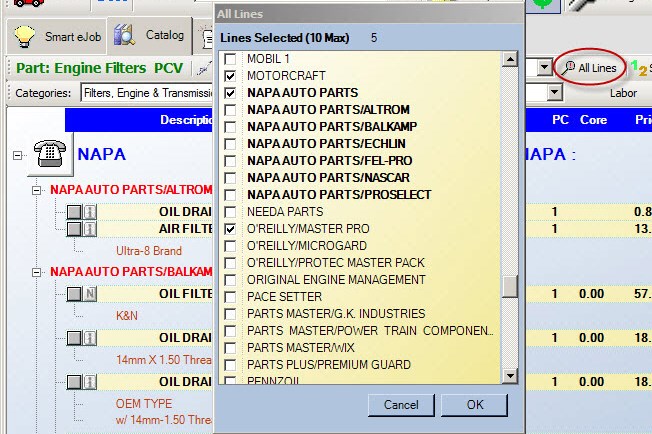
The lines that were already selected as part of your selected coverage(s), appear in bold. Select the lines you wish to view (maximum 10) and click OK.
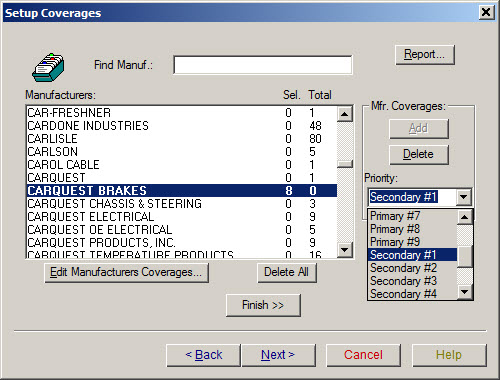
When you set up your coverage lists, you had the ability to set up certain lines as Primary or Secondary.
To Switch Primary and Secondary Lines
In Smart eCat you can switch between viewing Primary lines and Secondary lines by clicking on the ![]() or
or ![]() buttons in the toolbar. The color of the "1" and "2" indicate what lines your looking at.
buttons in the toolbar. The color of the "1" and "2" indicate what lines your looking at.
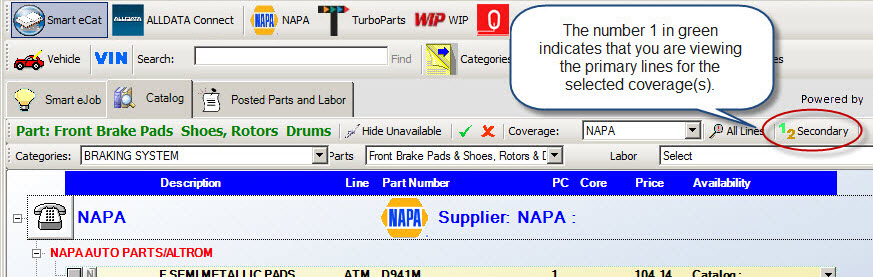
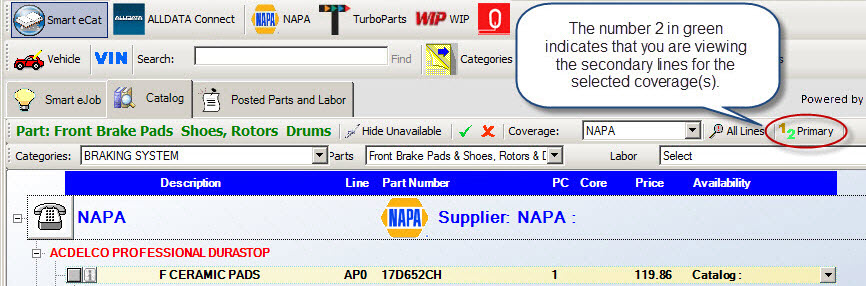
When you are viewing primary lines, the button displays "1" in green and the word "Secondary" ![]() . Clicking on this button changes the word to "Primary" and the number "2" is green.
. Clicking on this button changes the word to "Primary" and the number "2" is green.
To Track the Search by the Phone Button
The clock button indicates that price and availability is currently being queried for this line.
|
|
Search could not be completed. (Check the catalog's configuration.) |
|
|
Parts are available from the supplier. |
|
|
Parts are not available from the supplier. |
Part Columns
Each part row displays information in specific columns.
| Column | This column displays the … |
|---|---|
|
Description |
Description of the part. |
|
Line code of the part. |
|
|
Part Number |
Part number. |
|
PC |
Number of pieces needed such as 2 for rear brake pads. You can edit this number by clicking in the field and entering the new number. Then, click outside the field to save the new entry. |
|
Core cost if the part requires one or if there is another core cost available. |
|
|
Cost |
Cost (if available). |
|
List |
The list price. |
|
Availability |
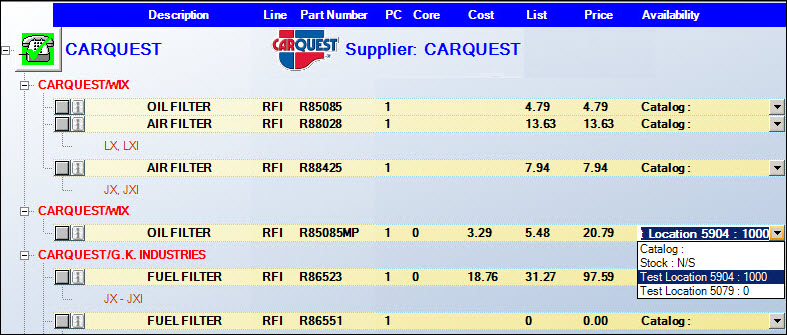
Where the item is available: Stock (your local inventory), Region, or Branch. If you have the part on hand in your R.O. Writer inventory, this column displays "Stock [# on-hand]". The on-hand value is defined as Your on-hand quantity minus the quantity committed on open repair orders, plus the quantity on-order (The quantity of that part on purchase orders not yet received.) Your on-hand quantity minus the quantity committed on open repair orders if the Ignore On Order Parts When Displaying On Hand Inventory Quantities option is selected in Configuration, the on-hand values displayed in Smart eCat is your on-hand minus the number committed. If you do not have the part in your inventory, this column displays "N/S". If the Region or Branch has it available for you to order online, the store will show the quantity available. You can change the where you order the part from by selecting catalog, store, or Stock in the dropdown list. The core, cost, and list price change and the price is recalculated to match the new location. If you click on the core, cost, list, or price, you also get a dropdown list with the options available to select from. |
Part Buttons
Buttons appear with the part:
- Click
 to select the part for posting or ordering. A red check appears in the box
  to indicate that it is selected.
 - Click
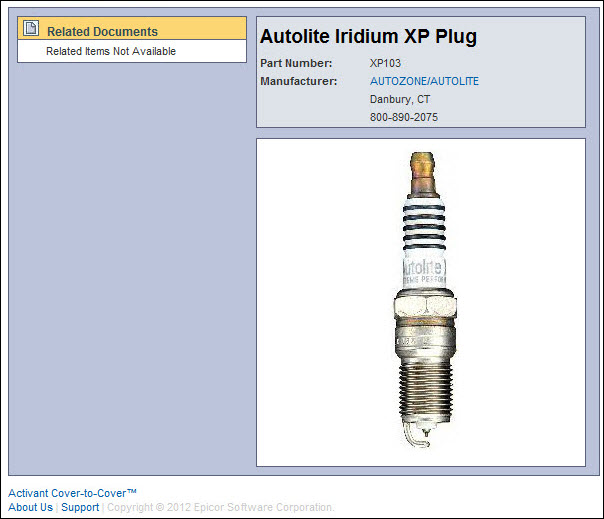
 to view Epicor or NAPA Cover to Cover information for this part.
If the Use Supplier Information in Favor of Cover to Cover option is selected in Smart eCat configuration, these buttons appear when supplier information is available:
Click to see that information:
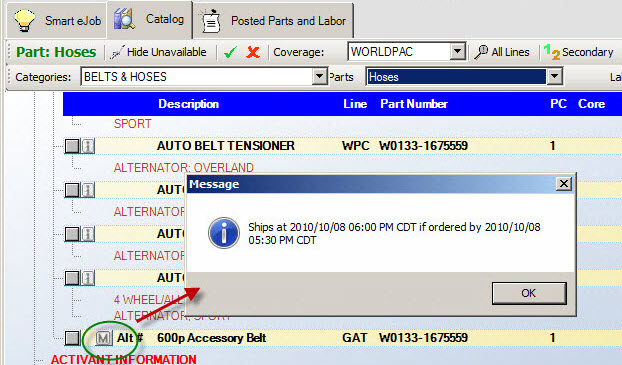
If vendor messages are available, ![]() appears.
appears.
If exhaust diagrams are available, a D appears. Click it to see those diagrams. Exhaust diagrams are extracted during the Epicor data load.

Miscellaneous
Alternate part numbers are flagged before the description with "Alt #" and the part is outlined in a white box which makes it very easy to tell the difference between an alternate number and a non-alternate part numbers.
Selecting any other option automatically will change all the other fields to match. For example, if you had multiple stores and wanted to select the lowest cost, you could click on the cost and click the lowest one.
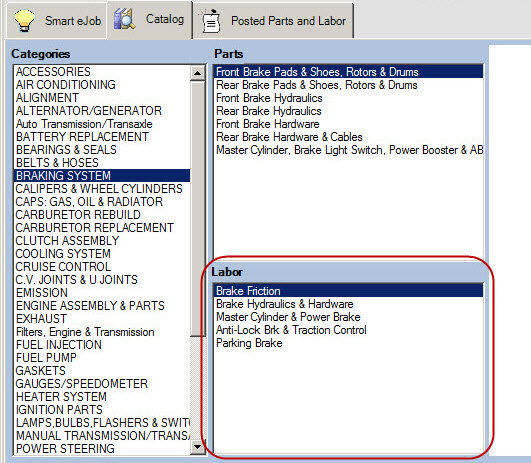
Labor Catalog
To post labor using Smart eCat, click on the ![]() button from an open estimate or repair order.
button from an open estimate or repair order.
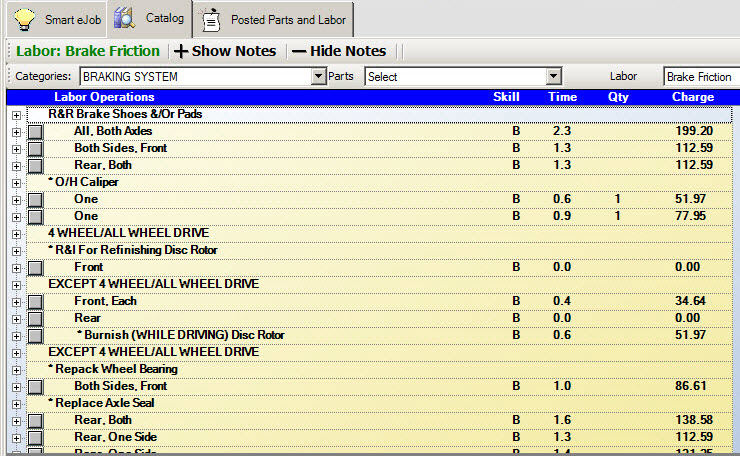
Select the Category and then double-click on the sub category under labor.
You may need to answer one or more vehicle condition questions. The answers you select will be saved the next time you access Smart eCat for this vehicle. You can edit the answers under edit vehicle, Epicor tab from the repair order or estimate (see Saving Epicor Vehicle Specs).
Labor Notes
You can collapse or expand the notes for each job by clicking the + sign to expand or the - sign to collapse.
To show notes for all jobs, click the ![]() button.
button.
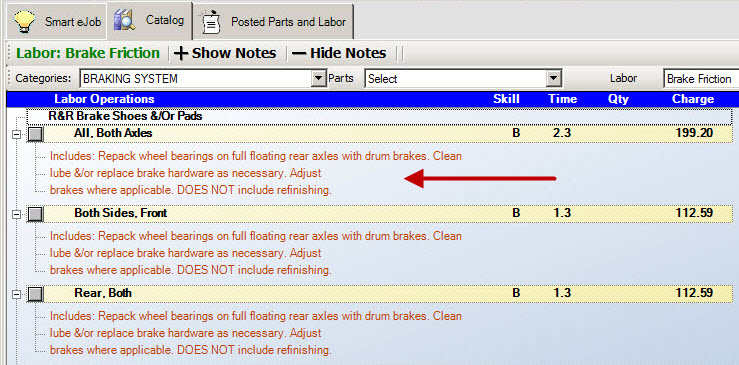
To hide notes for all jobs, click the ![]() button.
button.
Selecting and Posting Labor
Click ![]() to the left of the Job Description to select this job. A red check appears in the box
to the left of the Job Description to select this job. A red check appears in the box ![]() to indicate that it is selected.
to indicate that it is selected.
Click ![]() to add the selected items to the Posted Parts and Labor tab but stay on the Catalog tab.
to add the selected items to the Posted Parts and Labor tab but stay on the Catalog tab.
Click ![]() to add the selected items and move to the Posted Parts and Labor tab.
to add the selected items and move to the Posted Parts and Labor tab.
Posted Parts and Labor Tab
When labor and parts are posted, you can view them by clicking the Posted Parts and Labor tab. You can then order the parts and post the ticket from this tab.
Parts Tab
If you wish to delete a part from the posted parts and labor tab, click on the gray area before the part number to highlight the entire line and press the Delete key on the keyboard.
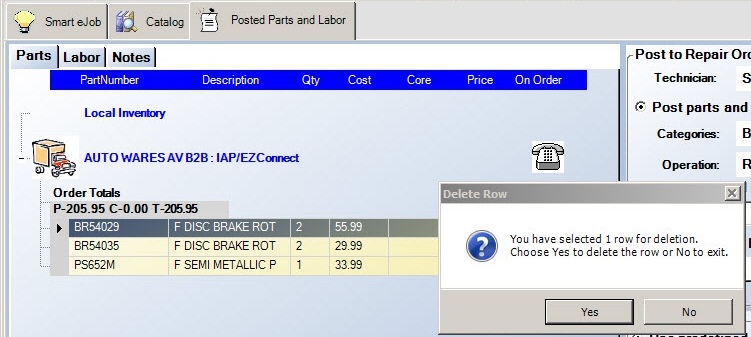
Answer Yes to the prompt, "You have selected 1 row for deletion. Choose Yes to delete the row or No to exit".
You can delete multiple rows by clicking on the gray area of the first part and holding down shift while clicking on the gray area of the last part if the parts are next to each other. If the parts are not next to each other, click on the gray area of the first part and hold down CTRL while clicking on the gray area of the other parts you wish to delete.
Items available to order online will have a truck button. Clicking on the truck button will order the part(s) online and post an accounts payable invoice if the option is set up as Prompt or Always in PO Transfer and Other Parts Options and the supplier you are ordering from is set to Post Orders to AP under Edit Suppliers.
If you did not purchase the Accounts Payable module, and the supplier is set to Post Orders to AP under Edit Suppliers, an invoice will not be posted but a confirmation number will be posted to the ticket in the invoice field. If this option is not set, no invoice number will be posted to the ticket.

When parts have been ordered the On Order box is checked.
When the parts are posted to the repair order, the To Order box is unchecked and the invoice number is posted.
If you do not want to order the parts now in Smart eCat, you can still post the parts to the estimate or repair order. The To Order box will be checked and you can order the parts at a later time.
Labor Tab
If you wish to delete a labor job from the shopping cart, click on the gray area before the labor description to highlight the entire line and press the Delete key on the keyboard.
You can delete multiple rows by clicking on the gray area of the first labor job and holding down shift while clicking on the gray area of the last labor job if the jobs are next to each other. If the jobs are not next to each other, click on the gray area of the first labor job and hold down CTRL while clicking on the gray area of the other labor jobs you wish to delete.
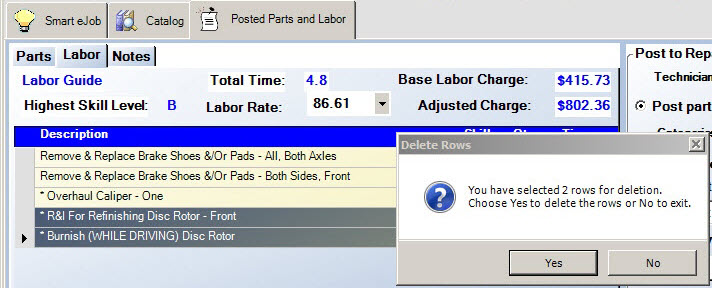
Answer Yes to the prompt and the selected lines no longer appear.
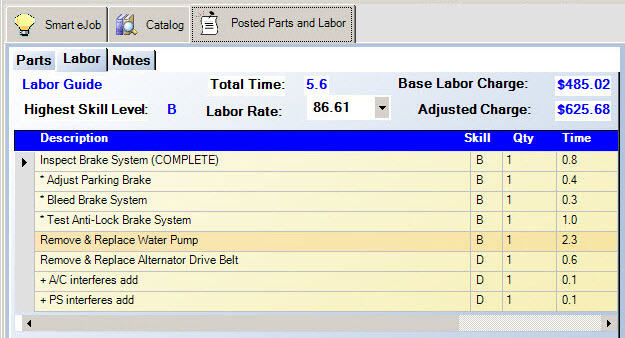
If there are multiple jobs posted, the system will use colors and shading to define groups of labor jobs that will be posted as one labor job to the repair order or estimate when the option "Add individual parts and labor to invoice".
In the above example, the first 4 labor jobs are all shaded the same color and will post as a group to one labor job. The Remove & Replace Water Pump is shaded a different color indicating that this job will post to a second labor job on the ticket. The last 3 jobs are all shaded a different color and they will post as a group to a third labor job on the ticket.
Other Labor is used with Smart eJobs. The total time at the top and the labor prices in the lower right hand corner do not include Other Labor.
The Labor Description, Skill, Qty and Time fields can be edited.
When posting labor, the highest skill level will be used to determine the labor rate; however, the labor rate can be changed using the dropdown list by the labor rate. The Total Time of all labor jobs in the shopping cart is also shown.
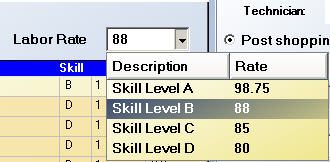
These labor rates are set up in the Configuration module.
You can select a Technician using the dropdown list.
Notes Tab
The Notes Tab contains catalog specifications or Epicor part specifications that are posted. These notes transfer to the repair order or estimate in the labor description.
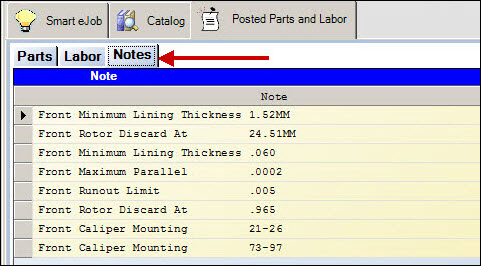
You are able to delete a full line by highlighting the entire row by left clicking once on the gray bar at the far left of each line and pressing the delete key.
Posting Options on the Right Side of the Window
The options on the right side of the window, determine how the part is connected to labor operations on the open ticket.
Posting the Part to Labor Operations
You have many options to post labor. This will default to the option you selected in Smart eCat Configuration under Options.
| Section | Option | Select this option to… |
|---|---|---|
|
|
Post Parts and Labor to a New Job |
Post the parts and labor to a new job that is not currently on the ticket. The dropdown list contains all labor categories and operations. Select the labor Category (required) and Operation (optional). |
|
Post Parts and Labor to an Existing Job |
Post the parts and labor to a job that is currently on the ticket. The dropdown lists contains only jobs on the open ticket. Select the job in the dropdown list. |
|
|
Add Individual Parts and Labor to Invoice |
Add the parts and labor as separate lines. Use this option if the jobs listed are not included in the same labor operation. Each part is added as a separate item. All labor jobs are grouped together. |

The selection under Labor Operations determines how the description appears on the Parts/Labor Tab.
Labor Options - Customize the Description of the Labor Operation on the Open Ticket
These options determine how the labor operation descriptions appear on the Parts/Labor Tab.

NOTE: A default option is chosen in Smart eCat Configuration under Options.
Smart eCat Best Practices
Watch the video below to see an overview of this functionality.