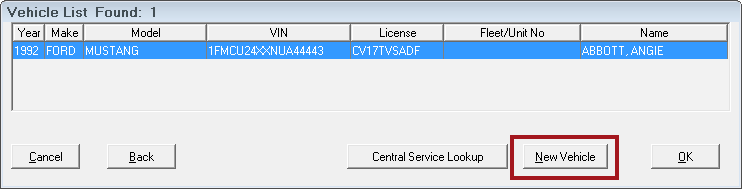
The most common way to enter a new vehicle is during customer intake. You create the new vehicle by clicking New Vehicle on the Vehicle List window that comes up after you select the customer.
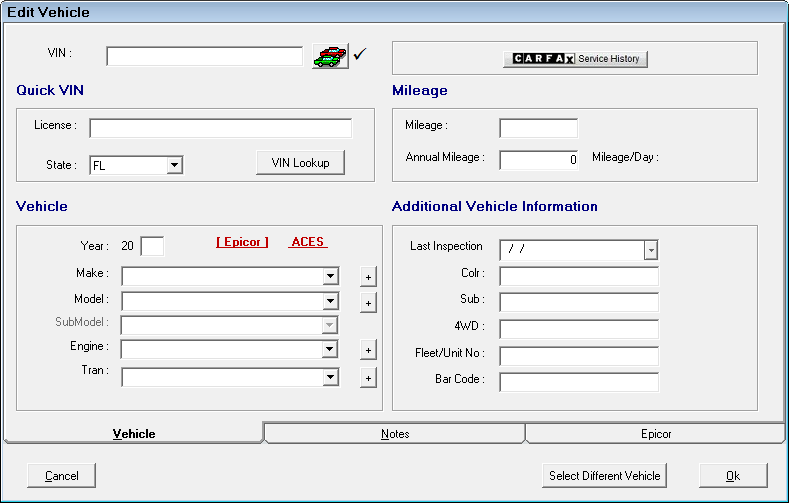
The Edit Vehicle window opens to the Vehicle tab.
R.O. Writer supports both Epicor Integration and ACES vehicle information.
Video Overview of Vehicle Options
Watch the following video to see customer entry options.
Title Bar
The title bar displays
- “Edit Vehicle” for new vehicles.
- The default year, make, model, and engine information for existing vehicles.
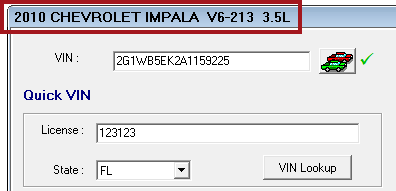
- If Epicor is installed and configured, the title bar displays the Epicor vehicle information.
- If Epicor is NOT installed and configured, the title bar displays the ACES vehicle information.
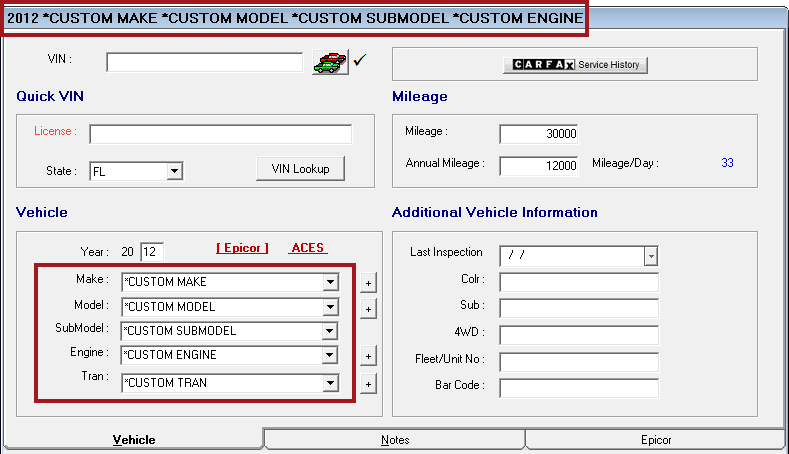
- If custom vehicle information is saved, the title bar displays the custom vehicle information. An asterisk appears before each piece of vehicle information.
NOTE: The title bar of the Edit Vehicle window always matches the vehicle in the vehicle section of the Parts/Labor tab. These rules about Epicor, ACES, and custom vehicles apply. 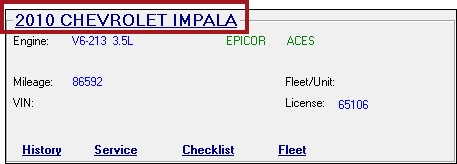
Edit Vehicle Tabs
There are three tabs to each vehicle record:
- Vehicle Tab where you enter the most important vehicle information such as year, make, and model as well as license plate and mileage.
- Notes Tab where you enter any notes about the vehicle.
- Epicor Tab where you can review Epicor settings (active only if Epicor is installed and configured).
Vehicle Tab
The vehicle record opens to the Vehicle tab, which contains the most important information about the vehicle.
The Vehicle tab contains the following sections:
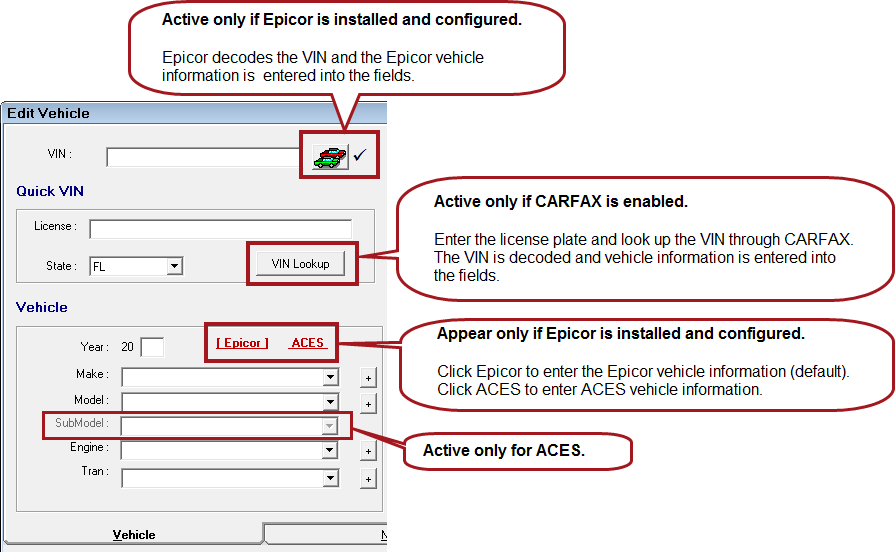
- VIN (Epicor VIN Decode) - Active only if Epicor is installed and configured.
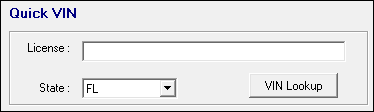
- Quick VIN
- License and State are entered manually.
- QuickVIN Lookup - Available only if CARFAX is active.
- Vehicle Information
- CARFAX Service History Button
- Mileage
- Additional Vehicle Information
Vehicle Information
The left side of the Edit Vehicle window provides you with the tools you need to enter the most accurate vehicle information.
In the Vehicle section, you can always select vehicle information manually. However, if you have Epicor and/or CARFAX installed and configured, you can use those automated tools to enter the vehicle information automatically.
The items in the vehicle dropdown lists depend on your configuration. If Epicor is installed and configured, Epicor is the default vehicle information. If Epicor is not installed and configured, ACES is the only vehicle information in the dropdown lists.
- To Enter Epicor Vehicle Information (There are several ways to enter Epicor vehicle information.)
- To Enter ACES Vehicle Information
- To Enter Custom Vehicle Information
To Enter Epicor Vehicle Information
If Epicor is installed and configured in R.O. Writer, the following occurs:
- The VIN decoder at the top of the window is available and active.
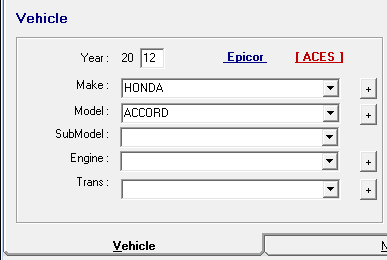
- Two links appear in the Vehicle section: Epicor and ACES.
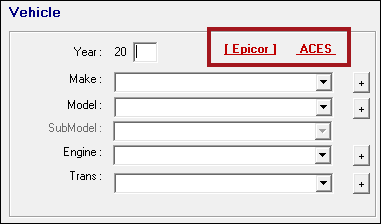
- The Epicor link is selected by default. The dropdown lists are updated by the vehicle tables in your database.
- You need to update R.O. Writer's vehicle tables with Epicor data regularly.
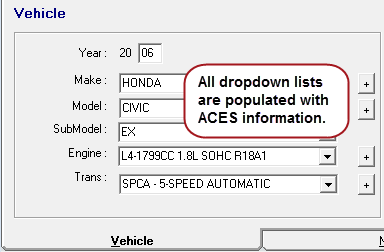
- When the ACES link is selected, the dropdown lists are populated with ACES vehicle information.
- The Epicor link is selected by default. The dropdown lists are updated by the vehicle tables in your database.
- Click these links to toggle between Epicor and ACES information for the same vehicle.
- The Epicor tab is active.
To Decode the VIN via Epicor
The  button after the VIN field is active only if Epicor is installed and configured.
Complete these steps:
- Enter the VIN. You can type in the VIN or scan it in with a bar code reader.
-
When a VIN is in this field, Epicor immediately begins validating the format of the number. Only 17-digit VIN numbers can be valid.
-
 means the VIN code is valid.
-
 means the VIN code is invalid.
-
-
Click the cars
button. If the VIN is found in the Epicor database, the Vehicle information is populated with Epicor vehicle information automatically. 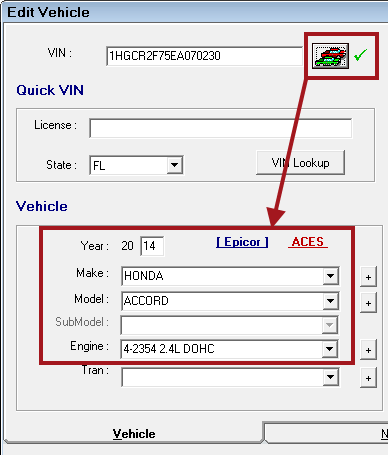
Epicor returns the Year, Make, and Model, and most often the Engine.
- If the Engine does not return, R.O. Writer recommends selecting the engine.
- The vehicle is validated for Epicor when the engine is selected.
- The Epicor link turns
Epicor does NOT return
- The Sub-Model. This field is inactive for Epicor.
- The Transmission. This is a static dropdown list with only two options: AUTO or STD.
Select AUTO or STD manually. - License plate information. You need to enter the license plate manually.
-
The VIN is checked against VIN numbers already stored in your database. If a duplicate is found, the following prompt appears.
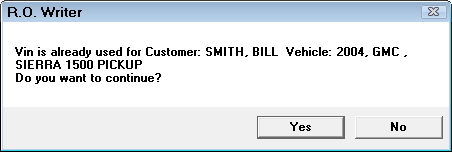
- Click Yes to use a duplicate VIN (not recommended!).
Click No to enter a new VIN.
To Enter Epicor Vehicle Information Manually
When the Epicor link is selected, the dropdown lists are populated by your database, which needs to be updated with Epicor information regularly.
Complete these steps:
- Type in the last two digits of the year in the Year field. The Make dropdown list is updated with makes available for that year.
-
Select the Make. The Model dropdown list is updated with the models for the make and year.
-
Select the Model. The Engine dropdown list is updated with engines for the model, make, and year.
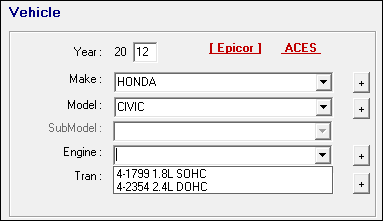
- Select the Engine.
The vehicle is validated for Epicor when the engine is selected.
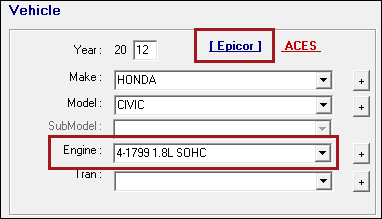
- The Epicor link turns
- Vehicles are not valid for Epicor until the engine is selected.
- Epicor validation has no impact on ACES validation.
- Select the Trans(mission): AUTO or STD.
-
At this point, you can
-
Click OK to save and close the Edit Vehicle window.
-
Enter the rest of the information for the vehicle and then click OK to save and close.
-
- The Epicor vehicle information displays in the Vehicle Section of the Parts/Labor tab.
The next time you open the Edit Vehicle window, the Epicor information displays in the title bar.
To Look up the VIN by License Place - CARFAX QuickVIN Lookup
If CARFAX is included in your license, the Quick VIN section is active. You can enter the license plate number and submit it to CARFAX, which decodes the license plate to the VIN and enters the vehicle information into the fields.
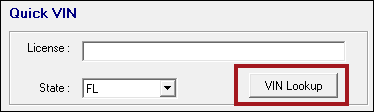
Enter the License plate and
- Click the VIN Lookup button to search CARFAX for the VIN by the license plate number. For details, click the following link: QuickVIN Lookup.
QuickVIN works with both Epicor and ACES; however, the VIN can be decoded only to Epicor vehicle information. If Epicor is not installed, the information from CARFAX is entered and the vehicle information is saved as a custom vehicle.
To Enter ACES Vehicle Information
If Epicor is installed and configured, you need to click the ACES link to enter ACES vehicle information. When you click the ACES link,
- Brackets appear around “ACES” to indicate that it is currently selected.
- The content of the dropdown lists changes to ACES vehicle information.
- If Epicor vehicle information has already been validated, R.O. Writer tries to enter the Year, Make, and Model fields based on the Epicor information.
If Epicor is not installed and configured, ACES is the only vehicle information available on the window. The vehicle dropdown lists are populated with ACES information automatically.
For more information, click the following link: ACES Vehicle Information.
To Enter Custom Vehicle Information
Custom vehicle information
- Is not associated with Epicor or ACES.
- Appears with asterisks (*) before the year, make, model, sub-model, and engine on the Edit Vehicle window in the title bar and Vehicle fields.
- Appears without asterisks in the Vehicle Section of the Parts/Labor tab.
However, “EPICOR” or “ACES” will never appear because custom vehicles are never valid for either one. - Cannot be read by Smart eCat, the integrated online catalogs, and integrated repair lookups.
The custom vehicle information is sent; however, the catalogs and repair lookups cannot read it as vehicle information in their systems. This means that if you want to search by vehicle, you need to select the vehicle in their windows.
Complete these steps:
- Type in the last two digits of the Year field.
- Type in the Make instead of selecting it in the dropdown list.
- Type in the Model instead of selecting it in the dropdown list.
- If the Sub-Model field is active, type it in instead of selecting it in the dropdown list.
- Type in the Engine instead of selecting it in the dropdown list.
- Type in the Trans(mission) instead of selecting it in the dropdown list.
- At this point, you can
- Click OK to save and close the Edit Vehicle window.
- Complete the other items on the window and then click OK to save and close.
The next time you open the Edit Vehicle window for this vehicle, the items in the dropdown lists will have an asterisk before them.
To Convert Custom Vehicles to Standard Vehicles
You can convert custom vehicles to standard vehicles - both Epicor and ACES - by selecting information in the dropdown lists that do NOT have an asterisk (*). Then, click OK to save your changes.
License and State
The License and State fields
- Appear in the QuickVIN section.
- Must be entered manually.
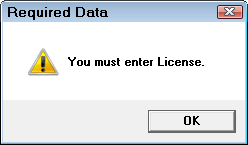
R.O. Writer Configuration has a required setting on the License field. If set to warn or required, the License field label is red.
If set to warn you,
- When you try to finalize the repair order, the prompt saying that some items need to be corrected appears.
- The Edit Vehicle window opens with a red, blank License field to indicate to you that you should enter the license.
If set to required,
- When you try to finalize the repair order, the prompt saying that some items need to be corrected appears.
- The Edit Vehicle window opens with a red, blank License field to indicate to you that you should enter the license.
- A prompt appears letting you know that the license plate number is required and you will not be able to finalize until it is entered.
CARFAX Service History Button
Click the CARFAX Service History button to obtain a service history report for the vehicle. You must first enter either a valid VIN or License and State on this window; otherwise, CARFAX has no information to search.
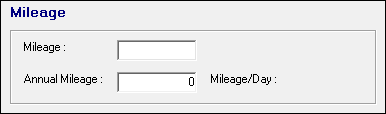
Mileage
The Mileage section helps you manage vehicle mileage.
| Field | Description |
|---|---|
|
Mileage |
You can type in the mileage. You may be prompted for the mileage when creating and/or finalizing a repair order. Tracking mileage is especially important when using the Mileage In/Out feature. |
|
Annual Mileage and Mileage/Day |
Annual Mileage is a data entry field. Mileage/Day is a calculated field that you cannot alter. If this is a new vehicle, the following information is entered by default when you click OK to save the vehicle information:
When mileage in and out is consistently entered over time, these numbers become more accurate. The Annual Mileage is used when setting up shop codes for Marketing by Mileage in the Marketing/Followup module. |
Additional Vehicle Information
These fields enable you to enter and track even more vehicle information.
| Field | Description |
|---|---|
|
Last Inspection |
Enter the date of the last inspection. |
|
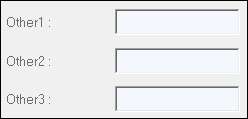
User Defined |
These fields appear with whatever names have been entered in the Vehicle Field Names setting in Configuration. If no names have been entered, these fields appear as follows: These fields appear on the printed repair order and invoice. |
|
Fleet/Unit No |
Enter the fleet or unit number if relevant to your business. |
|
You can associate a bar code with the vehicle. This enables you to create a new repair order for the customer and vehicle just by scanning the customer's loyalty card or ID. To enter the UPC of the bar code: Type the numbers into the Bar Code field OR Place the cursor in the Bar Code field and scan the customer's loyalty card or ID until the numbers appear. NOTE: The bar code is associated with the vehicle and not the customer because customers can have multiple vehicles, but a vehicle can be associated with only one customer. Saving the bar code to the vehicle makes sure R.O. Writer knows what vehicle to select for the repair order. (Repair orders cannot be created without a vehicle.) |
Notes Tab
Enter any information you want to associate with the vehicle record.
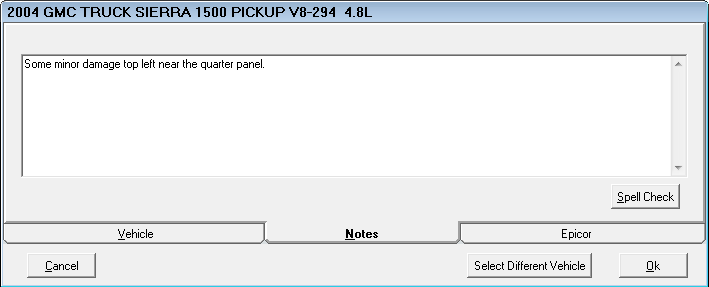
Use the Spell Check button to check the spelling of your notes.
This information that appears here also appears in the Vehicle Notes section of the Notes Tab as well. When information is added or edited here, it appears there automatically and vice versa.
TIP! This information does not print on tickets.
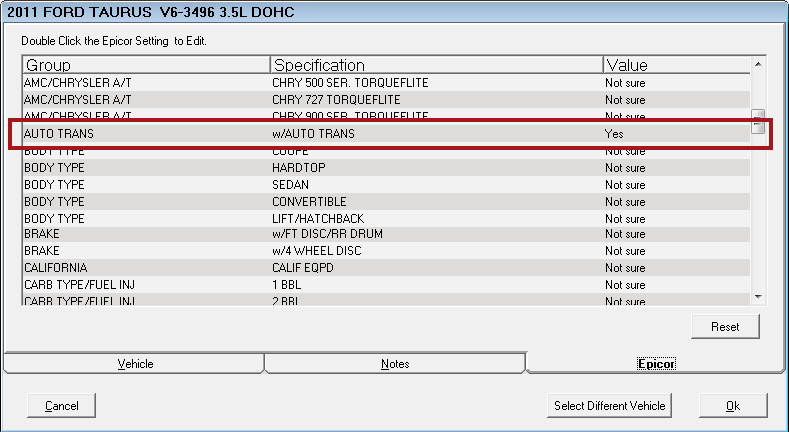
Epicor Tab
The Epicor tab is active only if Epicor is installed and configured. It displays the answers to the Specific Condition Questions that pop up for the vehicle in Smart eCat. You can edit those answers here.