Central Office Server Installation
The Central Office computer should be a different computer than the store computer even if they are at the same physical location.
When installing Central Office, a copy of each store’s database and license is required to complete the installation of the Central Office Server site. Before beginning the process, plan a strategy for collecting all files such as a zip drive or a read/write CD or DVD drive.
Ensure you are logged in as an administrator and run the Central Office installation file you saved (example: CentralOffice1.25.exe).
Complete these steps:
- Double-click the EXE and the Setup Wizard opens.
- Click Next through the Setup Wizard.
- When the Installation Type window opens, select Server.
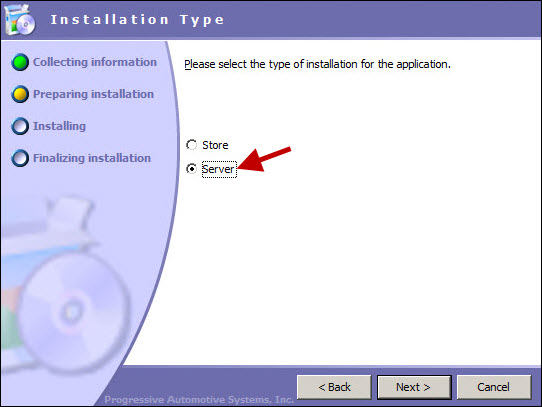
- Click Next and use the Default Settings.
- When installation is complete, the final window appears.
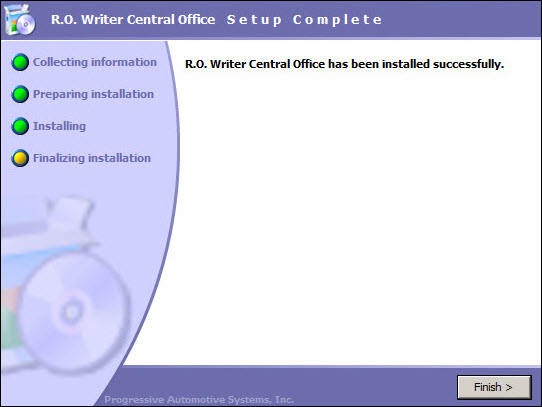
- Select Finish to exit.
Configuring the Central Office Server
When the Central Office Server has been installed, you must configure the stores and clients and the transmit information. R.O. Writer Central Office utilizes FTP (File Transfer Protocol) to pass information between the stores and the office. It is necessary to have internet access and FTP space in order to run Central Office. Most ISPs (Internet Service Providers) will provide a limited amount of FTP space along with an internet access account. It is recommended that a minimum of 2 MB (megabytes) of FTP space per store be established for normal Central Office operation.
The Central Office Setup Stores configuration requires an existing, unique database for each store that is set up. For new installations, copies may be made of the default database, and the copies renamed for each store location.
If all installations already have R.O. Writer installed and have been using the product, or have had old databases converted to R.O. Writer,you must have copies of the existing database from each store as well as a copy of the store’s license diskette. The client installation will create a copy of each client site’s database (see Central Office Client Installation).
Copy the Default Database to Each Store Location
For every new installation, R.O. Writer installs a blank database called ROWriter.mdb. In a new installation of R.O. Writer that involves Central Office, with all stores having the same, or very similar configurations, it means they have the same defaults settings. As a result, it is much easier to configure the Central Office Server site prior to the installation of the stores, and configure the database.
When configured, copies may be made of the configured database and populated to the stores. In this manner, the configuration process will only have to be performed once.
Complete these steps:
- On the desktop, right-click on the My Computer button and select Explore. The window divides: folders display on the left and the selected folder's content displays on the right.
- On the left side click on the + on the left of Local Disk (C:)
 .
. - If R.O. Writer was installed in C:\ROWriter instead of C:\Program Files\ROWriter, skip this step. If not, access the Data folder (C:\Program Files\ROWriter\Data). The contents of the Data folder display on the right side.
- Locate the ROWriter.mdb file. If the View settings on the computer are set to hide file extensions for known file types it may only read as ROWriter.
- Right-click on the ROWriter.mdb file. Select Copy from the menu that appears. There is no visible indication that anything has been copied but the ROWriter.mdb file has been copied.
- On the left side of the window, right-click on the Data folder. Select Paste on the menu that appears. A new file named "Copy of ROWriter.mdb" (
 ) is created in the Data folder.
 - Repeat the copy and paste process for each store location. It is recommended that one database be established for training for testing purposes without affecting the stores.
- Each database needs to be renamed to something meaningful that identifies the store where it's going to be used. To reduce the likelihood of errors and confusion, use each store’s number in the file name.
- To rename a file, locate the file on the right side.
- Right-click on file name and select Rename from the menu. The file name is outlined with a box with the name highlighted (
 ).
). - Type in the new name. If a file extension is shown, include it with the name. When the new name has been entered, left-click the blank space next to the file name to de-select the file. Complete the renaming.
- The next step is to set up multiple databases and add each store database. This is done in the Configuration in Configuring Multiple Databases.
Central Office Server Setup
Open Central Office.
Click Setup and the Central Office Setup window opens.
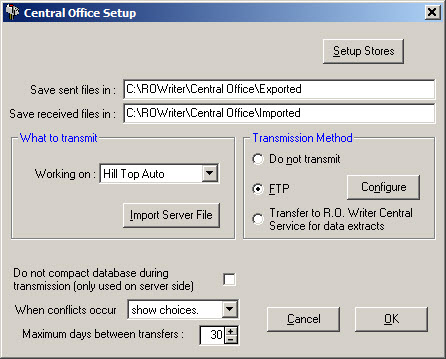
Verify that the Sent files and Received file folders are correct.
FTP - Configuring FTP for the Client
For proper operation of the program, the Central Office Server and all Central office clients must be transmitting to the exact same FTP address with the same parameters. It can cause the program to not function as intended if the FTP server information, Listing type, Connect type and Transfer type do not match at the server and the store.
You need to obtain your FTP login credentials prior to configure your FTP connection.
Complete these steps:
- In the Transmission Method section, select the FTP option and click the Configure button. The FTP Setup window opens.
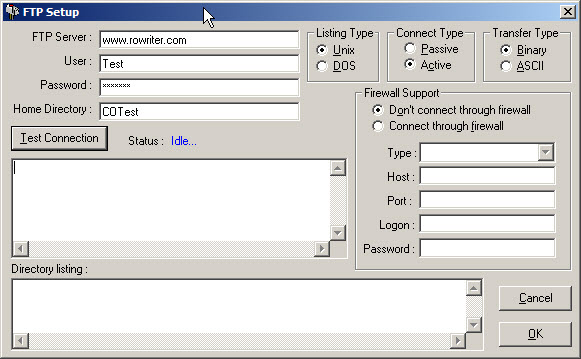
- Enter the following from your FTP provider:
- FTP Server address
- User name
- Password
- Listing Type - Unix or DOS
- Connect Type - Passive or Active
- Transfer Type - Binary or ASCII
- Make sure you are connected to the internet.
- Verify the FTP connection by clicking the Test Connection button. You should see the following status:
- The Status field says "Success!" and the Directory listing window lists the files. The filenames for Central Office are 20 characters made up of the following information:
- 1st digit = for Store or C for Central office
- Next 7 = Store number as specified in the setup window.
- Next 6 = Time the file was made in HHMMSS format.
- Next 6 = Date the file was made in MMDDYY format.
- The compressed file extension is always a .ZIP and contains up to two files:
- One contains the store name, all the transmit information, and an extension of .MDB.
- If you are using the Accounting Interface module, there is an .IIF file as well.
- When the connectivity has been verified, Central Office configuration is complete and the program is ready to use.
- Click OK to exit FTP configuration.
- Click OK on the Central Office Setup window and you are returned to the Central Office Client.
Import Server File
When the clients are installed (Central Office Client Installation), a server file is exported.
From the Central Office Server Setup window, select the store for which the file is being imported from the dropdown list, and select Import Server File.
Browse to the removable media on which the file is stored, and select the file. This will import the file into the Central Office Server.
WARNING!: Ensure the correct store is showing in the Working on window, before selecting Import Server File and then ensure the correct data file is selected. If you import one store’s database into another store, it will overwrite the data.
Transfer to R. O. Writer Central Service for Data Extracts
Select this option to allow data to transfer to Central Service. This option works like the Do Not Transmit option and creates the Accounting Interface export file (.iff) that transfers to Central Service and does not remove the IIF files from the accounting export path. This prevents shops that do not have an office to transmit to from losing their accounting export files.
When Conflicts Occur
It is possible for a store and the Central Office to update the same data. This option allows the store to select to use the store data, use the Central Office data, or to show the conflict so that the store can determine the appropriate resolution.
If the Central Office plans on entering and updating data especially updating parts pricing, the best configuration is at the Central Office location, use the setting "show choices" and at the store, use the setting "use server data". When using this configuration, ensure that at the store, you have also checked the box called "Do not overwrite critical store Inv". See Central Office Client Installation for more information on this setting.
NOTE: On the days when the Central Office transmits pricing changes to the stores, every part that was used or edited by the store will show a conflict which could take forever to resolve. It may be necessary to transmit price changes at night after all previous transmits or on Sundays when the stores are not open to avoid conflicts.
Maximum Days between Transfers
This option establishes the maximum number of days between transfers. It is the number of days deleted records are kept. The default number is 30 and most likely will not need to be changed.
If the client site is not ready to transmit and receive data from the Central Office, select "Do not transmit". If the site is ready to transmit, select FTP.