The first part of the process is to select the services and transfer the details to Smart eCat. Then, you can post services to open tickets.
NOTE: You can transfer services to Smart eCat only when you open Service Intervals from an open ticket.
There are a few steps to the process:
Step 1 – Select the Service Types
Step 2 – Select the Service Type Details
Step 3 – Transfer Selected Service Type Details to Smart eCat
- If the Service Does NOT Include Parts
- If the Service Includes Catalog Parts
- If the Service Includes Catalog and Non-Catalog Parts
Step 1 – Select the Service Types
When you click Service Intervals in the Catalogs section ![]() from an open ticket with vehicle information, you may be prompted for more information:
from an open ticket with vehicle information, you may be prompted for more information:
After the vehicle information is entered and the questions answered, the Service Intervals tab appears displaying the Service Types Window. This window displays all matching service types for the vehicle.
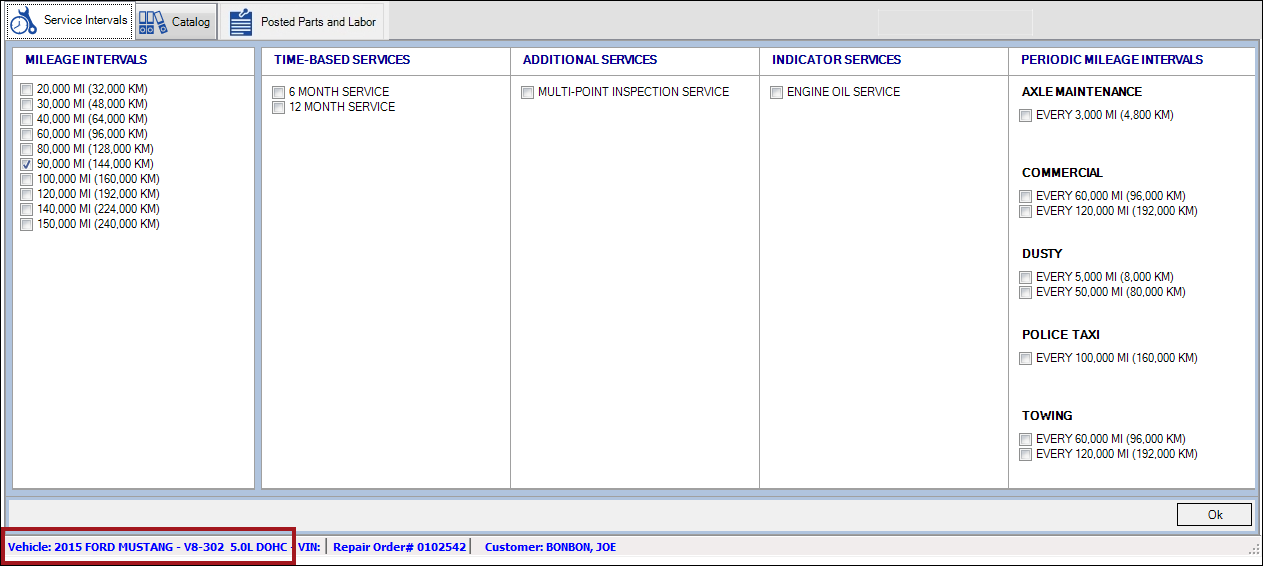
There is always one interval selected in the Mileage Intervals column based on the vehicle mileage information. Leave it checked if this is the service you want to transfer. If not, uncheck that mileage interval.
Check the services you want to transfer and click OK.
If you select multiple services, keep in mind that
- The service details will take longer to load.
- You can transfer only one service to Smart eCat at a time.
For more information, click the following link: Selecting and Posting Multiple Services.
Step 2 – Select the Service Type Details
The service type details for the selected services types appear on the Service Details Window (in the Service Intervals tab).
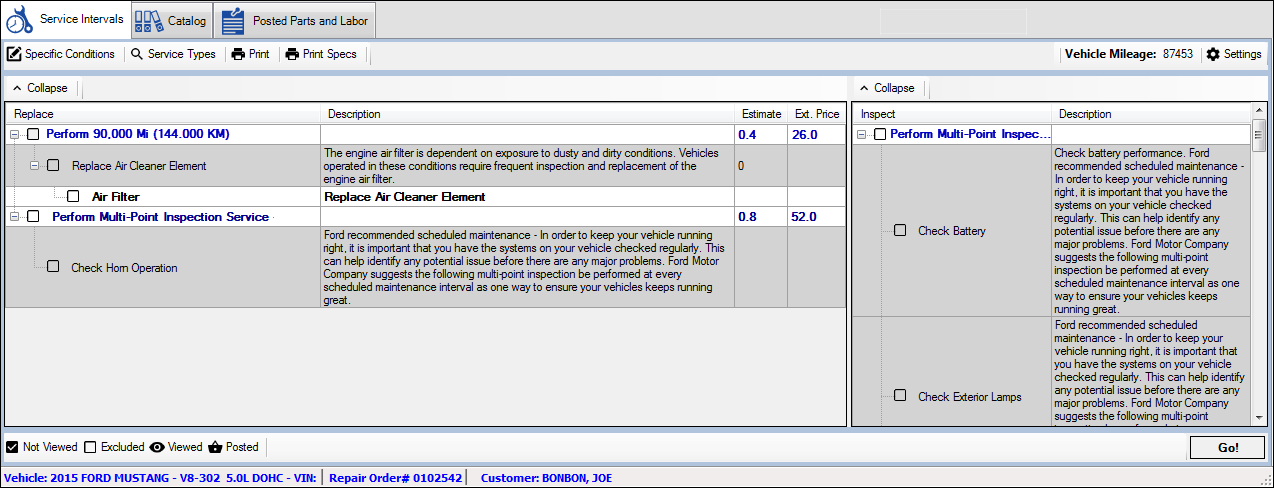
The part and labor rows are determined by Epicor and cannot be modified on this window. This means
- You cannot add or delete rows to a service. Instead, select rows to include those items and uncheck rows to exclude those items.
- You cannot move detail rows between services.
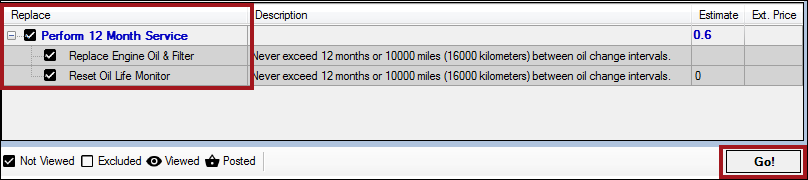
To select a service, click the checkbox of the labor row for the service. The top line and all its detail rows select.
You can select only one service at a time. If one service is selected and you select another service, the first service is unselected automatically.
This means that you can transfer only one service to Smart eCat at a time.
R.O. Writer recommends that you post one service type at a time to the open ticket as well.
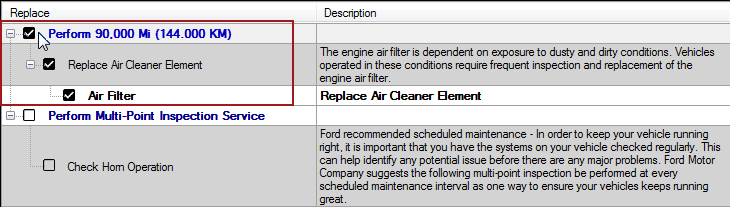
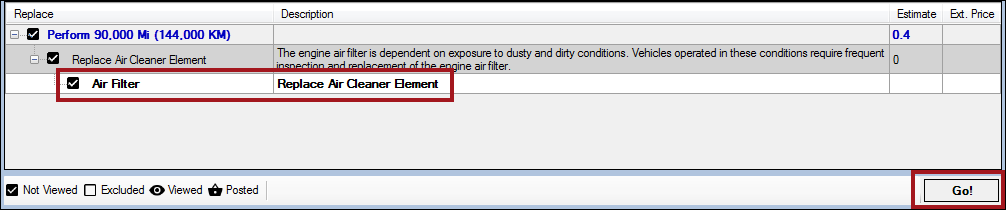
Removing Detail Lines
If you want to remove a sub-labor or part from the service before transferring, click the checkbox of the line to uncheck those items.
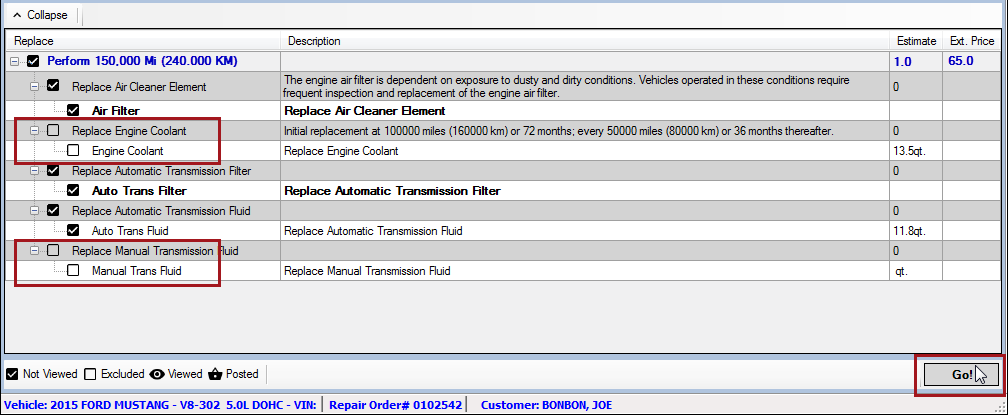
Only checked items are transferred to Smart eCat when you click Go!.
Selecting Inspection Labor
An Inspection Labor Section appears on the right side of the window when the service includes an inspection. These columns display the inspection labor in the service.
The inspection can be the name of the service, but it does not have to be. If any detail row includes an inspection, the inspection labor also appears in the inspection labor section.
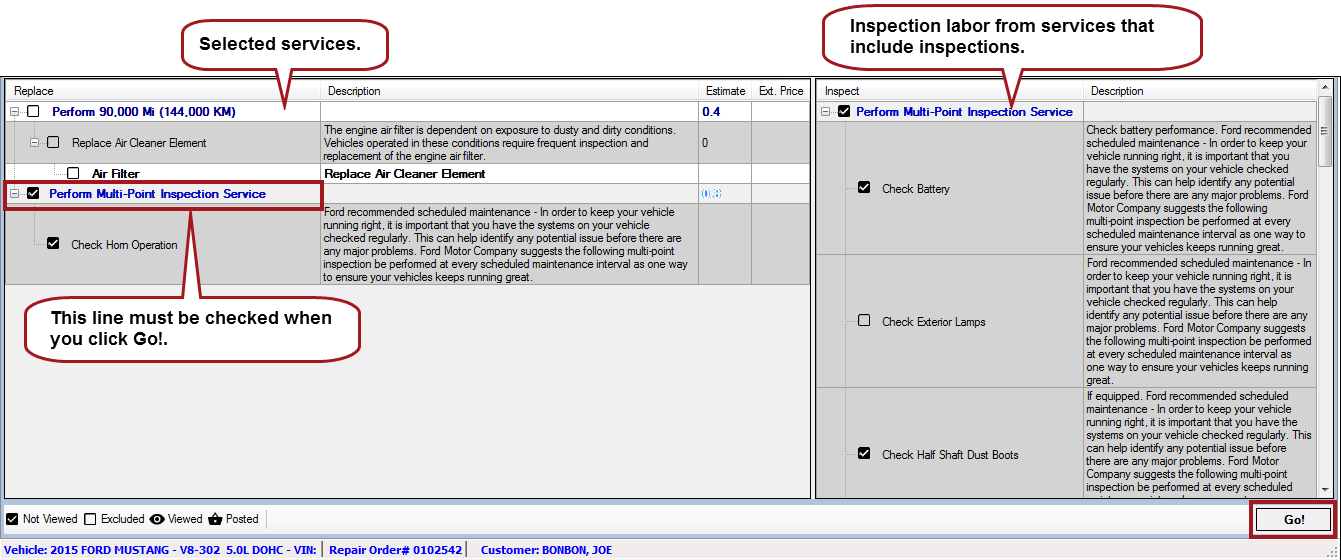
To select the inspection,
- Click the checkbox of the labor row for the service in the left column. This selects the all inspection labor on the right automatically.
- Uncheck and recheck the inspection labor on the right. Only checked items are transferred when you click Go!.
NOTE: When you select the inspection service in the right column first, it does not select the matching service in the left column.
Step 3 – Transfer Selected Service Type Details to Smart eCat
You can transfer only one service to Smart eCat at a time.
When the service type details are selected, click the Go! button to transfer the service to Smart eCat. What happens next depends on the service type details selected.
If the Service Does NOT Include Parts
If the service includes only labor, no parts lines appear in the service details section.
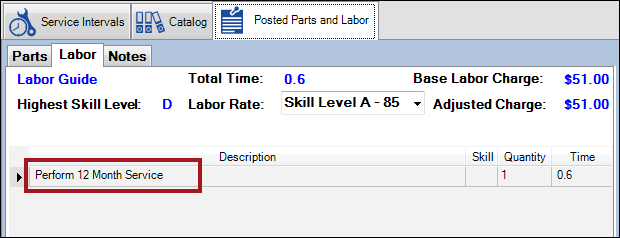
When you click Go!, the Posted Parts and Labor tab opens to the Labor tab (instead of the Parts tab). Only the 2 - Labor Row for the Service of the service displays.
For more details, click one of the following links:
If the Service Includes Catalog Parts
If the service includes 4 - Catalog Part Rows, those part lines appear in bold.
When you click Go!, Smart eCat launches a search for each catalog part.
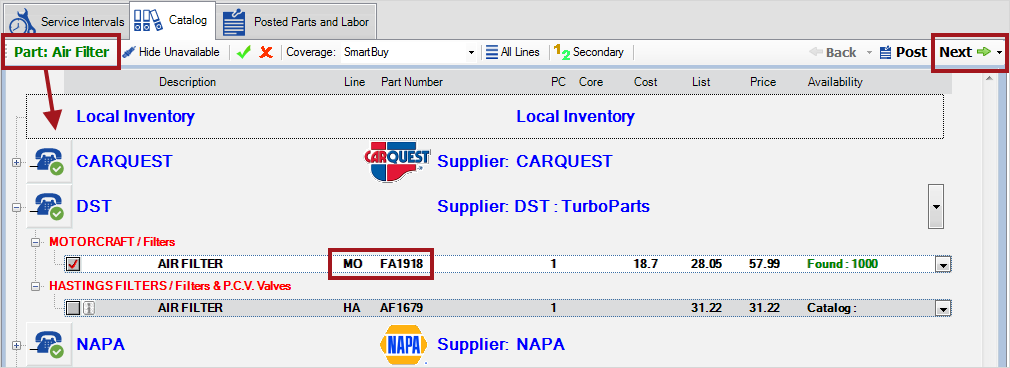
This search is the same as any search for catalog parts.
- Check the part from the catalog you want and click Next.
- If there is another catalog part, Smart eCat searches for that part automatically. Click Next.
- Continue until the Posted Parts and Labor tab opens to the Parts tab, which displays the parts from the search.
Quantity in the PC Column
The PC column displays the part quantity from the Estimate column:
- If the part had a quantity, that quantity is displayed in the PC column.
- If the part did NOT have a quantity, Smart eCat assumes the quantity is one and displays “1” in the PC column.
To change the quantity, click inside the PC column on the row and type in the new quantity.
Parts Tab
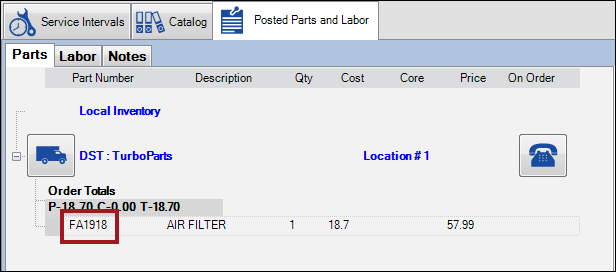
When all catalog part searches are complete, the Posted Parts and Labor tab opens to the Parts tab.
Catalog parts appear under the supplier with the supplier’s part number.
For more details, click one of the following links:
If the Service Includes Catalog and Non-Catalog Parts
If the service type detail group includes both 4 - Catalog Part Rows and 5 - Non-Catalog Part Rows when you click Go!, Smart eCat launches a search for the catalog parts. After all catalog parts are posted to Smart eCat, the Posted Parts and Labor tab opens to the Parts tab.
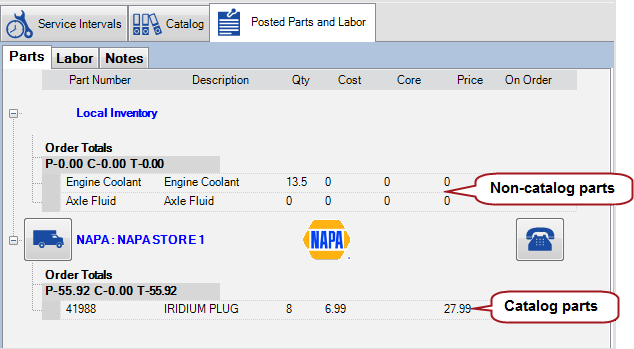
- Catalog parts appear according to the supplier selected in the search.
- Non-Catalog parts appear together under Local Inventory.
For more details about the Labor tab, see Review and Confirm Parts from the Service.
After transferring the service details to Smart eCat, the next step is to post the service from Smart eCat to the open ticket.