Only one service can be transferred to Smart eCat at a time. When a service is transferred, it appears on the Posted Parts and Labor tab:
- The parts appear on the Parts tab.
- The labor for the service appears on the Labor tab.
NOTE: If you selected multiple service types, R.O. Writer recommends that you post one service to the open ticket at a time. For details, click the following link: Selecting and Posting Multiple Services.
There a few steps to posting services to the open tickets:
Step 1 - Review and Confirm Parts from the Service
Step 2 - Review and Confirm Labor from the Service
Step 3 - Select the Posting Options
Step 4 - Select the Labor Options
Step 5 - Post the Service to the Open Ticket
See Recommended Configuration and Posting to see the posting method that R.O. Writer recommends.
Step 1 - Review and Confirm Parts from the Service
If the service includes parts, the Parts tab appears first on the Posted Parts and Labor tab.
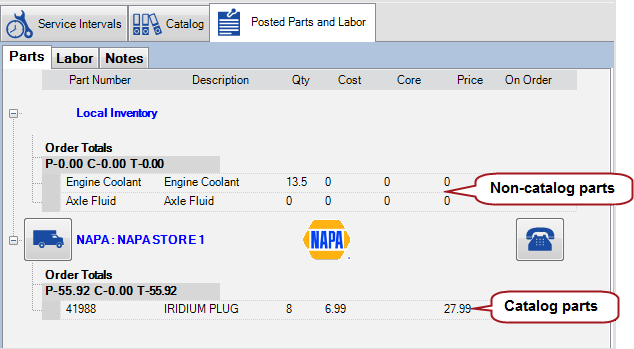
Catalog Parts
If the service includes catalog parts, Smart eCat searches the catalogs for those parts when you transfer the service to Smart eCat.
After all catalog parts searches are complete, the Posted Parts and Labor tab opens to the Parts tab. Catalog parts appear under the supplier and supplier location.
The Parts tab functions the same way it does for all catalog parts in Smart eCat. You can delete or modify parts as needed.
Check Price and Availability
Click the Phone button ![]() to check the price and availability at any time. Smart eCat connects to the supplier and checks the availability. The phone button changes to the running clock while Smart eCat connects to the supplier
to check the price and availability at any time. Smart eCat connects to the supplier and checks the availability. The phone button changes to the running clock while Smart eCat connects to the supplier ![]() .
.
If the connection is successful and the part is found,
-
The part information is updated.

- A green checkmark appears over the phone

A green
.
Quantity, Cost, and Price
The quantity, cost, and price were chosen during the catalog search.
You can change the quantity and price (but not the cost) before posting.
Order Parts
Click the Truck button ![]() to order the part before posting the service to the open ticket
to order the part before posting the service to the open ticket ![]() .
.
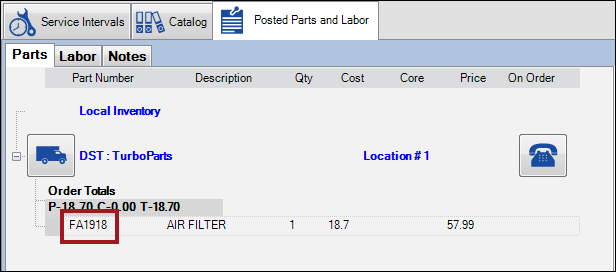
Non-Catalog Parts
If the service includes non-catalog parts, Smart eCat does not launch a search when you transfer the service to Smart eCat. Non-catalog parts are posted directly to the Parts tab.
Non-catalog parts appear under Local Inventory.
NOTE: If you found a catalog part in your local inventory during the search and posted it, the catalog part appears in the Local Inventory section with the part and supplier information.
The Parts tab functions the same way it does for all non-catalog parts in Smart eCat. You can delete or modify parts as needed.
Quantity
The Qty column displays the quantity from the Estimate Column of the top-level labor line:
- If the non-catalog part had a quantity, that quantity displays.
- If the non-catalog part did NOT have a quantity, “0” displays.
You can change the quantity here by clicking on the number in the Qty column and typing in the desired quantity.
Cost and Price
There is no cost or price information for non-catalog parts.
Step 2 - Review and Confirm Labor from the Service
When the service is transferred to Smart eCat, only the text of the labor row of the service displays on the Labor tab.
If there are no parts included in the service, the Labor tab appears first. If there are parts included in the service, the Parts tab appears first and you need to click on the Labor tab to see the labor details.
Each row is one service and displays the name of the service type selected.
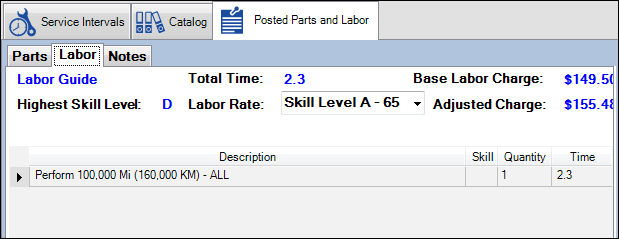
To Confirm or Select the Labor Rate
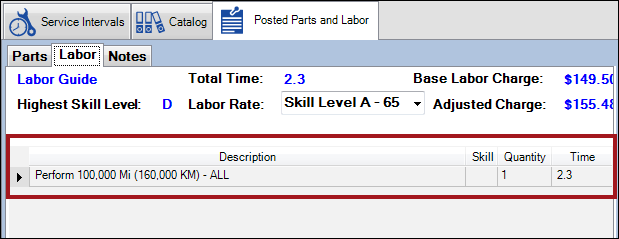
The Labor Rate selected on the Labor tab is the rate of the labor operation that posts to the open ticket for the service. This labor rate overrides the labor rate in any labor operation posted to the open ticket.
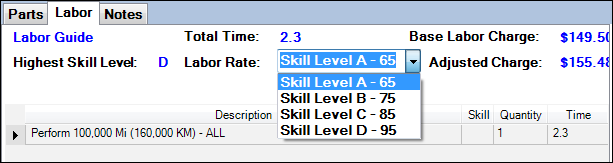
Skill Level A is selected automatically. If you determine that a different rate applies for this service, select it in the Labor Rate dropdown list.
Labor rates are established in R.O. Writer Configuration (Configuration > Configuration menu > Labor > Labor Rates).
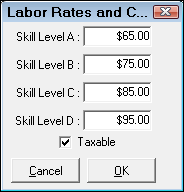
Skill Levels
Labor rates are based on skill level. Even though some labor detail rows have skill levels, the labor row of the service does not have a skill level.
Because the top-level labor line does not have a Skill Level
- Skill Level is blank for the labor line on the Labor tab.
- Smart eCat defaults to Skill Level A.
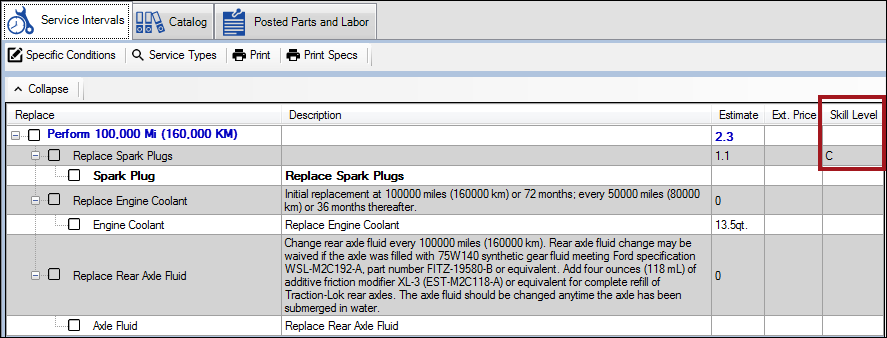
NOTE: If you would like to see the skill levels on the labor detail rows to assess the labor rate you should choose on the Labor tab, click the Service Intervals tab to see the service details. Then, click the Settings button to add the Skill Level column.
Labor Columns
Four columns appear for services.
| Column | Displays the: | Description |
|---|---|---|
|
Description |
Name of the service |
This is the same name of the labor row of the service. on the Service Details Window. The labor detail rows |
|
Skill level |
This column is blank unless you type in a value. NOTE:
|
|
|
Quantity |
Number 1 |
One is the default value for labor in Smart eCat. You can change the quantity. When you change the quantity, the times and charges are multiplied by that number. For example, if you change one to two, all times and charges are doubled. This value does not come from Epicor. |
|
Total time for the service |
This is the time in the Estimate column of the service labor. This time becomes the Billed Time on the posted labor operation. For details, click the following link: Additional Columns for Service Details. |

Step 3 - Select the Posting Options
Services include labor and often parts. These options determine how the labor and parts are posted.
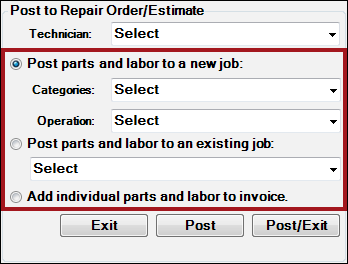
There are three options:
- Post Parts and Labor to a New Job (Recommended)
- Post Parts and Labor to an Existing Job
- Add Individual Parts and Labor to the Invoice
Post Parts and Labor to a New Job (Recommended)
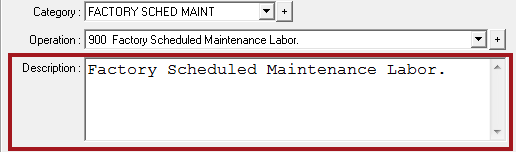
When you select this option, you need to select the category and the labor operation in the dropdown lists.
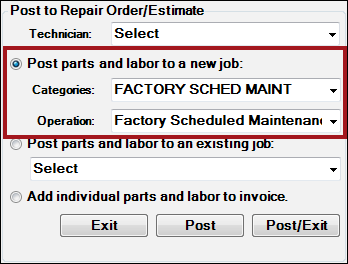
If you have Set the Default Labor for Service Intervals, this option, the category, and the operation are already selected with the Posted Parts and Labor tab opens. You can change the category and operation if desired.
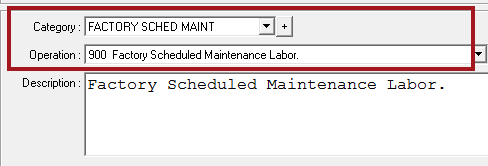
When the service posts, this is the category and labor operation on the Edit Labor window.
What appears on the labor line of the Parts/Labor tab and in the Description box depends on the labor options you select in Step 4 - Select the Labor Options.
NOTE: The Labor Rate that appears on the Labor tab and posts to the ticket is not the one set in the labor operation. For details, click the following link: To Confirm or Select the Labor Rate.
Post Parts and Labor to an Existing Job
When you select this option, you must select the job in the dropdown list.
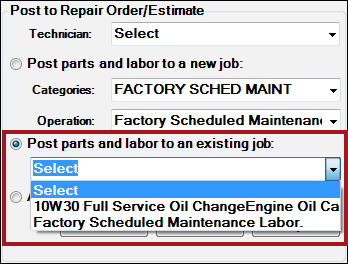
- Only jobs already posted to the open ticket appear in this dropdown list.
- All jobs are included, not just service intervals.
- The name that displays in the dropdown list is the name that displays on the labor line of the Parts/Labor tab.
Be careful! When selecting this posting option, pay close attention to the labor options you select. If you select Replace Predefined Description (Recommended), the existing job is replaced by the new job.
Add Individual Parts and Labor to the Invoice
When you select this option, parts, and labor post separately.
- Labor is one labor line with the name of service on the Labor tab.
- No category or operation is selected for the service. You need to add both.
- The labor detail rows are posted to the Description regardless of the Labor Option selected.
- All parts - both catalog and non-catalog - are grouped under one labor line named “No Job Assigned”.
Step 4 - Select the Labor Options
After you decide how the labor and parts are to be posted, you need to select the Labor Options.
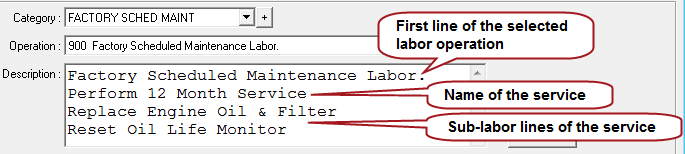
The labor option determines the information that posts to the description on the open ticket. The description prints both on the repair order and the final invoice to the customer.
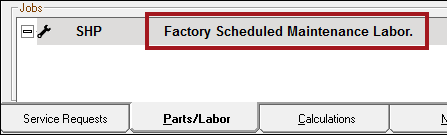
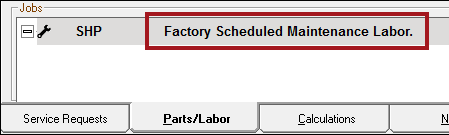
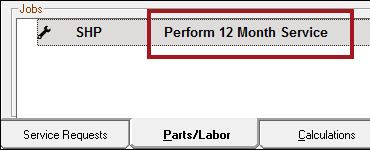
The first line of the description is also the name of the labor line in the Jobs section on the Parts/Labor tab.
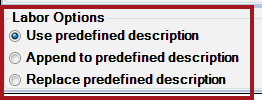
There are three options:
- Use Predefined Description
- Append Predefined Description
- Replace Predefined Description (Recommended)
Use Predefined Description
This option posts the information of the labor operation selected in Step 3 - Select the Posting Options. None of the service details post!
| Posted Item | Results for Use Predefined Description |
|---|---|
|
Labor Line |
The name of the labor operation.*
*The first line of the Description is what posts because it is the default name of the labor operation. If you chose to post labor and parts individually, the labor line is the name of the service type. |
|
Description |
The Description of the labor operation entered in Configuration. None of the labor detail rows in the service are posted.
|
|
Prints on the |
|
Append Predefined Description
This option adds the information from the service to the end of the labor operation selected in Step 3 - Select the Posting Options.
|
Posted Item |
Results for Append Predefined Description |
|---|---|
|
Labor Line |
The name of the labor operation.*
*The first line of the Description is what posts because it is the default name of the labor operation. If you chose to post labor and parts individually, the labor line is the name of the service. |
|
Description box |
First Section - The content of the Description box of the labor operation selected. If the labor operation did not have any text in the Description box, the second section becomes the first section. Second Section - The name of the service, which is the 2 - Labor Row for the Service that displays on the Labor tab. The labor detail rows of the service that displayed on the Service Details Window.
|
|
Prints on the Invoice |
|

Replace Predefined Description (Recommended)
This option replaces the information of the labor operation selected in Step 3 - Select the Posting Options with information from the service.
|
Posted Item |
Results for Replace Predefined Description |
|---|---|
|
Labor Line |
The name of the service, which is the top-level labor line that displays on the Labor tab.
|
|
Description |
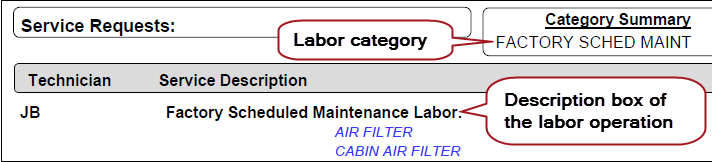
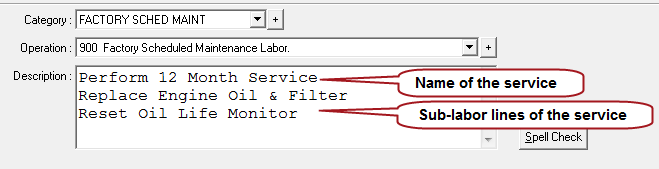
First Line - The name of the service, which is the 2 - Labor Row for the Service that displays on the Labor tab. Following Lines - The labor detail rows of the service that displayed on the Service Details Window.
|
|
Prints on |
|

Step 5 - Post the Service to the Open Ticket
After you have confirmed the parts and labor, selected the posting and labor options, the next step is to click the post buttons.

There are three posting buttons:
Exit Button
You click Exit to close Smart eCat without posting any services.
Post Button
You click Post to post the service to the open ticket.
- The service is posted to the open ticket.
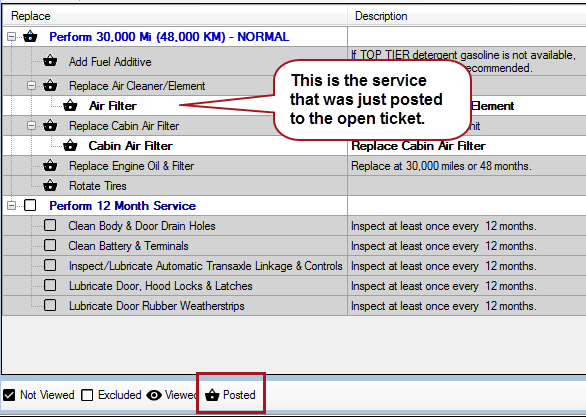
- The Service Details Window appears automatically.
- All line items in the service just posted have the Posted button at the beginning of the line.
Clicking the Post button always returns you to the Service Details Window. For this reason, clicking Post is recommended if you are Selecting and Posting Multiple Services.
At this point, you would select another service group and click Go! to transfer the service to Smart eCat.
R.O. Writer strongly recommends that you post one service at a time to the open ticket. If you transfer multiple services to Smart eCat and then post multiple services to the open ticket at the same time, only one labor operation posts to the ticket. All service details are grouped into the first labor operation in the list on the Labor tab.
Post/Exit Button
Click Post/Exit if
- You are posting the last of multiple services.
- You are posting only one service.
- You want to close Smart eCat after posting.
If you are prompted that other services are pending, that means that services on the Service Details Window have not been transferred to Smart eCat yet.
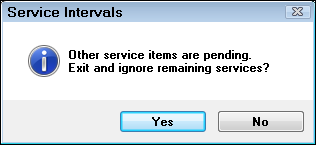
- Click Yes to ignore the pending services, post the current service, and close Smart eCat.
- Click No.
- Click the Post button to post the current service and return to the Service Details Window.