Printing to the Screen (Print Preview)
Printing to the screen opens the printed version of the document or report in a print preview window. You can review what the document or report will look like in printed form before you print it.
Printing to the Screen
When you want to see a document such as a ticket, a receipt, or a report on the screen first, you still need to print the document - just select Screen as the output.
To Print to the Screen
Complete these steps:
- Click the print button on the R.O. Writer window.
- If you are printing a report, the data begins compiling.
- The Output Selection window appears with the Printer tab showing.
-
Click the Screen tab.
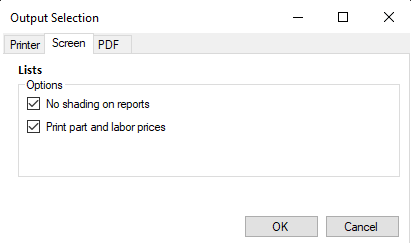
- If you are printing a report, decide if you want shading on the report:
- Check No Shading on Reports if you want no shading on the rows of the report.
- Uncheck No Shading on Reports if you want to shade every other row of the report.
This option applies only to reports and not any other type of document.
- If you are printing an estimate, repair order, or customer invoice, decide if you want to print or suppress the prices for the individual parts and labor:
- Check Print Part and Labor Prices to print the prices.
- Uncheck Print Part and Labor Prices to suppress the prices.
This option applies only to tickets and not to any other type of document.
- Click OK. The Print Preview window opens.
Print Reports to the Screen
When you print reports to the screen, the Print Preview window opens with a column on the left called the "Tree Viewer".
The Tree Viewer displays all headings in the document. This is very useful for large reports but may not be needed for one-page documents.
On the Print Preview window, you can
- Work with the data.
- Export the data to multiple formats.