Working with Integrated Search Results for all Suppliers
When you search with a Smart eJob, the Epicor catalog, or open Smart eOrder without a ticket open, the default search is the integrated search. All matching parts from all integrated and configured suppliers appear on the Catalog tab.
This window includes a search for local inventory and then a section for each supplier coverage configured in Smart eCat Configuration. The order of the list of coverages is determined by the Smart Buy coverage, which is the default coverage.
NOTE: You can search only when a vehicle is selected. The selected vehicle appears at the bottom of the Smart eCat window.
Phone Button During Searches
While searching for matching parts, the running timer button ![]() appears at the top of each supplier section.
appears at the top of each supplier section.
When the search is complete, the phone button appears with an indicator.
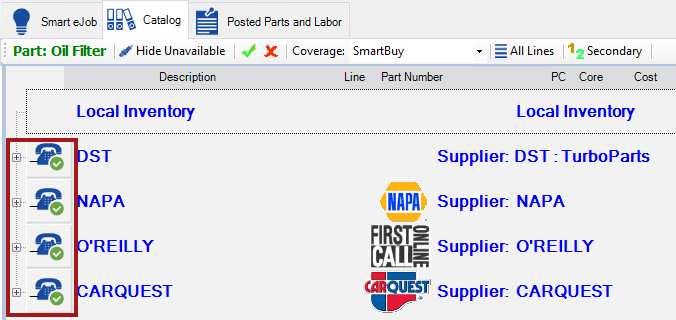
The indicator on the phone button to show you the status of the parts search.
|
Indicator |
Meaning |
|---|---|
|
|
The availability has not been checked yet. |
|
|
Parts are available from the supplier. |
|
|
Parts are not available from the supplier. |
|
|
The search could not be completed. To resolve this problem,
|


You can click the phone button at any time to search again.
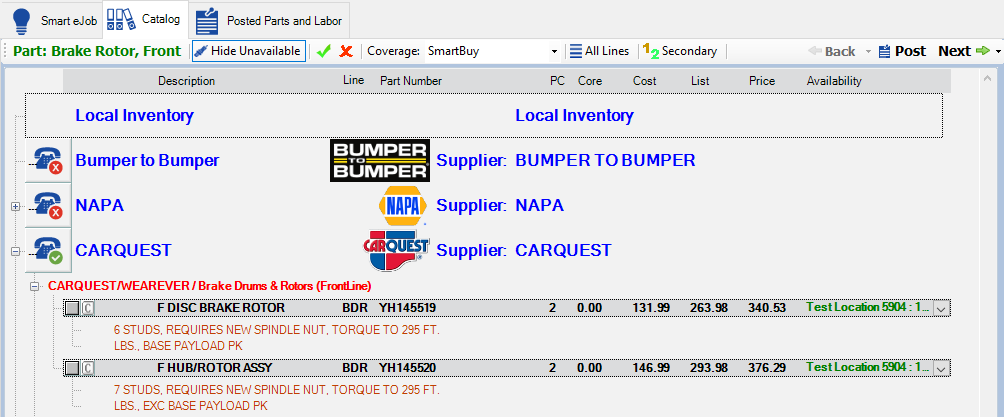
Search Results
The search results window contains many options that enable you to find the appropriate part as quickly as possible.
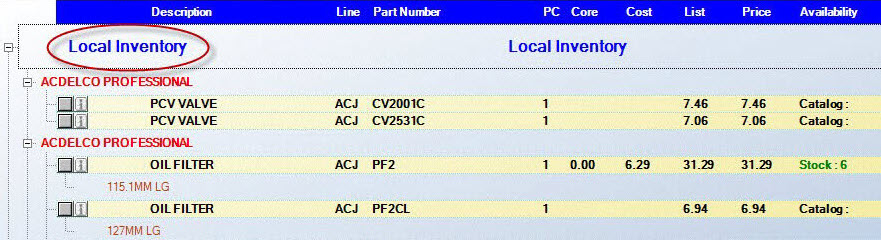
When Smart Buy is selected in the Coverage dropdown list, all coverages included in your Smart Buy are searched automatically. Local Inventory should appear first at the top of the list.
If no parts are found in local inventory,
- The Local Inventory section is closed.
- The primary (first) supplier section is open.
- The window is scrolled down so that the primary supplier is at the top.
Part Columns in the Search Results
Each part row displays information in specific columns.

|
Column |
Description |
|---|---|
|
Description |
This is the description of the part. |
|
Line |
This is the line code of the part. |
|
Part Number |
This is the part number. |
|
PC |
This is the number of pieces needed, also referred to as the quantity. You can edit this number by clicking in the field and entering the new number. Then, click outside the field to save the new entry. |
|
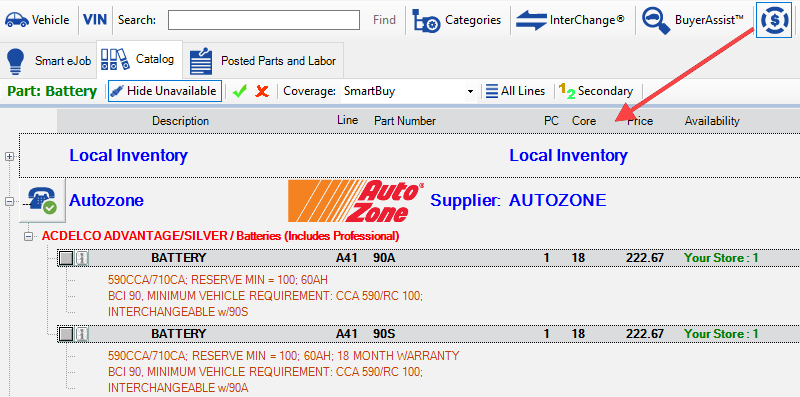
Core |
This is the core cost if the part requires one or if there is another core cost available. |
|
Cost |
This is the cost of the part (if available). |
|
List |
This is the list price of the part. |
|
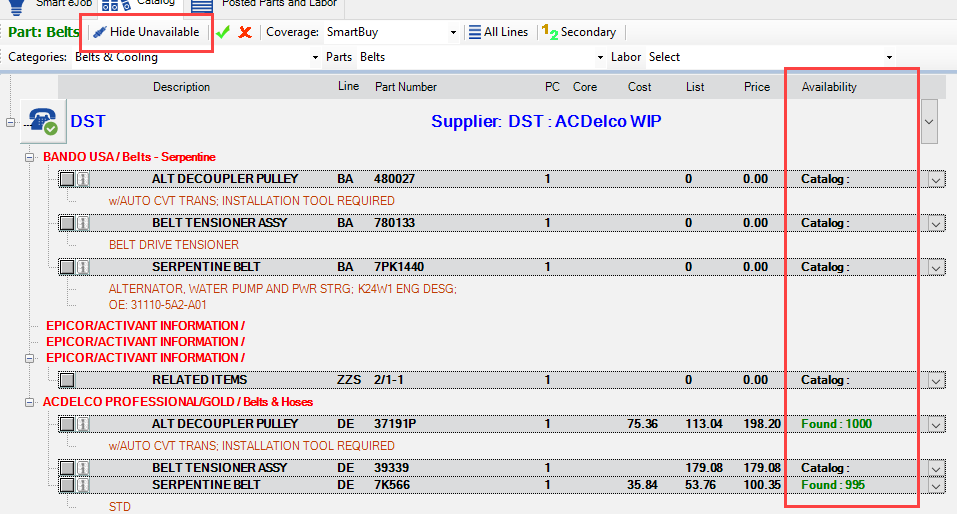
Availability |
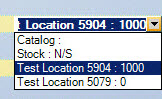
This is where the part is available: Stock (your local inventory), Region, or Branch.
You can select the ordering location in the dropdown list. The core, cost, and list prices are recalculated to match the new location. |
|
Stock (local inventory) |
Stock : [# on-hand] displays if you have the part on hand in your R.O. Writer inventory. The on-hand quantity depends on the Ignore On Order Parts When Displaying On Hand Inventory Quantities option in Configuration.
N/S displays if you have an inventory record for the part but none are available. |
|
Region or Branch (online supplier) |
The entry in the dropdown list displays Location Name : [# on-hand] if the supplier's Region or Branch has the part. |
Buttons on the Part Line
Sometimes, buttons appear at the beginning of the part line. All parts have a selection button. The other buttons depends on the data that is available from the supplier.
|
Button |
Name |
Description |
|---|---|---|
|
|
Selection |
All parts have gray selection button at the beginning of the line. Click to select the part. A red check appears in the box |
|
|
“I” |
Some part lines have an information button. Click to open Epicor or NAPA Cover to Cover information for this part. |
|
|
”C” and “N” |
If the Cover to Cover option is selected in Smart eCat configuration, these buttons appear when supplier information is available for the part: Click C or N to see the information available for the part.
|
|
|
Message |
Click to open the message from the supplier. |
|
|
Diagram |
Click to see the exhaust diagram(s) for the part.
NOTE: Exhaust diagrams are extracted during the Epicor data load. |
|
Varied |
Miscellaneous |
Alternate part numbers have "Alt #" before the description. The part is also outlined in a white box which makes it very easy to tell the difference between an alternate number and a standard part number. Selecting any other option automatically changes all the other fields to match. For example, if you had multiple stores and wanted to select the lowest cost, you could click on the cost and click the lowest one. |


To Show/Hide Unavailable Parts
The name of the button toggles from Show to Hide after you click it.
Click the Show Unavailable toolbar button to show unavailable parts from suppliers.When the Show Unavailable button appears in the toolbar, only available parts appear in the search results.

Click the Hide Unavailable button to hide the parts that are unavailable. When the Hide Available button, unavailable parts appear in the search results.
To Show/Hide the Cost
Click the Cost button in the toolbar  to display or hide the Cost column.
When there is no border around the cost button, the Cost and List columns display.
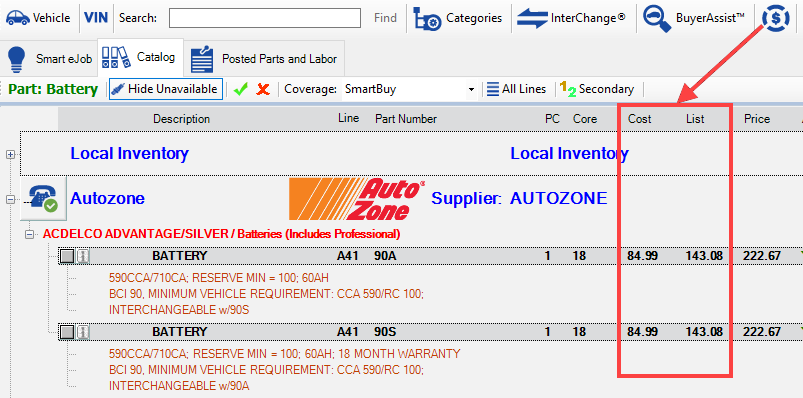
When there is a border around the Cost button, the Cost and List columns are hidden.
To Select a Different Coverage
If you wish to select one specific coverage (other than the Smart Buy coverage which includes multiple suppliers), select it in the Coverage dropdown list. The search results are narrowed to show only the lines included in that coverage list.
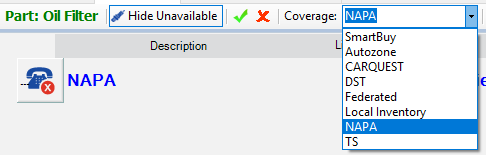
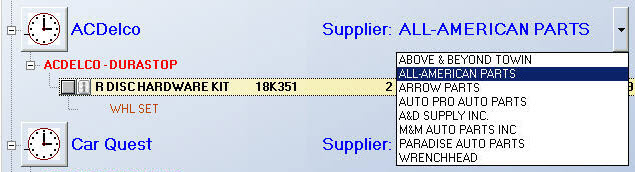
When there is a dropdown arrow next to a supplier, it means there are several suppliers available for that coverage. Click the dropdown arrow to see the list of suppliers in the coverage.
To Select Specific Lines
If you only wish to see selected lines of parts, click the All Lines button. The All Lines window pops up showing the lines that were searched.
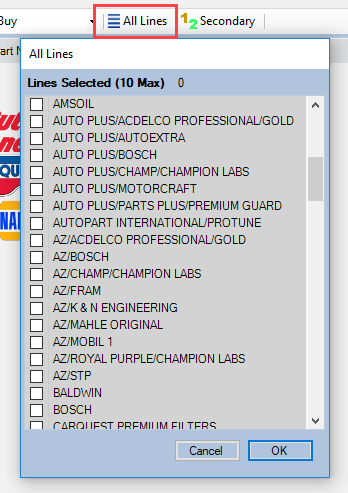
The lines that were already selected as part of your selected coverage(s), appear in bold.
Select the lines you wish to view (maximum 10) and click OK.
To Switch Primary and Secondary Lines
In Smart eCat you can switch between the Primary lines and Secondary lines by clicking the Primary  or Secondary
  buttons in the toolbar. The color of the number "1" and "2" indicate what lines you are looking at in the search results.
When you are viewing primary lines, the button displays "1" in green and Secondary . Clicking the Secondary button changes the word to "Primary" and the number "2" to green.
NOTE: When you set up your coverage lists, you can set up certain lines as Primary or Secondary in the Priority dropdown list.
To Post Found Parts
When part results appear on the window, a blank gray box appears to the left of each part. Click the blank gray box  to select the part. A red check appears in the box
  to indicate that the part is selected.
- Click the Post button
 to post the part but stay on the Catalog tab.
 - Click the Next button
 to post the part and move to the next part or labor included in the search or job.
The part is posted to the Parts tab of the Posted Parts and Labor tab in the background. You can click the Posted Parts and Labor tab at any time to verify.