Tire Group for Tire Parts
Tires are a special kind of part. Certain taxes, fees, and information apply only to tires. R.O. Writer enables you to create one parts department group specifically for tires. This is the tire group.
Tire parts in the tire group have:
- Specific fees associated with them that you manage through the tire group.
- The ability to enter tire information like load ratings, UTQG, and manufacturer that
- Appears whenever the part is found in searches.
- Prints on quotes, estimates, work orders, and repair orders.
- A Tire Info Button on the Edit Parts window. When clicked, the tire information and DOT fields appear at the bottom of the Edit Parts window.
Guidelines
Keep the following in mind when creating the tire group:
- Only one parts department group can be the tire group.
- Only tires in the tire group are included in Tire Quote searches of your local inventory.
- When configuring an electronic interface for a tire supplier, you must select a parts department that is in the tire group as the default department.
Creating the Tire Group
Parts in the tire group are controlled by the tire group settings and those settings apply only to tires. Therefore, the tire group should include only tires and NOT any other kind of part.
The tire group is a grouping of other parts departments that contain tires. You may want to review the parts departments that include tire parts before you add those departments to the tire group. For example, you wouldn't want to manage windshield wipers the same way you manage tires, so verify that the parts departments you add to the tire group do not include windshield wipers.
To Create the Tire Group
NOTE: Before you create the Tire Group, you may want to check which parts are included in your parts departments.
Complete these steps:
- In the Configuration module, click Configuration menu > Parts > Parts Department Groups.
- On the Departments Group window, either
- Click the Add button to create a new parts department group.
- Select an existing parts department group from the dropdown list.
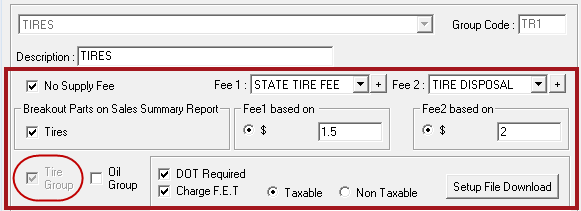
- Select the Tire Group option. The tire group options appear.
- If you do not see this option on the window, a tire group already exists. Scroll through the dropdown list to find it.
- If you do not see this option on the window, a tire group already exists. Scroll through the dropdown list to find it.
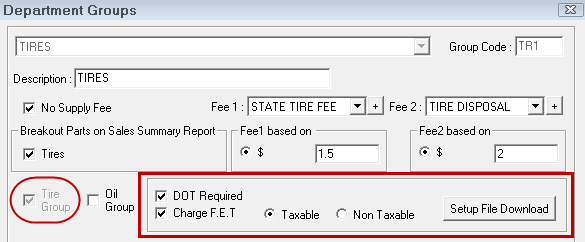
- Enter Fee 1 and Fee 2 according to your business needs.
- Complete the Tire Group Options.
-
At the bottom of the window, add the departments that include the parts you want in the tire group.
These parts departments should include only tires.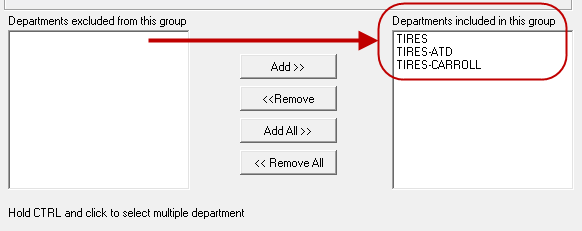
- Click Save to create the tire group.
Tire Group Options
| Option | Description |
|---|---|
| DOT Required |
Check this box to require that a DOT number is entered for each tire.
|
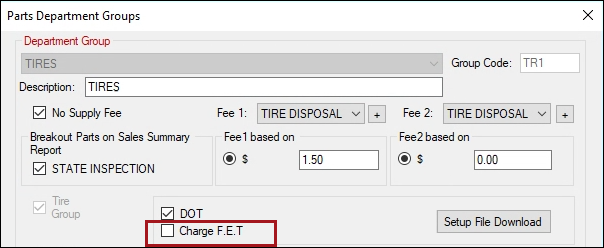
| Charge F.E.T. |
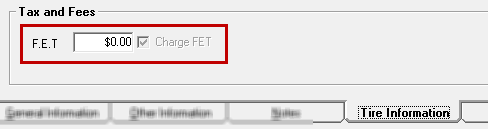
Check Charge F.E.T. if the inventory records in this group include any F.E.T. tires. When checked, all parts in the tire group have a Charge F.E.T. box that is checked and disabled on the Tire Information tab of the inventory record.
Do NOT check this item if you plan to set up the F.E.T. charge as a part. |
| Taxable |
Check Taxable to make F.E.T. amounts taxable. In Other Taxes and Fees, R.O. Writer uses Taxable Fee 4. |
| Non-Taxable |
Check Non-Taxable to make F.E.T. amounts non-taxable. In Other Taxes and Fees, R.O. Writer uses Non-Taxable Fee 5. |
The Tire Group in Tire Quote
Tire Quote includes only the tires in the tire group. When you configure the interface for tire suppliers, you must select a Default Department.
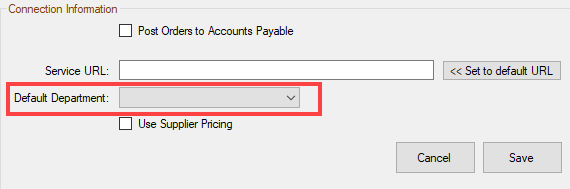
The Default Department dropdown list contains all parts departments; however, you must select a parts department that is in the tire group. Otherwise, the supplier’s tires will not appear in the search results.
Reviewing Parts Departments Before Creating the Tire Group
Before creating the tire group, we recommend that you review which parts are in the parts departments you want to include in the tire parts group. The fastest way to do this is to run an Inventory List report for each parts department that contains tires.
To Run an Inventory List
Complete these steps:
- Open the Inventory module.
- Click the Reports button
 .
. - In the Inventory Reports list, select the Inventory List.
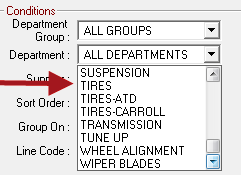
- In the Department dropdown list, select the parts department whose parts you want to review.
- Select the other options as applicable.
- Click Print.
- On the Printing Options window, select Screen and click OK. The print preview window opens displaying the parts in the selected parts department.
- Click CTRL + F and search for parts that you may want to check on.
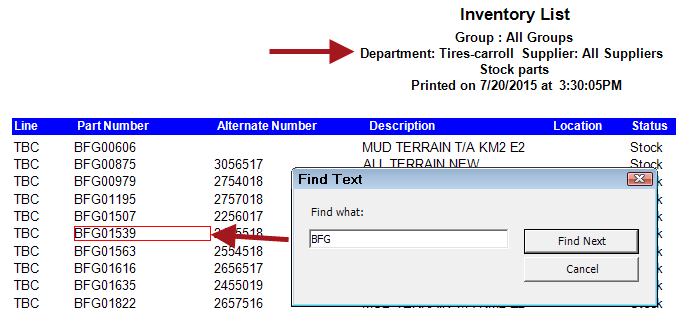
You can also print the list and review it thoroughly.
Reviewing Parts in an Existing Tire Group
If the tire group already exists, you can run an Inventory List report by the tire parts department group.
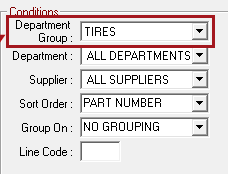
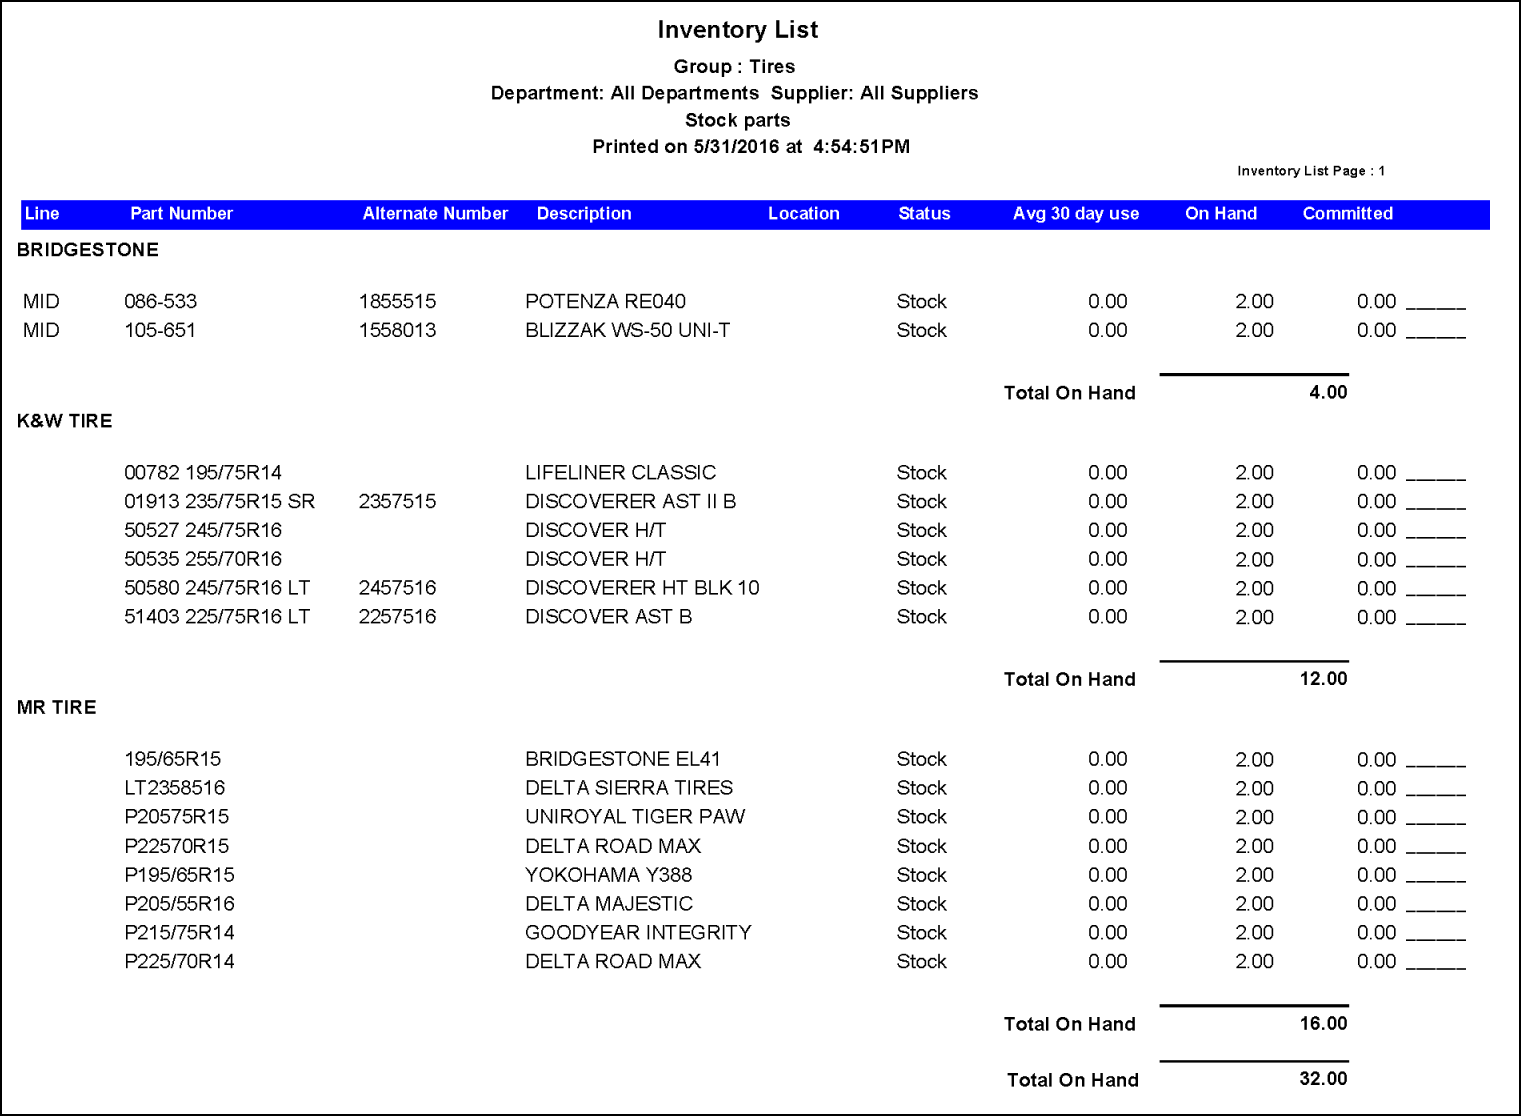
When the report is run,
- The heading indicates that it's for the tire group.
- If you select a Group - such as Supplier - a subtotal appears for each supplier.
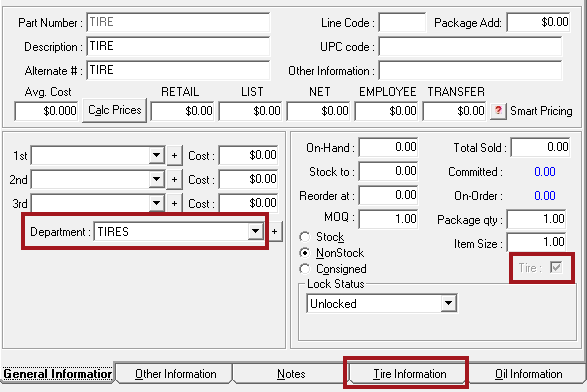
Checking Tires Group Tires in Inventory
Tires in the tire group
- Are in a parts department that is in the tire group.
- Have a Tire option that is checked and disabled on the General Information tab.
- Have the Tire Information tab enabled.
Managing Fees through the Tire Group
Every part record has an Other Information Section on the Other Information tab where you set fees for parts. The fees entered here apply only to the individual part.
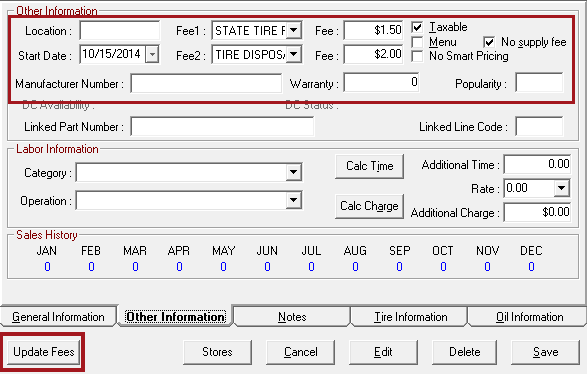
For tires in the tire group, it is best to manage these fees with the tire group settings on the Department Groups window in Configuration.
To Change Fees for All Tires in the Tire Group
Complete these steps:
- Open the tire group in Configuration.
- On the Department Groups window, enter the new fee information, and click the Update Fees in Inv button
 at the bottom of the window.
 - All tires in the tire group are updated with the new fees.
NOTE: F.E.T. fees are not managed this way. If Charge F.E.T. is selected in the tire group, you enter the specific charge on each tire individually.
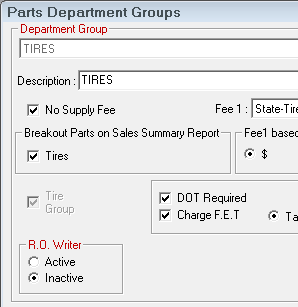
Deleting the Tire Group
You cannot delete the tire group, but you can make it inactive by selecting the Inactive option on the Department Groups window.
Inactive tire groups:
- Don’t appear in dropdown lists in other parts of R.O. Writer, including the Department Group dropdown list in Inventory Reports.
- Do appear in the dropdown list on this window so they can be edited or reactivated.
After the tire group has been inactivated, the Tire Group option is active for new parts department groups.
At the group level, the only difference between an active and inactive tire group is that you
- Can't add new parts departments to an inactive tire group.
- Can't run a report for the group in Inventory.
Inactive Tire Group Parts
Inactivating the tire group has no impact on the parts in the inactive tire group.
- The Tire Information tab is still active in Inventory.
- The Tire Info button still appears on the Edit Parts window.
- Tire information still appears in all the same places.
Setting up F.E.T. as a Part
Instead of using the Charge FET option in the tire group, you can create a part for F.E.T.. Then, link each F.E.T. tire to the F.E.T. part.
- Track F.E.T. separately in Accounts Payable and on the Parts Stock Value Report.
- Calculate the percentage for tire disposal on the F.E.T. as well.
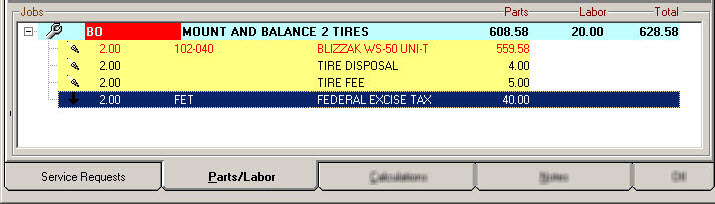
When that tire part is added to a ticket, the F.E.T. tax is added with it automatically.
NOTE: If you choose this method, do NOT check the Charge F.E.T. box in the tire group because you are not using it and you don't want to risk taxing a tax.
In Inventory, click the Inventory button and select Inventory Entry. Enter "FET" as a part number.
You can also set up an F.E.T. part for each F.E.T. amount such as "FET10 ($10.00)", "FET15 ($15.00)", or" FET20 ($20.00)".
Average Cost is updated as F.E.T. fees are received and sold just as the parts do. Average Cost shows a value of all tires on hand that include an F.E.T.
The retail price should always be adjusted to match the average cost to ensure the customer is charged correctly.
The part should be Stock so that it
- Can be tracked on the Parts Stock Value Report.
- The on-hand quantity can be increased when added to inventory and depleted when the F.E.T. is relieved.
Select the No Smart Pricing checkbox on the Other Information tab.
The tire disposal fee should be set up as an amount or percentage that can be added to the F.E.T. itself.
You may want to also set up a separate parts department that can be added to the tire group for reporting purposes, but the parts department should not update the fees from the tire group.
Edit each tire in inventory that requires an F.E.T.
- Click the Other Information tab at the bottom and type all or a portion of the part number for the F.E.T.
- Press the ENTER key to search inventory.
- In the parts list, double-click on the part number to open it.
When a tire is purchased that includes an F.E.T. fee, both the tire and the F.E.T. should be added to the AP invoice.
When the tire is sold, the F.E.T. part is automatically added when the tire is posted to the ticket.
A Part Audit Trail Report can be printed to screen by selecting the tire group. The report shows the number of F.E.T. parts received and sold.
F.E.T. is also included in the Parts Stock Value Report and the Parts Stock Value Detail Report. The Stock Value reports can be printed for the tire group only and the F.E.T. fee is part of the tire value.