Local History
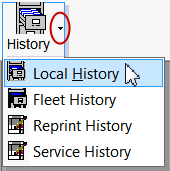
To search local history, click the down arrow q to the right of the History button in the main toolbar and select Local History.
This opens the standard search window for Searching for Customers and Vehicles. In History, there is also an Other section at the bottom of the search window that lets you search by repair order, estimate, or inspection number.
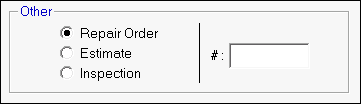
NOTE: The inspection number is entered on the Other Information tab of an estimate or repair order.
Search for and select the customer and the vehicle and the customer's history for that vehicle opens.
The Repair Order tab opens. You are able to select which tab displays when customer history first opens in the Configuration module under Configuration menu > see Configuration menu > Repair Order > R.O. Options > Start History Showing.
NOTE: You can also open customer history from an open estimate or repair order, click the ![]() button in the ticket's toolbar. The history for the customer and vehicle opens.
button in the ticket's toolbar. The history for the customer and vehicle opens.
History Summary Toolbar
The History Summary The toolbar on the history window contains a number of options for working with history information.
![]()
The toolbar also includes the following items.
| Button | Click to… |
|---|---|
|
|
Run a Customer History Report for this customer and vehicle. Invoices are closed repair orders. Estimates are saved estimates. |
|
|
|
|
|
Display the current service recommendations for the selected vehicle. |
|
|
Search for customer history at other stores in your system. The Central Service Lookup button appears only if you are signed up for Central Service. |
Sections of the Repair Order Tab
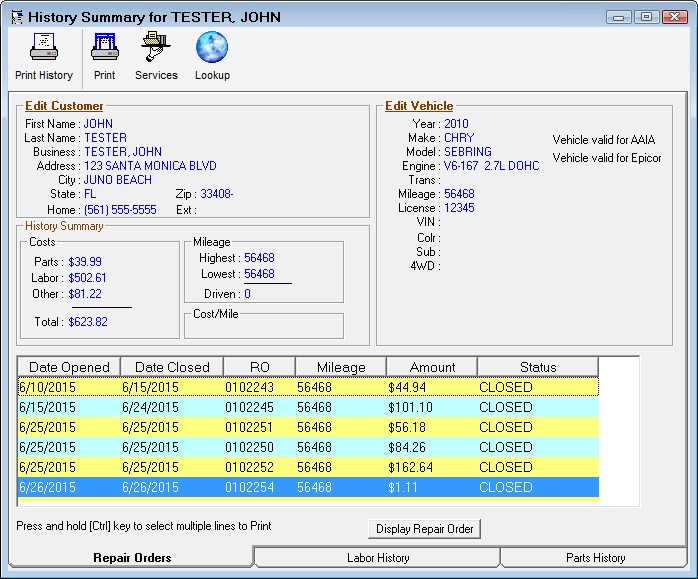
The Repair Order tab displays the list of repair orders and estimates for this customer and vehicle.
| Item | Description |
|---|---|
| Edit Customer and Edit Vehicle |
These are the Edit Customer and Edit Vehicle sections for the customer and vehicle selected. They appear as they would on an open estimate or repair order. |
| History Summary |
This section displays a summary of the total repair costs for the vehicle, the highest and lowest mileage, total miles driven, and repair cost per mile. saved estimates are not included in the calculation in the History Summary. |
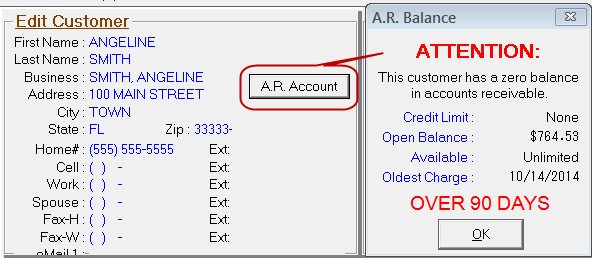
| A.R. Account Button |
When a customer has an open Accounts Receivable account, this button will be visible. When selected, you will be able to view information about this customer's account.
|
| Display Repair Order Button |
Click this button to open the selected repair order. |
| List of Items |
The table displays the Date Opened, Date Closed, Repair Order or Estimate number, Mileage Amount, and the Status (for repair orders). If the item is a saved estimate, it displays "ESTIMATE" as the status. To open a repair order or estimate in the list, double-click it. |
To Open Repair Orders from the Search Results
To open a repair order, you can
- Double-click on it in the list
- Select it in the list and click the Display Repair Order button
The repair order appears as it did when it was active except that most of the fields on the tab windows are inactive.
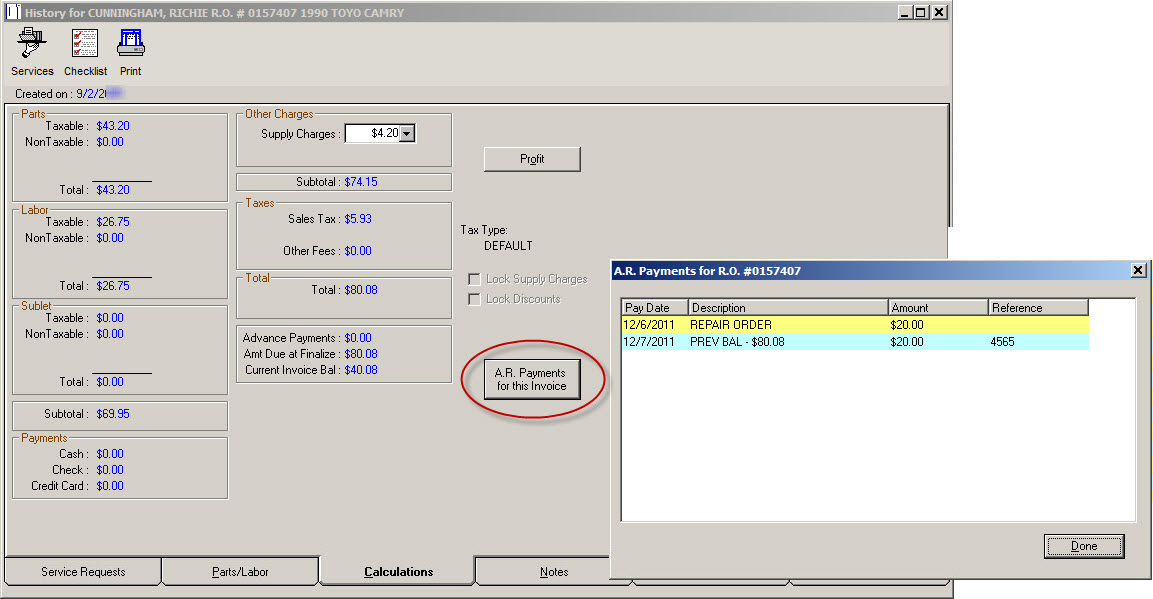
Calculations Tab in History
The Calculations Tab displays the payment information, including any taxes, fees, or discounts that were applied when the repair order was finalized.
Click the Profit Button on this window to see how much gross profit was made on the selected repair order. This does not include any supply charges or sales taxes.
Click the AR Payments for This Invoice to see a list of payments made to Accounts Receivable on this invoice.
Reference Tab in History
If you Capture and Save Electronic Signatures… when Finalizing Repair Orders, an image of the captured signature is stored on the Reference tab when the repair order is stored in History.
When you open a repair order from History where a signature was captured during finalize, the Signature button is active. When you click it, an image of the captured signature appears in the center of the window.
The captured signature prints if you print the repair order from history.
Changing the Status
You can change the status of a closed repair order to Open or Voided the Other Information tab.
- Open - See Reopening Repair Orders for details before you decide to select this option.
- Void - Deletes all parts and labor and returns stock parts to inventory and will no longer report any sales for this repair order. The original calculations are retained for tracking purposes only.
You can reopen an estimate by changing the status of a saved estimate to Open; it is moved from History to the Estimates in Progress Window.
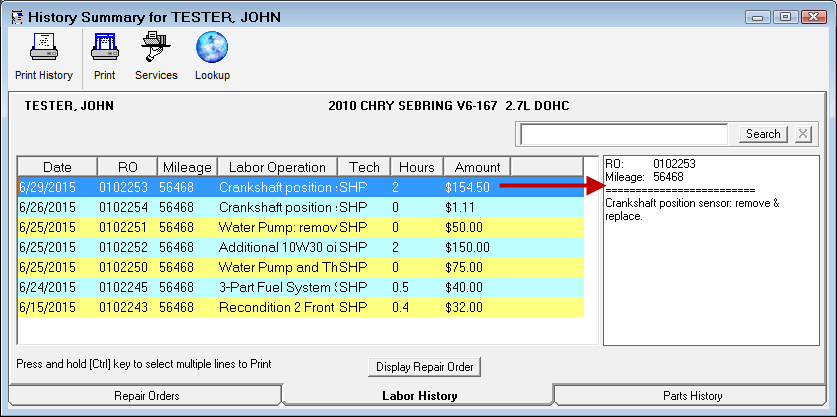
Labor History Tab
This tab displays all labor performed on the selected vehicle. Each labor operation appears in its own row.
- When you select a row, a detailed labor description appears in the right pane.
- Use the Search box to search for specific keywords.
- To print the repair orders where the labor appears, select one or more rows and click the Print button in the toolbar.
To Open a Labor Operation
Double-click on it in the list. The repair order where it appeared opens. Double-click the labor operation on the repair order and the Labor History window opens displaying the labor operation the way it appeared on the repair order.
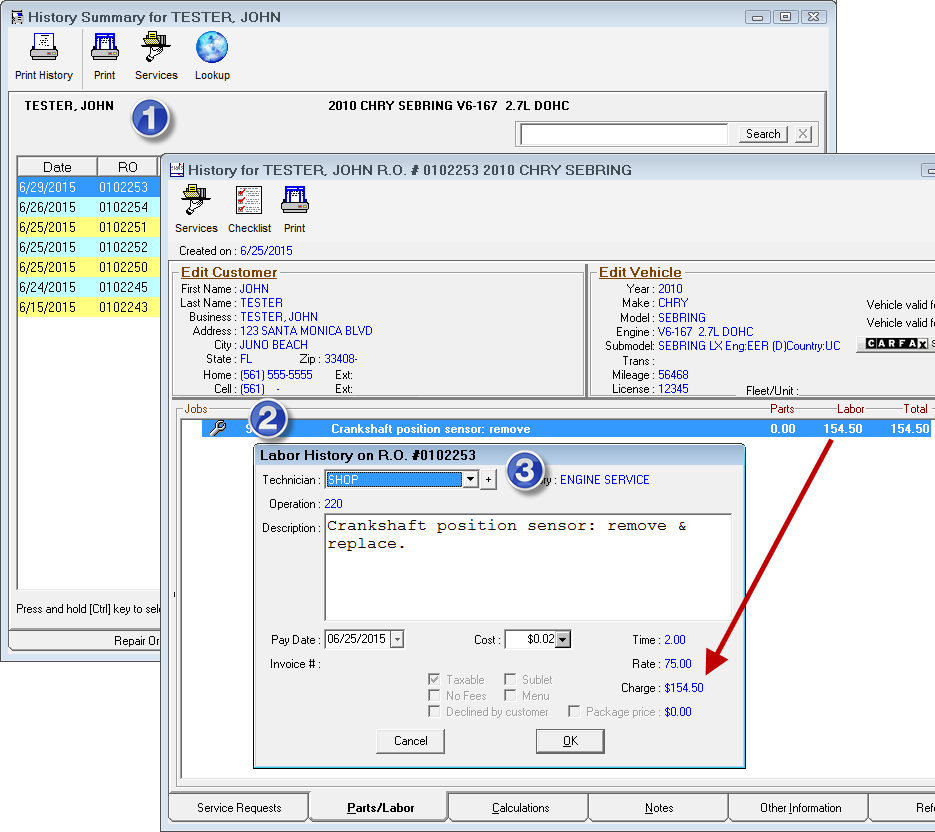
Only the Technician, Pay Date, and Cost can be modified on the Labor History screen.
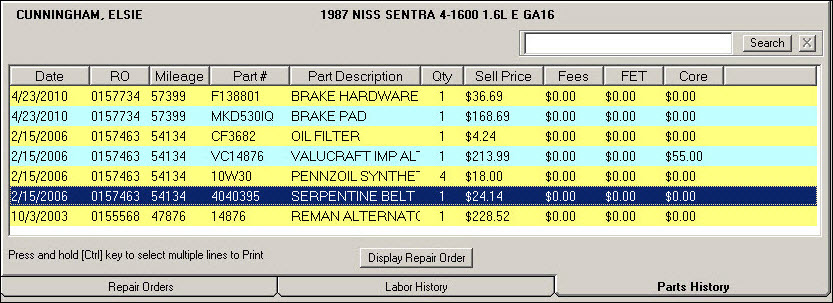
Parts History Tab
This tab displays all parts used on the selected vehicle: the date, the repair order number, the mileage, part number, part description, quantity, sell price, parts fees, FET fees, and core charges.
You are able to search using a keyword and clicking the Search button.
Selecting Print from this tab will print the selected repair order(s). To select multiple parts, press and hold the CTRL + SHIFT keys while clicking on parts.
To Open a Part
Double-click a part to open the repair order where it's listed. When the repair order opens, double-click the part again to display the part information as it appears on the repair order. Only the Technician may be modified on this screen.
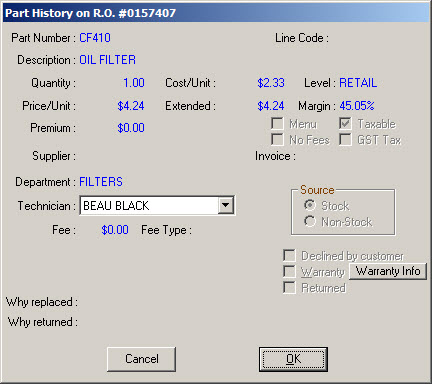
Tip!: This is a great way to retrieve vendor invoice numbers for parts, which may be useful for warranties.