Configure the Central Office Server
One and only one machine can be the Central Office server. You cannot have multiple Central Office servers within one system.
You should configure the Central Office stores first. Then, export the store data before you configured the Central Office server.
After you select the machine you want to use as the Central Office server and export the store data, complete the following steps:
Step 1 - Check That the Machine is the Central Office Server
Step 2 - Enter the Central Office Server Settings
Step 3 - Import the Store's Server File
Requirements for the Central Office Server
The server machine must:
- Have an active Internet connection.
- Have an active license that includes Central Office.
- Be connected to a database that contains a license number that includes Central Office.
- An FTP connection configured in Central Office.
Step 1 - Check That the Machine is the Central Office Server
After installing R.O. Writer for the first time, all machines are considered Central Office stores until you re-activate the license on that machine as a Central Office server.
Step 1a - Review Your License Details
Complete these steps:
- Open R.O. Writer.
- On the main window, click Help menu > Licensing System.
- If prompted, enter the correct password. The R.O. Writer License System opens.
- Click the Display License Details button. Your license details display on the window.
-
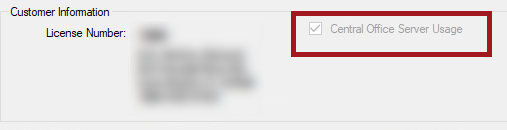
In the Customer Information section, there is a Central Office Server Usage box.
If this box is unchecked and disabled, that means that this computer is a Central Office store and not the Central Office server.

- Click the Close button to close the license details window.
- At this point, you should verify whether this computer is supposed to be the Central Office server.
- If this is not the right computer, find out which computer is supposed to be the Central Office server, and repeat Steps 1—7.
- If this is the right computer, proceed to Step 1b to re-activate the license as the Central Office server.
Step 1b - Re-activate the Current License as the Central Office Server
After you have verified that the current computer is supposed to be the Central Office server, you need to re-activate the license to make it the Central Office server.
Complete these steps:
- Open R.O. Writer.
- On the main window, click Help menu > Licensing System. The R.O. Writer License System opens.
- If prompted, enter the correct password.
- Click the Display License Details button. Your license details display on the window.
-
Click the Re-Activate Application button. The initial activation window opens.
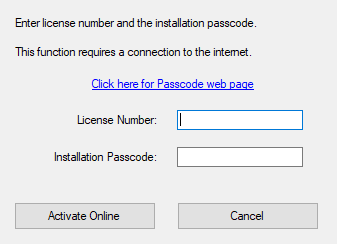
- Enter the License Number and Installation Passcode.
- Click the Activate Online button. The Activation Request window opens.
- Select an Activation Reason in the dropdown list.
-
In the Central Office section, check Central Office Server.
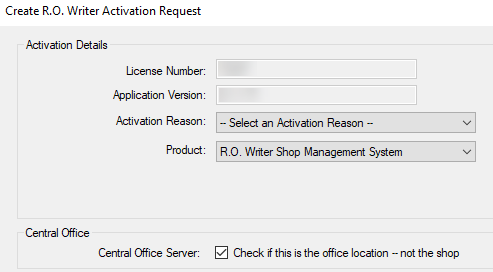
- Click the Submit Activation Request button. The license updates.
- On the License System window, click the Display License Details button.
- Your license details display.
In the Customer Information section, the Central Office Server Usage box is checked and disabled. This indicates that the current computer is the Central Office server.
- Close the Licensing System.
- Re-boot R.O. Writer.
- Open R.O. Writer Configuration, and click File menu > Central Office Setup. The Central Office Server Setup window opens.
NOTE: All Central Office windows on the server have "Server" in the title bar.
Step 2 - Enter the Central Office Server Settings
You configure the connection, transmission, and conflict resolution information on the Central Office Server Setup window.

To Enter the Central Office Server Settings
Complete these steps:
- On the Central Office server, open R.O. Writer Configuration
 .
. - Click File menu > Central Office Setup. The Central Office Server Setup window opens.
- Complete the What to Transmit section.
- Decide to check the other options or leave them unchecked.
- If applicable, set a Backup Path and an Accounting Path.
- Click the Replica Setup button to tell Central Office how to resolve conflicts.
- Click OK to save your settings.
Step 3 - Import the Store's Server File
After the server files have been exported to the FTP site from the Central Office store, you can import those server files on the Central Office server.
To Import the Server Files From One Store
For each store, the entire database imports, which can take some time. R.O. Writer creates a database for the imported store and imports the data into it.
The license information is also imported with the database. You do not need to import the license information in Setup Stores after the import is complete.
Complete these steps:
- On the Central Office server, open R.O. Writer Configuration .
- Click File menu > Central Office Setup. The Central Office Server Setup window opens.
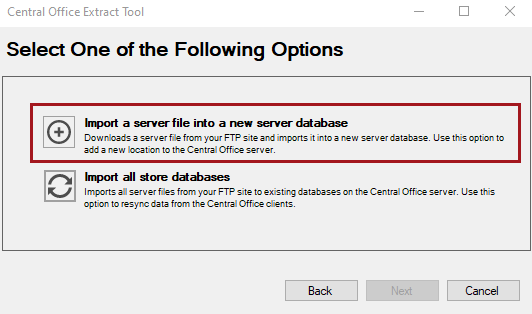
- Click the Import Store button. The Central Office Extract Tool opens.
-
Click the Import a Server File... option.
-
Select the Central Office store.
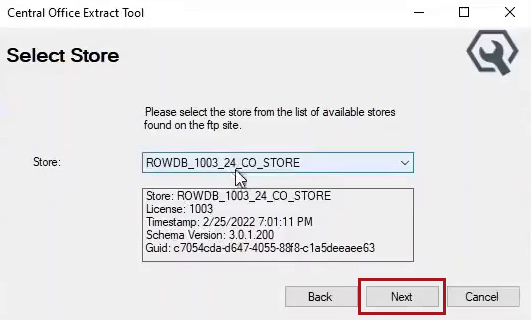
- The Store dropdown list contains only the stores that have been exported to the FTP site.
- Stores are listed by store name.
- The box below the Store dropdown list displays the store information for your review.
-
Click Next. The Connection Information window appears.
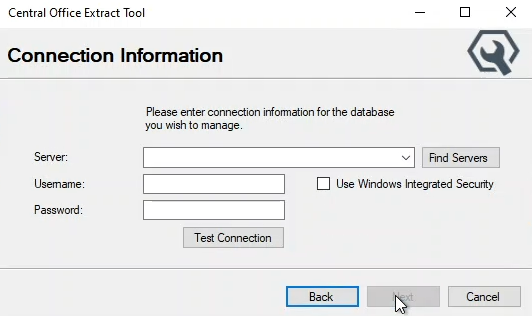
- Enter the connection information and click the Test Connection button to verify the connection to the SQL Server. When the connection is successful, the Next button activates.
-
Click the Next button. The Import Database window opens
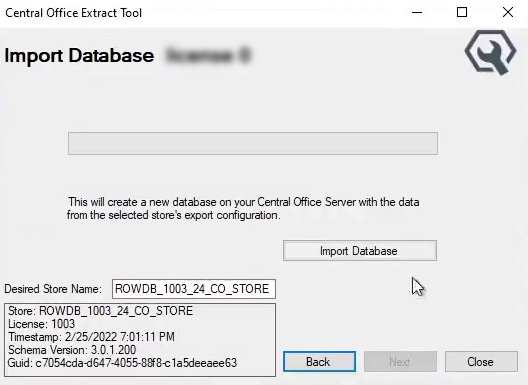
- The top of the window displays "Import Database [Store Name] [License Number]".
- The store information also appears at the bottom of the window.
- You can change the store name in the Desired Store Name field.
-
Click the Import Database button. The store data begins importing.
-
When the import is complete, the progress bar indicates that the process is complete.

- Click the Next button. The extract tool window closes and you are returned to the Central Officer Server Setup window.