Entering Customer Information
You can access, review, and edit customer information by
- Searching in Configuration
- Clicking the customer name in the upper left corner of the Parts/Labor Tab of an open ticket
- Double-click the customer name in a list of search results
You are prompted to search for a customer and vehicle whenever you
- Create a new estimate, repair order, or parts-only ticket
- Search local history
- Create an appointment
The Edit Customer window has several tabs; you enter the majority of the information on the Customer tab, which opens first.
Watch the following video to see customer entry options.
Customer Tab
The Customer tab contains the personal information about the customer: name, address, phone numbers, and email addresses.
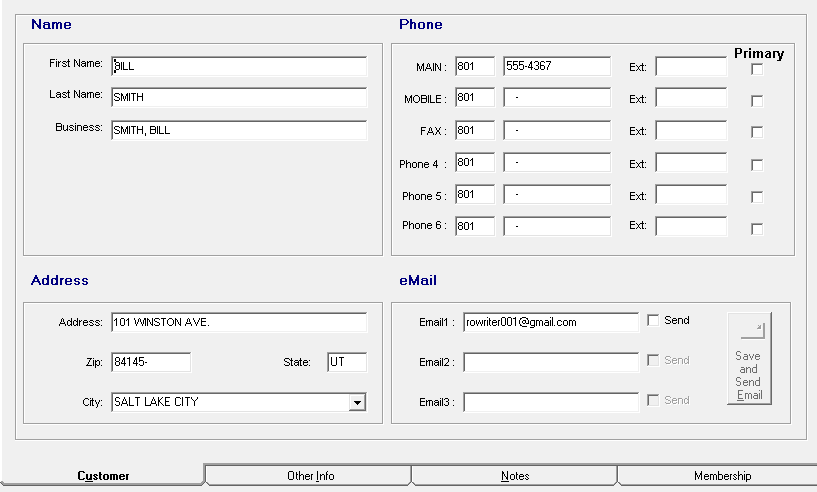
Name and Address
If the customer is an individual,
- Enter their name in the First Name and Last Name fields
- Leave the Business name blank. R.O. Writer enters the first and last name into the Business field.
If the customer is a business,
- Leave the First Name and Last Name fields blank
- Enter the Business name
When you enter the zip code for the first time, the area code associated with that zip code is automatically entered into the phone number fields for you. After the customer record is saved, entering a new zip code that is associated with a different area code does not overwrite the area code for existing phone numbers.
NOTE: If your International Options are set to use Canadian values, the Zip field is named "Postal Code" and accepts alphanumeric characters. In addition, the State field is named "Province."
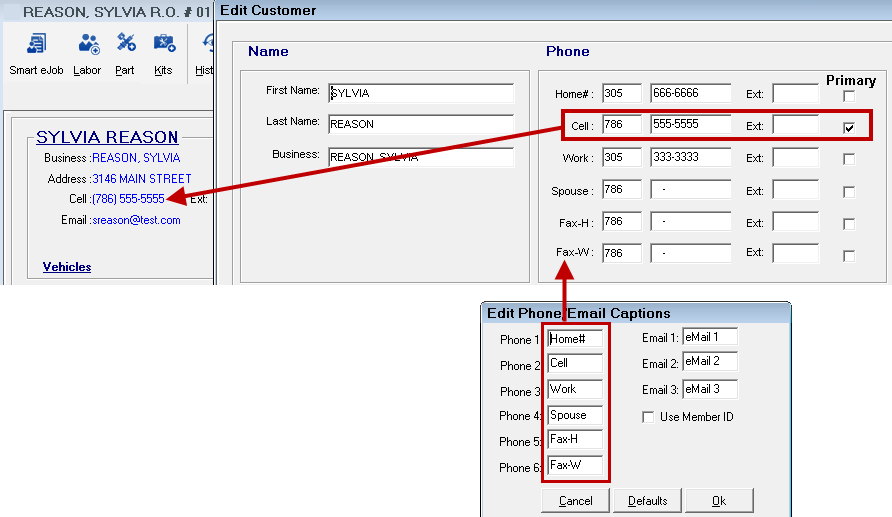
Phone Numbers
- You can enter up to six phone numbers for each customer.
- You can mark only one phone number as Primary.
- Only the primary phone number appears in the customer section of the Parts/Labor Tab of a ticket.
- The label for each phone number field on both the Edit Customer and Parts/Labor tab - "Home", "Work", "Cell", etc. - is customizable in Configuration (Configuration > Customer > Edit Phone/Email Fields).
Email Addresses
- You can enter up to three email addresses.
- You can check Send for multiple email addresses.
- The email labels on the Edit Customer window are customizable in Configuration (Configuration menu > Customer > Edit Phone/Email Fields).
- On the Parts/Labor Tab of a ticket:
- The email address in the first field of the Edit Customer window is the only email address that displays.
- The email label is always Email.
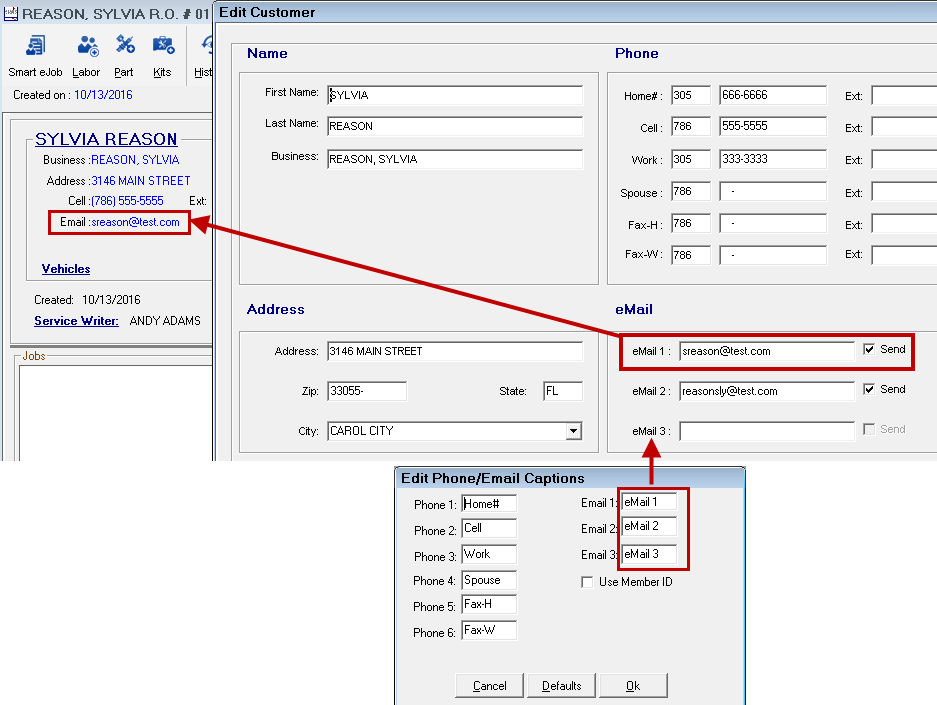
Check Send to include this email address when sending bulk emails. Leave Send unchecked to make sure this email is ignored when sending bulk emails.
When the Save and Send Email button is enabled, click it to send an email. This button is enabled only when:
- R.O. Writer is integrated with your email system in Configuration (File menu > Email Setup).
- At least one valid email address has Send checked.
Email Validation
Validating customer emails ensures that only valid email addresses are saved. As a result, more of your emails reach actual email addresses, which is especially helpful when sending bulk emails for customer follow-up.
R.O. Writer validates any email address entered on the Edit Customer window when you click OK or Cancel on the Edit Customer window. The format of the email must be: text@text.text
A valid email has five parts:
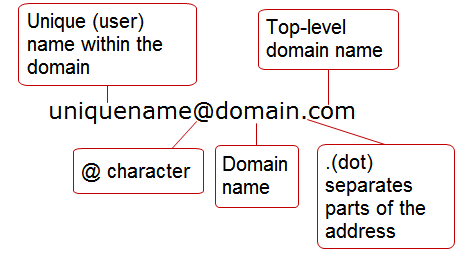
For information about what makes an email address valid, see http://tools.ietf.org/html/rfc5322.
When the email address is not valid, the following prompt appears.
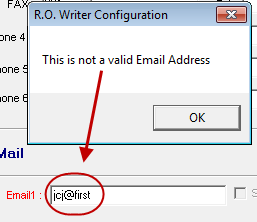
Click OK, enter a valid email address, and click OK on the Edit Customer window to save it.
Other Info Tab
On the Other Info tab, enter financial and marketing information for this customer. This information does not print on the final invoice to the customer.
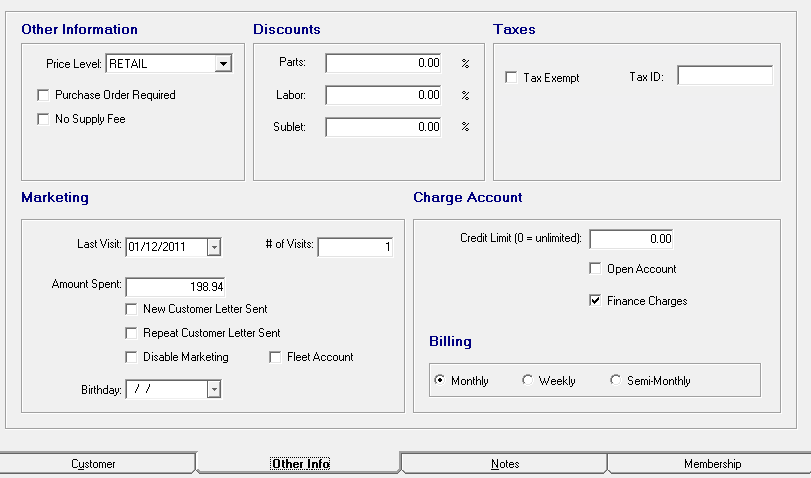
This tab contains the following sections:
Other Information
| Item | Description |
|---|---|
|
Price Level |
Select the price level for this customer. The first price level is the default. |
|
Purchase Order Required |
Select to require a purchase order before work can be performed for this customer. |
|
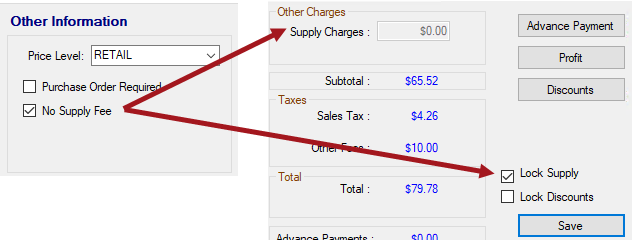
No Supply Fee |
Select to disable all supply charges for this customer. When a ticket is created for the customer, the Supply Charges field is disabled and Lock Supply is checked on the Calculations tab.
|
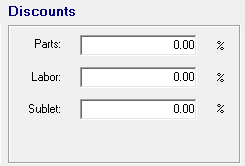
Discounts
Enter a percentage discount on Parts, Labor, and Sublet for this customer.
Taxes
| Item | Description |
|---|---|
|
Tax Exempt |
Check to mark the customer as tax-exempt. You may be prompted to enter the ID. |
|
Tax Type |
A customer can be set up to automatically calculate taxes using a separate Tax Type. For details, click the following link: Multiple Tax Rates. |
|
Prompt for Tax Type |
If selected, you are prompted to select a Tax ID when opening a new ticket for this customer. Do not select if you want to always use the selected Tax Type. |
|
Tax ID |
Enter the Tax ID to make the customer tax-exempt. |
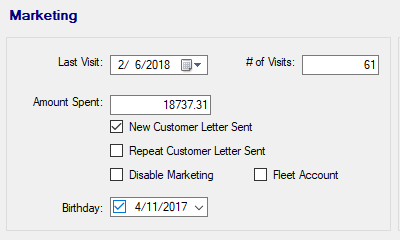
Marketing
The Marketing section determines if and how this customer is included in marketing efforts.
|
Item |
Description |
|---|---|
|
Last Visit |
The date of the customer's last visit. |
|
# of Visits |
The total number of visits the customer has completed at the shop. |
|
Amount Spent |
The total amount the customer has paid for all visits. |
|
New Customer Letter Sent |
This is checked by R.O. Writer after the new customer marketing letter is sent. |
|
Repeat Customer Letter Sent |
This is checked by R.O. Writer after the repeat customer marketing letter is sent. |
|
Disable Marketing |
Check to opt the customer (and all associated vehicles) out of marketing efforts. Disable Marketing is unchecked for new customers, which means that new customers are opted into marketing efforts by default. Customers must be allowed to opt out of marketing at any time. When Disable Marketing is checked for a customer:
NOTE: R.O. Writer never sells your data. At your request, R.O. Writer can send your data to a third-party company. In this scenario, it is up to you to inform your customers that their data is being sent to a third party and provide them with a way to opt out (by checking Disable Marketing on the Other Information tab). |
|
Fleet Account |
Check to make the customer a fleet customer. This also excludes the customer from all marketing efforts. However, fleet customers might be sent a fleet follow-up list for items due on vehicles. |
|
Birthday |
You can enter the customer's birthday. Shops often include promotions based on the customer's birthday. |
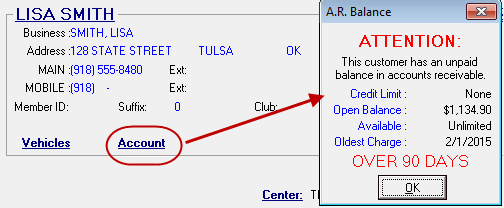
Charge Account
The Charge Account section establishes a customer account in Accounts Receivable.
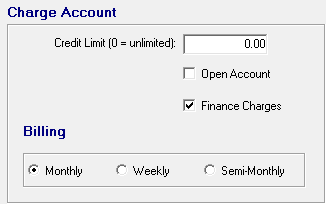
You can charge a customer's charge account for parts and labor.
| Item | Description |
|---|---|
|
Credit Limit |
The Credit Limit field is inactive until Open Account is checked.
If Open Account is unchecked, the Credit Limit is returned to zero and disabled. |
|
Open Account |
Check Open Account to create a charge account for the customer. When a customer has an open charge account,
|
|
Finance Charges |
Select to apply finance charges on past due amounts. |
|
Billing section |
Select the billing cycle of the account: Monthly, Weekly, and Semi-Monthly (every two weeks) |
Notes Tab
This Notes tab provides you with a space to enter text about the customer.

Membership Tab
The Membership tab appears only if Use Member ID is selected in the Edit Phone/Email Fields Configuration setting.
When the Membership tab does appear, you can enter the membership information configured.
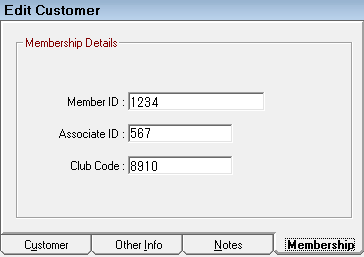
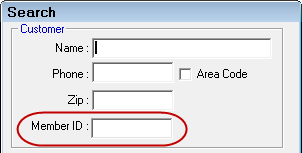
You can search for customers using their Member ID.
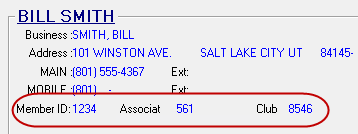
The membership information is also displayed on the ticket in the Customer section.
Deleting Customers
When editing the customer in the Configuration module, a Delete button appears on this window. You can only delete customers with no vehicles, appointments, repair orders, or open charge accounts; see Deleting Old Customers and Vehicles.